

Contents
Making a flowchart on paper is easy – you just grab a few pens and get going. The transition to digital makes things more difficult, however, with mice being imperfect tools for drawing. Thankfully, though, freehand drawing isn't necessary with the right software. You can create a flowchart in Word using simple, simple preset shapes that still look great.
Two ways for creating a flowchart in Word
In fact, there are two Word flowchart tools you can use: Shapes and SmartArt. If you just want to create a flowchart in Word as quickly as possible, SmartArt is the way forward. It provides several flowchart templates you can pick and customize.
The shape tool requires a little more time investment, but still allows you to make your flowchart pretty quickly. The advantage, of course, is that you can make your chart look exactly how you envisioned. This way, you can fit your company's branding or do some more advanced flows.
Today, we're going to show you how to make a flowchart in Word using both methods. Let's start with the more complex one, shapes:
How to Create a Flowchart in Word with Shapes
Creating a Word flowchart with shapes sounds intimidating, but with a couple of simple tips you can make sure it looks clean and professional. Here's how:
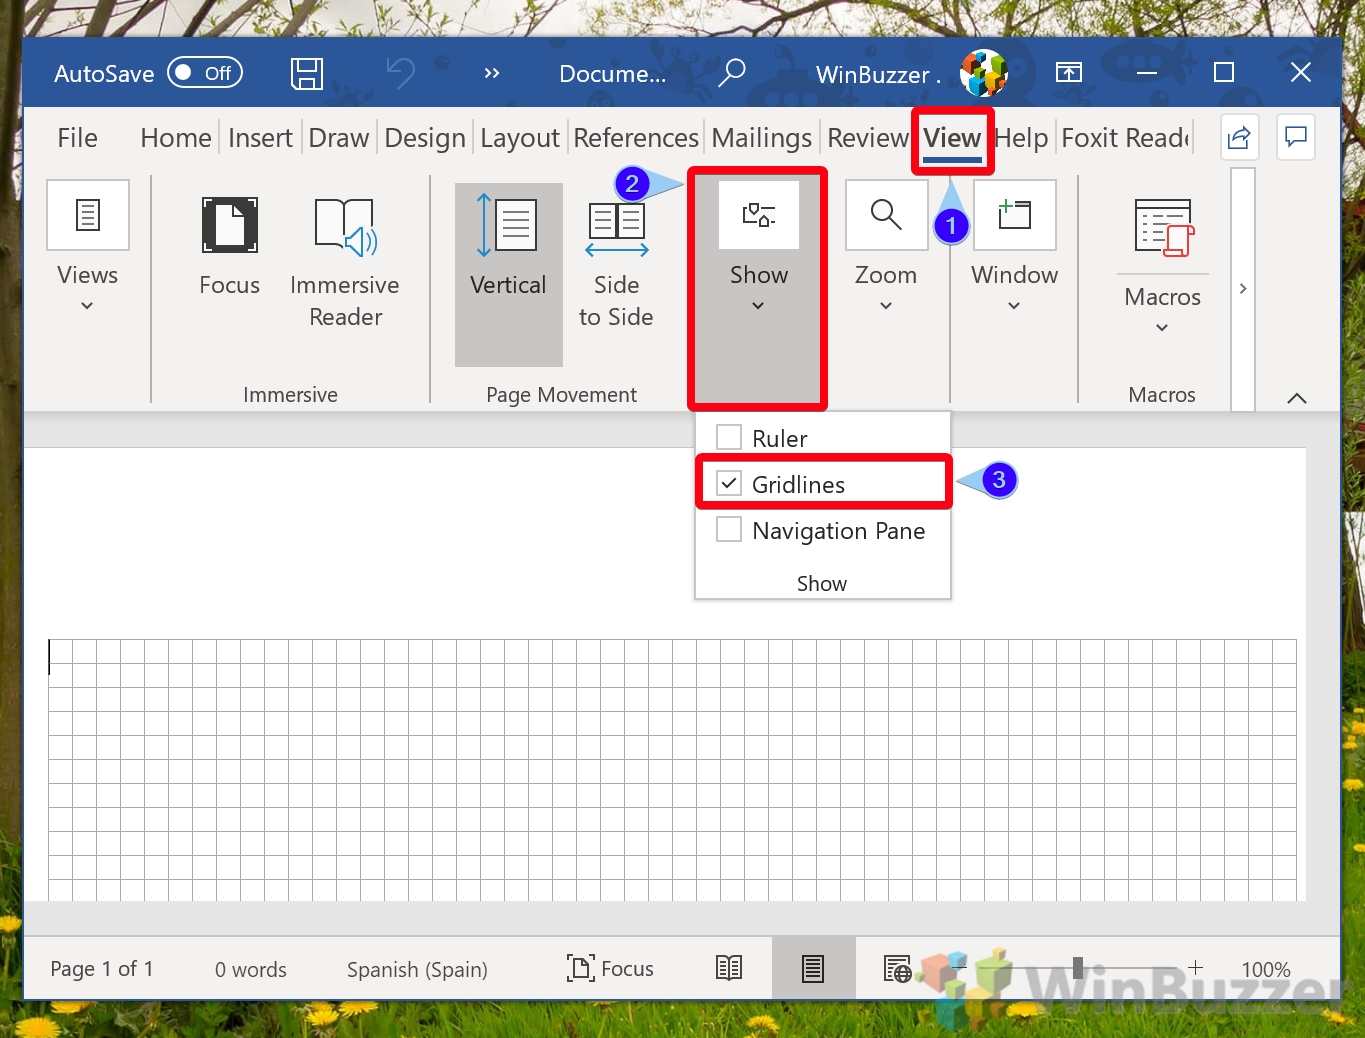
- Open Word and turn on gridlines
Gridlines are the puzzle piece many people miss when creating a flowchart in Word. Without them, your elements will end up misaligned or require a lot of careful tweaking.
To enable gridlines, click the “View” tab in your Microsoft Word ribbon, press “Show” in the ribbon, and then tick “Gridlines”.
- Press “Insert” to start adding shapes
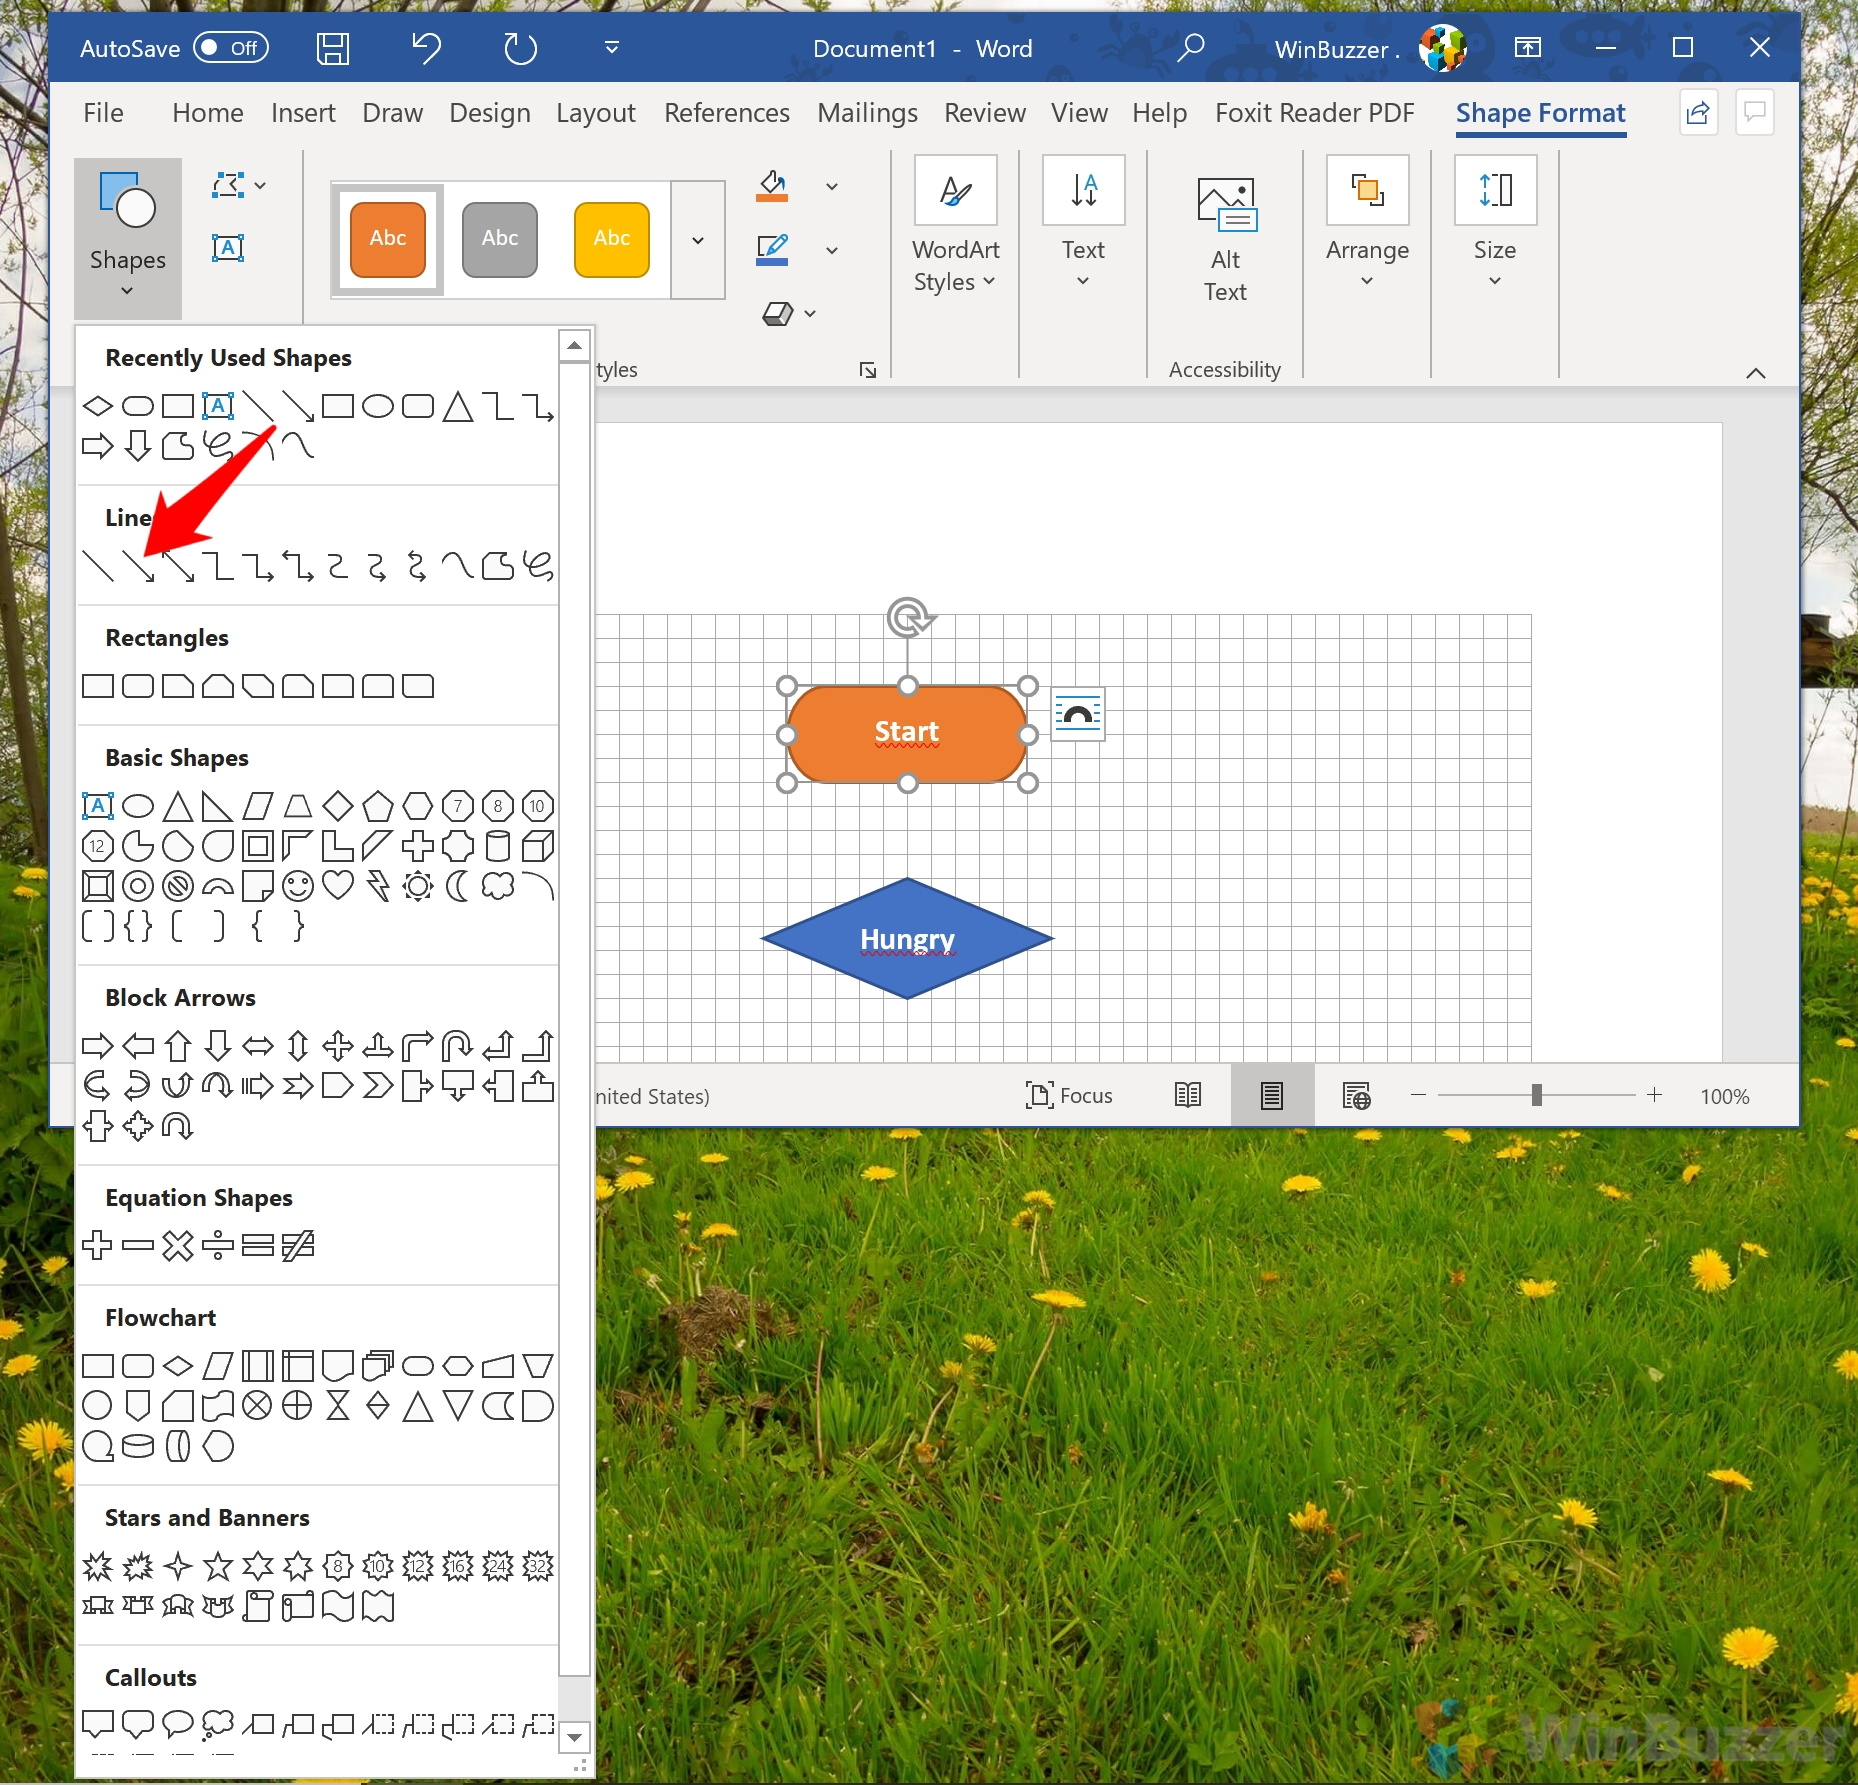
Back in your Word ribbon, switch to the “Insert” tab and press “Illustrations > Shapes”. You'll see an almost overwhelming number of options, but don't worry – you only need a few of them.
Arrows in Word are found under the “Lines” section and will be one of the most common elements in your flowchart. You have a variety of different types of lines and arrows to fit your process.
For the body of your flowchart, you want to look not at the basic shapes section, but the dedicated “Flowchart” category. Here you'll find anything from squares to diamonds, ovals, triangles, circles, and speech bubbles.
It's worth noting that there are standard shapes that are used for various aspects of a flowchart. You can read on for an explanation of the most important elements.

- Read up on flowchart shape meanings
A basic rectangle indicates a regular step in your process. You'll be using a lot of these.
Ovals indicate the start and end points of a flow, while a diamond shows the point at which a decision needs to be made. A downward triangle indicates a step that combines multiple sets into one, while a circle indicates an inspection point.
If you forget these at any point, you can simply hover over their shape for a quick tooltip reminder.

- Insert your shape
With that covered, we can insert our first shape, an oval. Simply click it and then drag the crosshair on your canvas to insert it. You can move it across the grid after to the position you want.

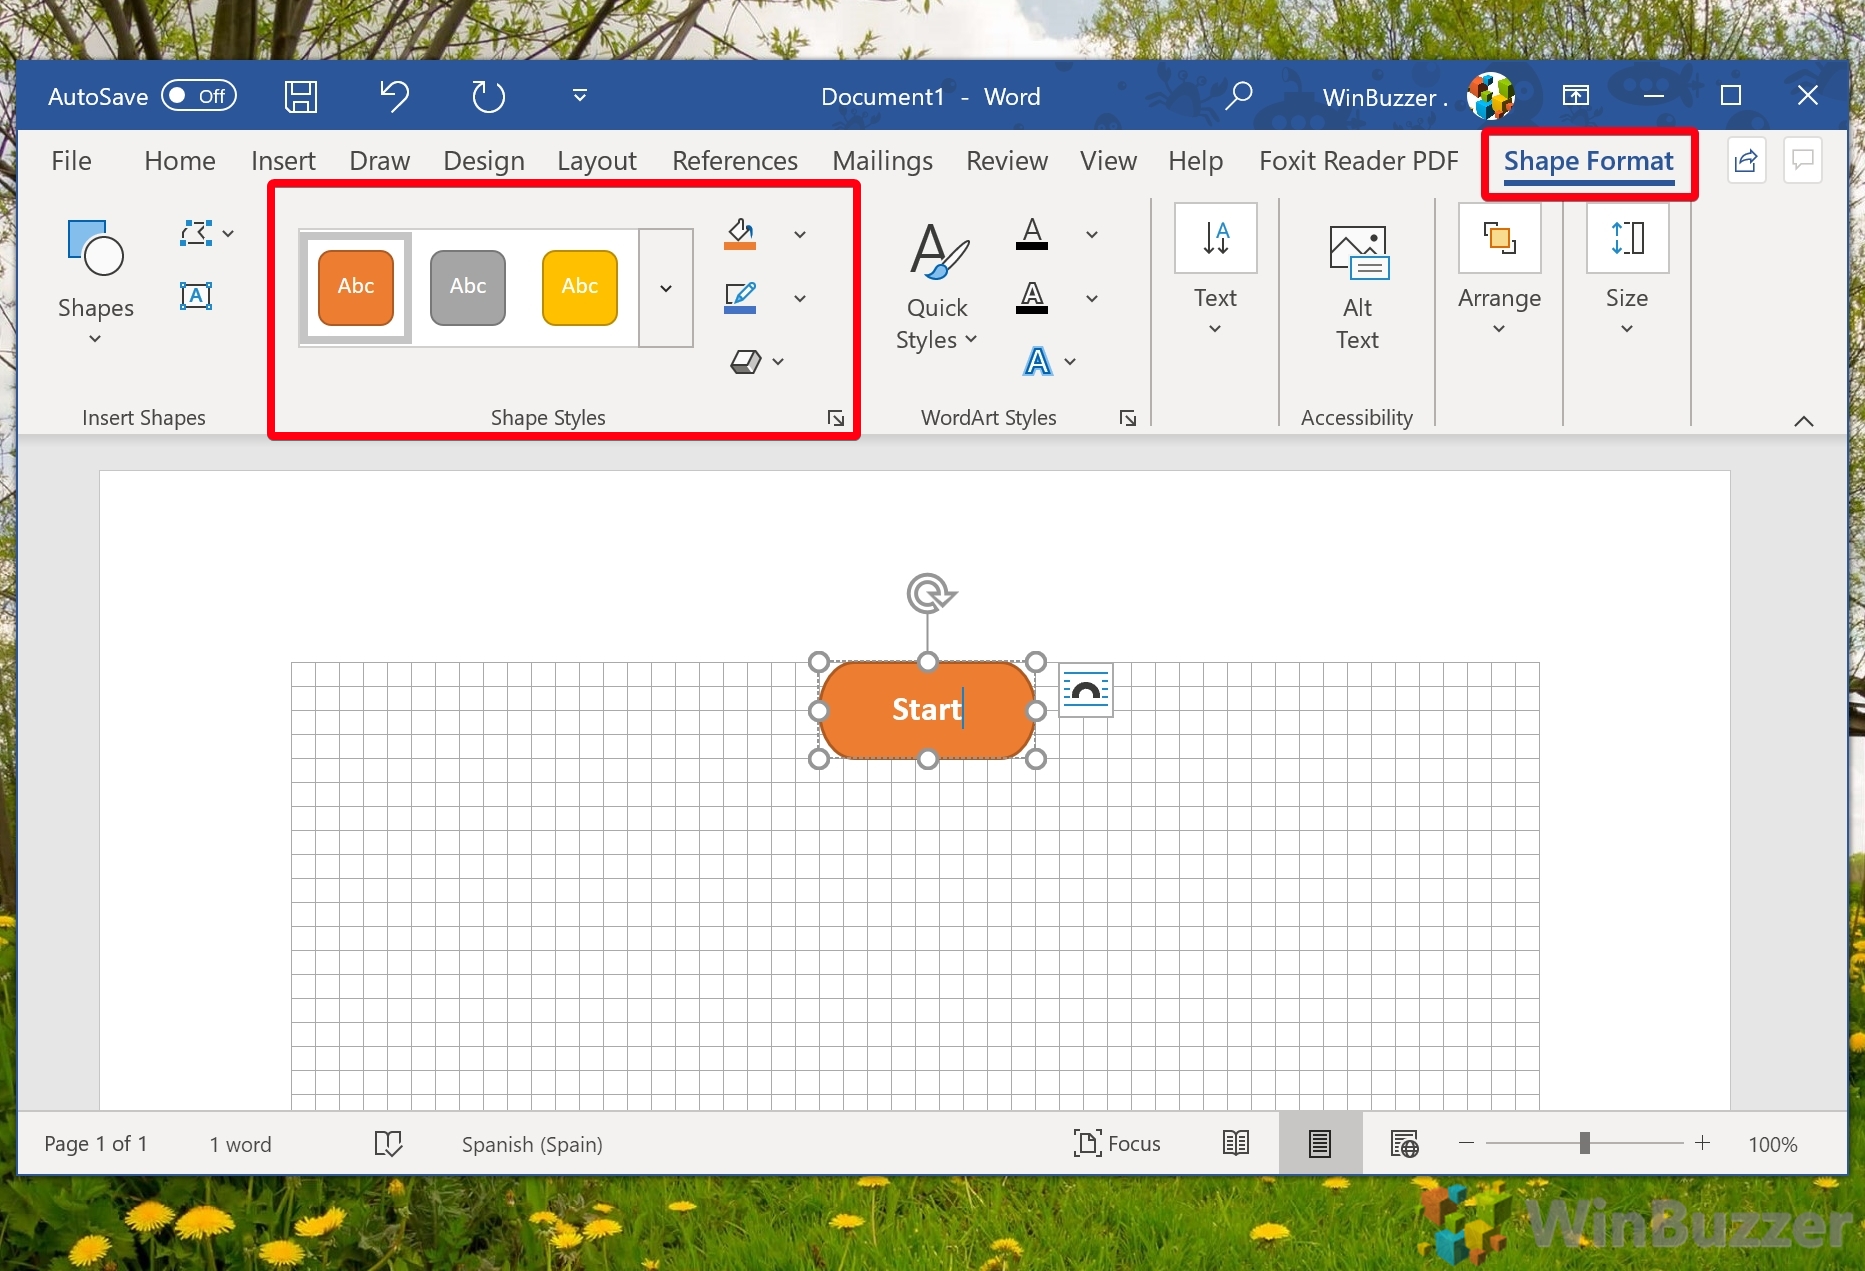
- Format your flow chart shape
Once you add your shape, you'll notice that a “Shape Format” tab shows up in your Microsoft Word ribbon. If you click it, you'll get several options for shape styles, and can also customize colors to your liking.
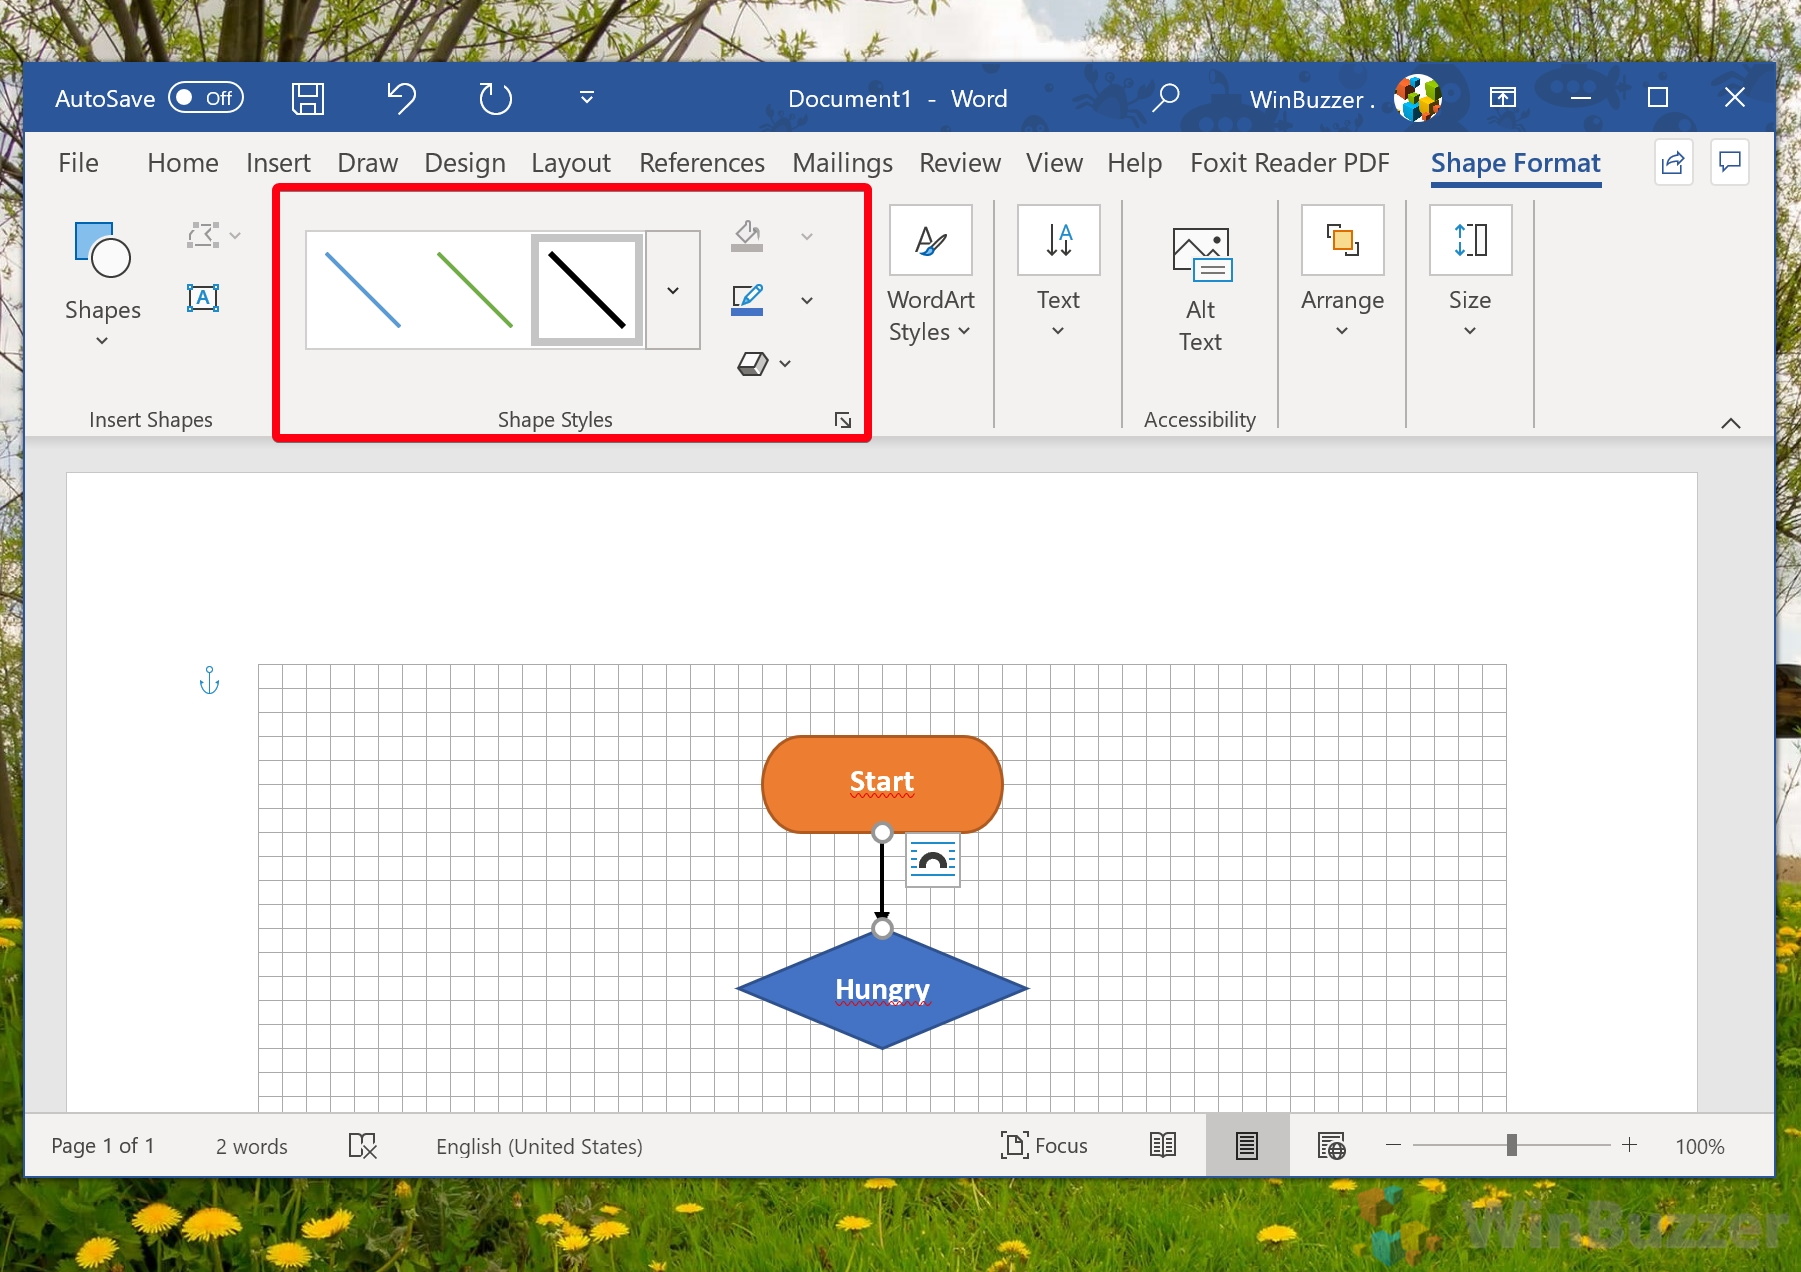
- Add your arrows in Word Shapes
Add your second shape, a diamond or a square, then connect them using an arrow. To do so, you'll need to go back to the “Shapes” button and click an arrow under the “Lines” section. Again, just click and drag to insert it once it's selected.

- Format your arrow
You can format arrows in Word just like you can shapes. Choose from the preset styles, line thickness and more until you get your intended result.
- Optional: set the line as your default
Another tip for keeping your flowcharts professional and consistent is setting a default line.
Right-click on the arrow you just created and select “Set as Default Line”.
All of your lines and arrows from now on will follow the color and style of the original, saving a lot of manual tweaking.

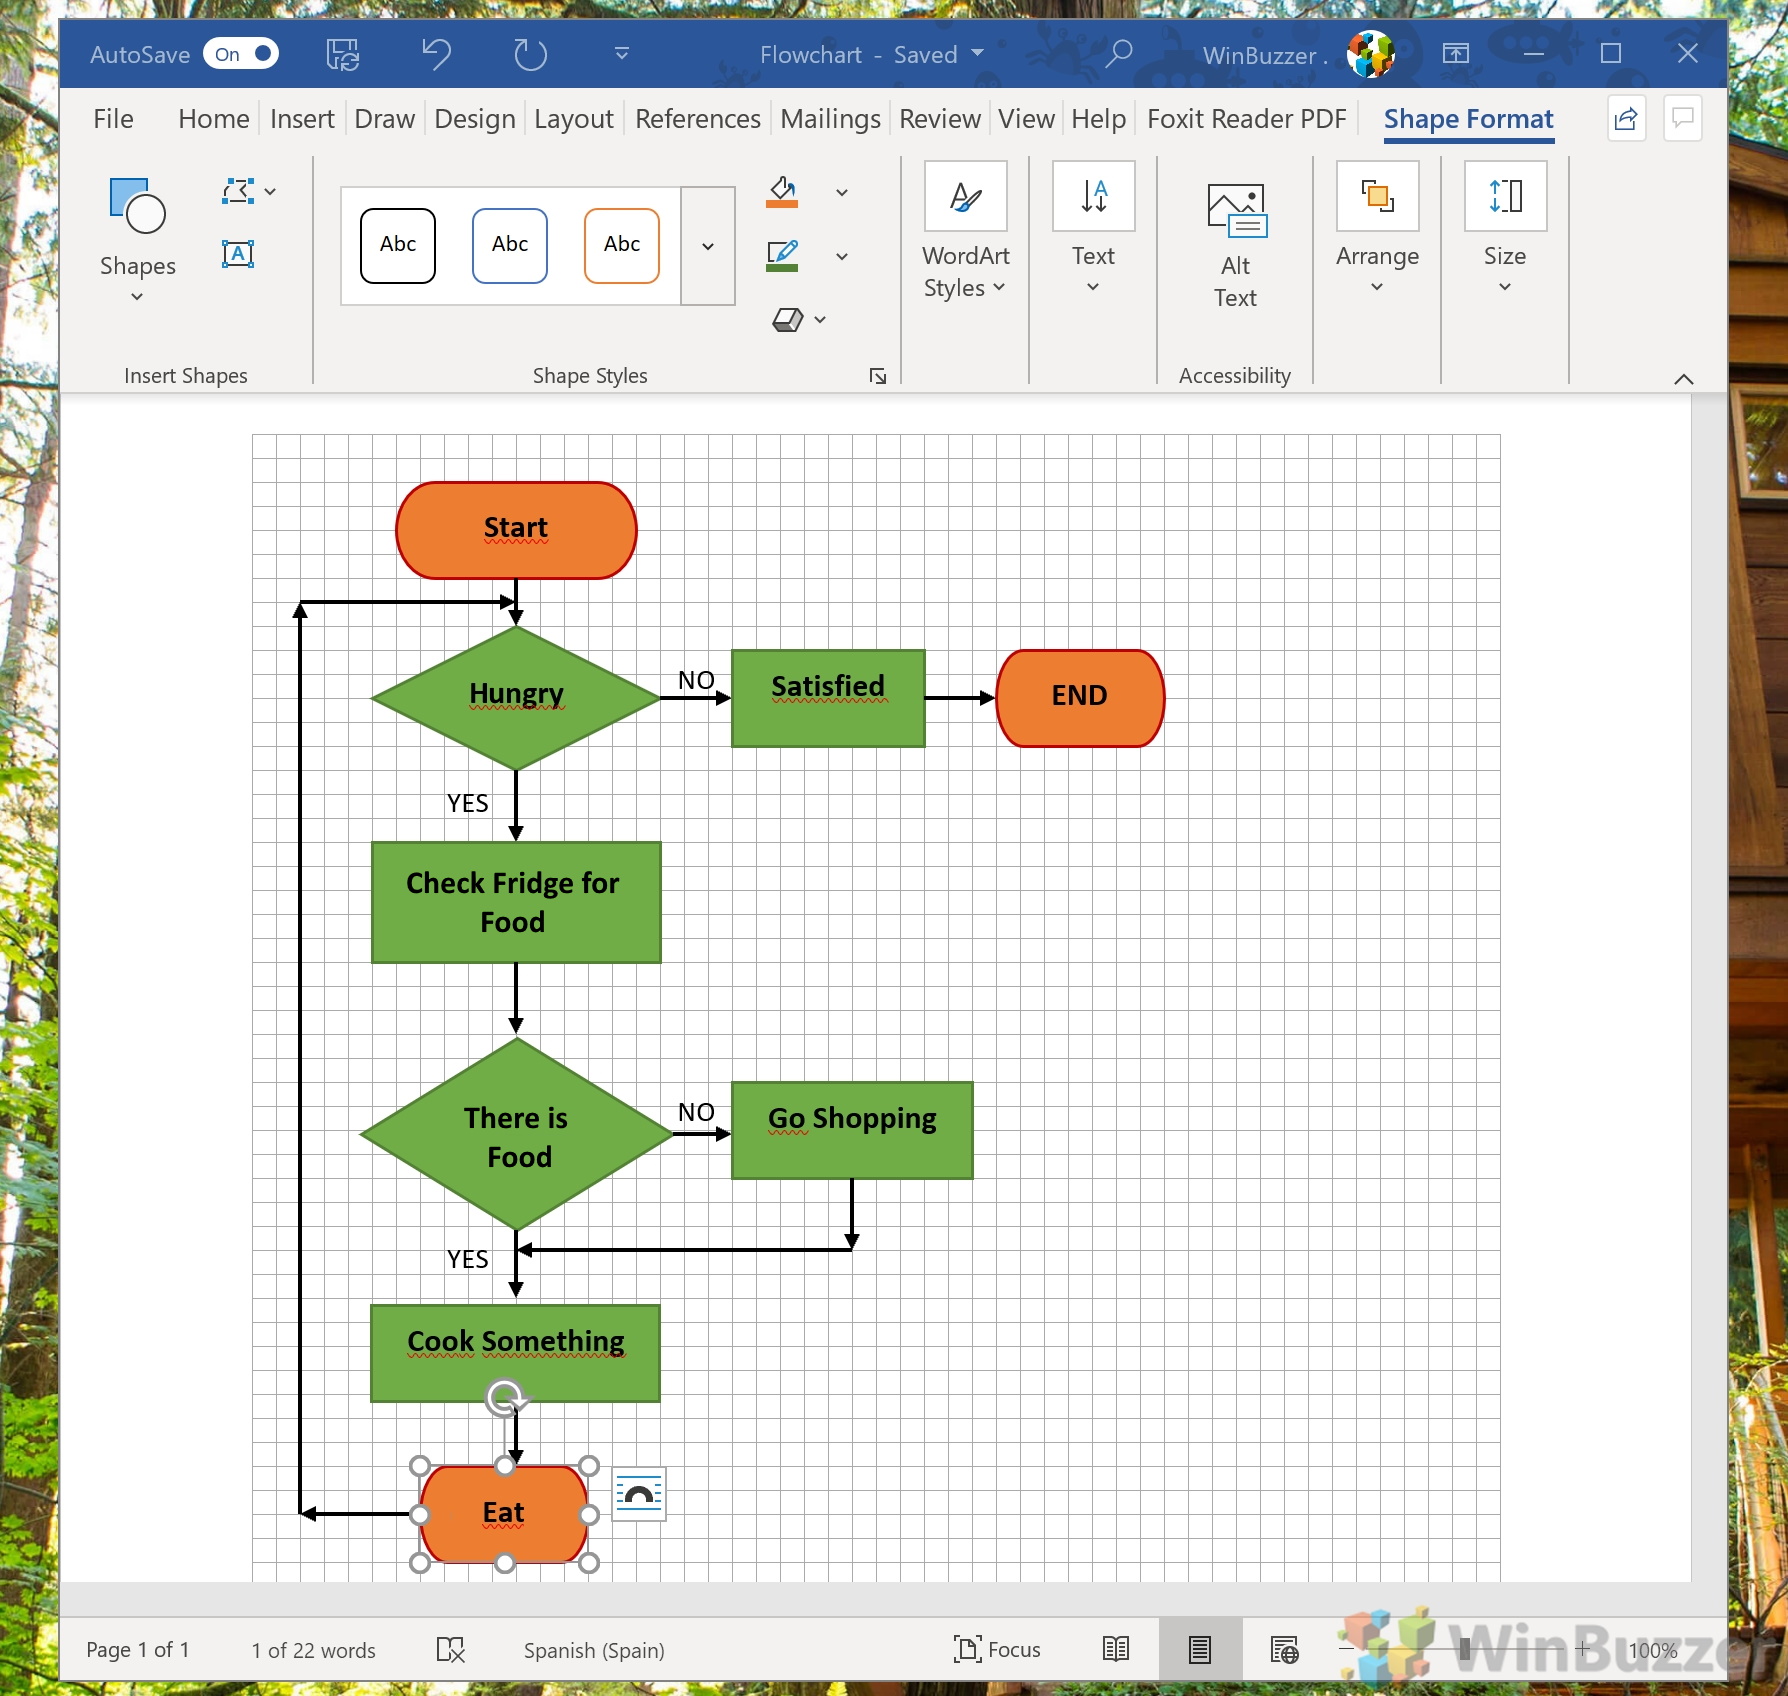
- Keep going until you complete your flowchart in Word
Keep adding shapes, arrows, and text as required until you've completed your flowchart in Word. You can then print it or print it as a PDF to send to others digitally.

How to Make a Flowchart with SmartArt in Word
If you're short on time, SmartArt in Word will give you good results quickly. Here's how you can use it:
- Open the SmartArt menu
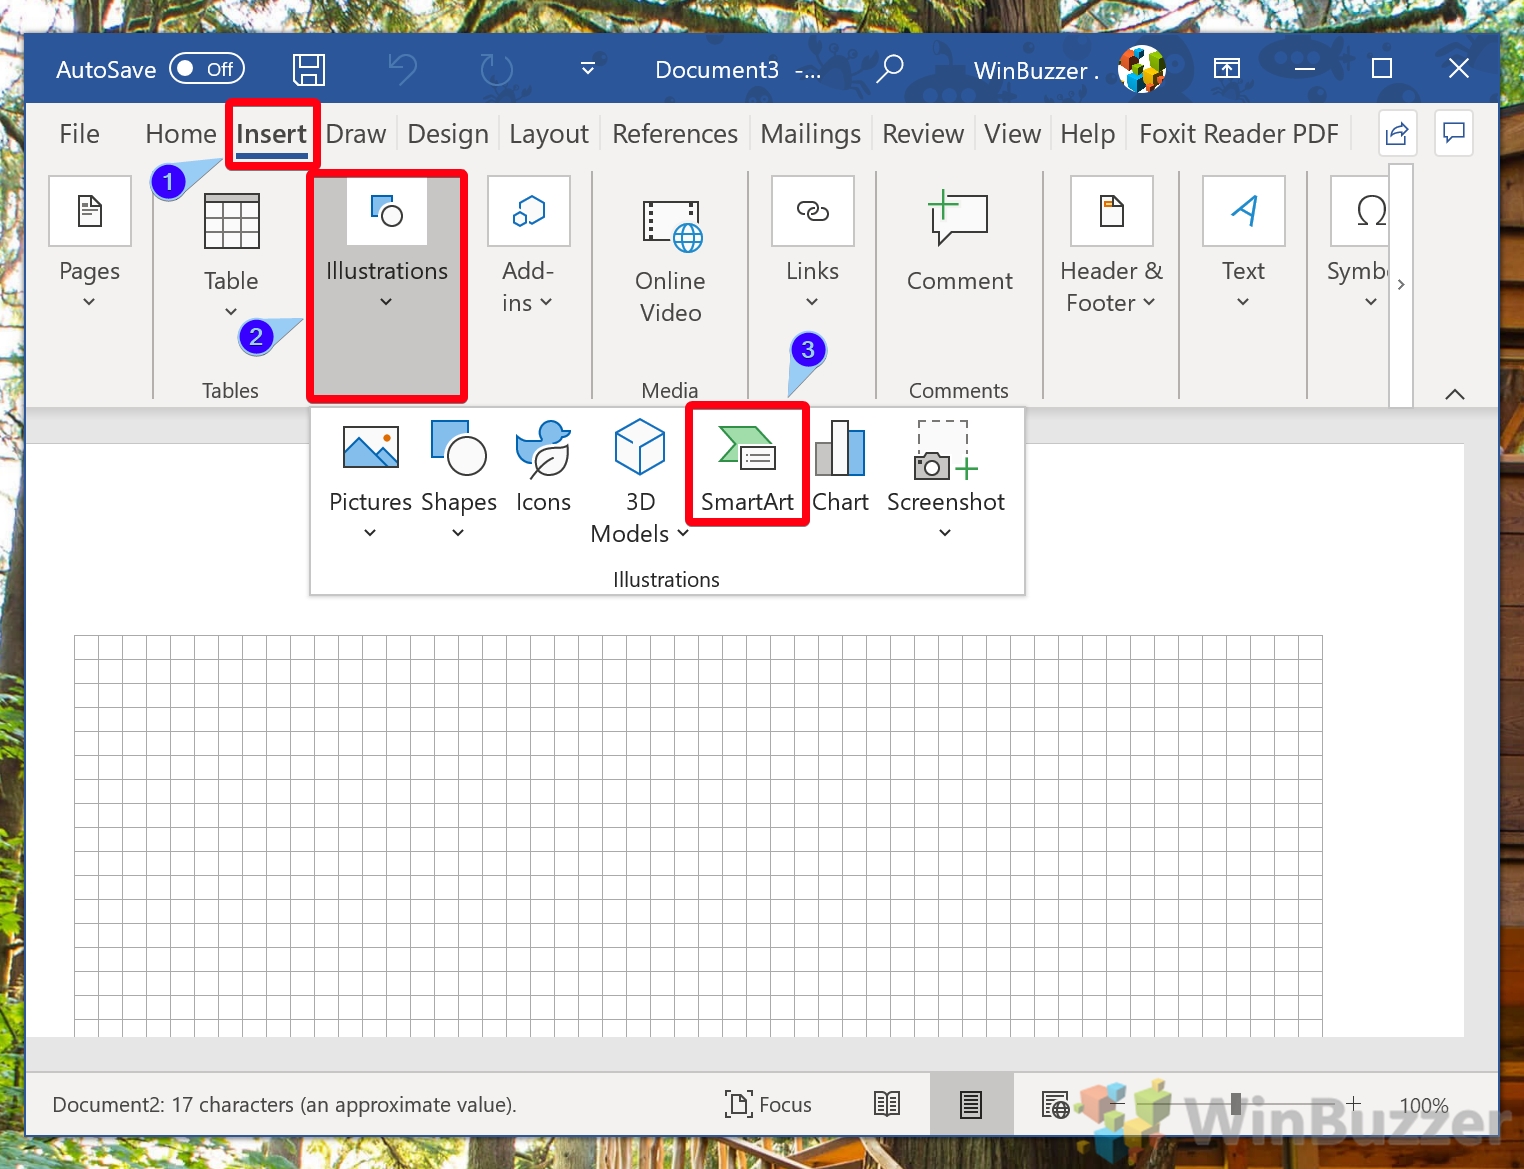
Click the “Insert” tab in your Word ribbon, then select “Illustrations > SmartArt”.
- Choose a flowchart template from the “Process” category
You can find anything from a basic blocklist to more advanced designs. We're going to choose the basic block list template.

- Insert pictures if required
You'll notice that some of the templates have an image icon on them. Click this icon and you can insert pictures from the internet or your local PC to spice up your flowchart.

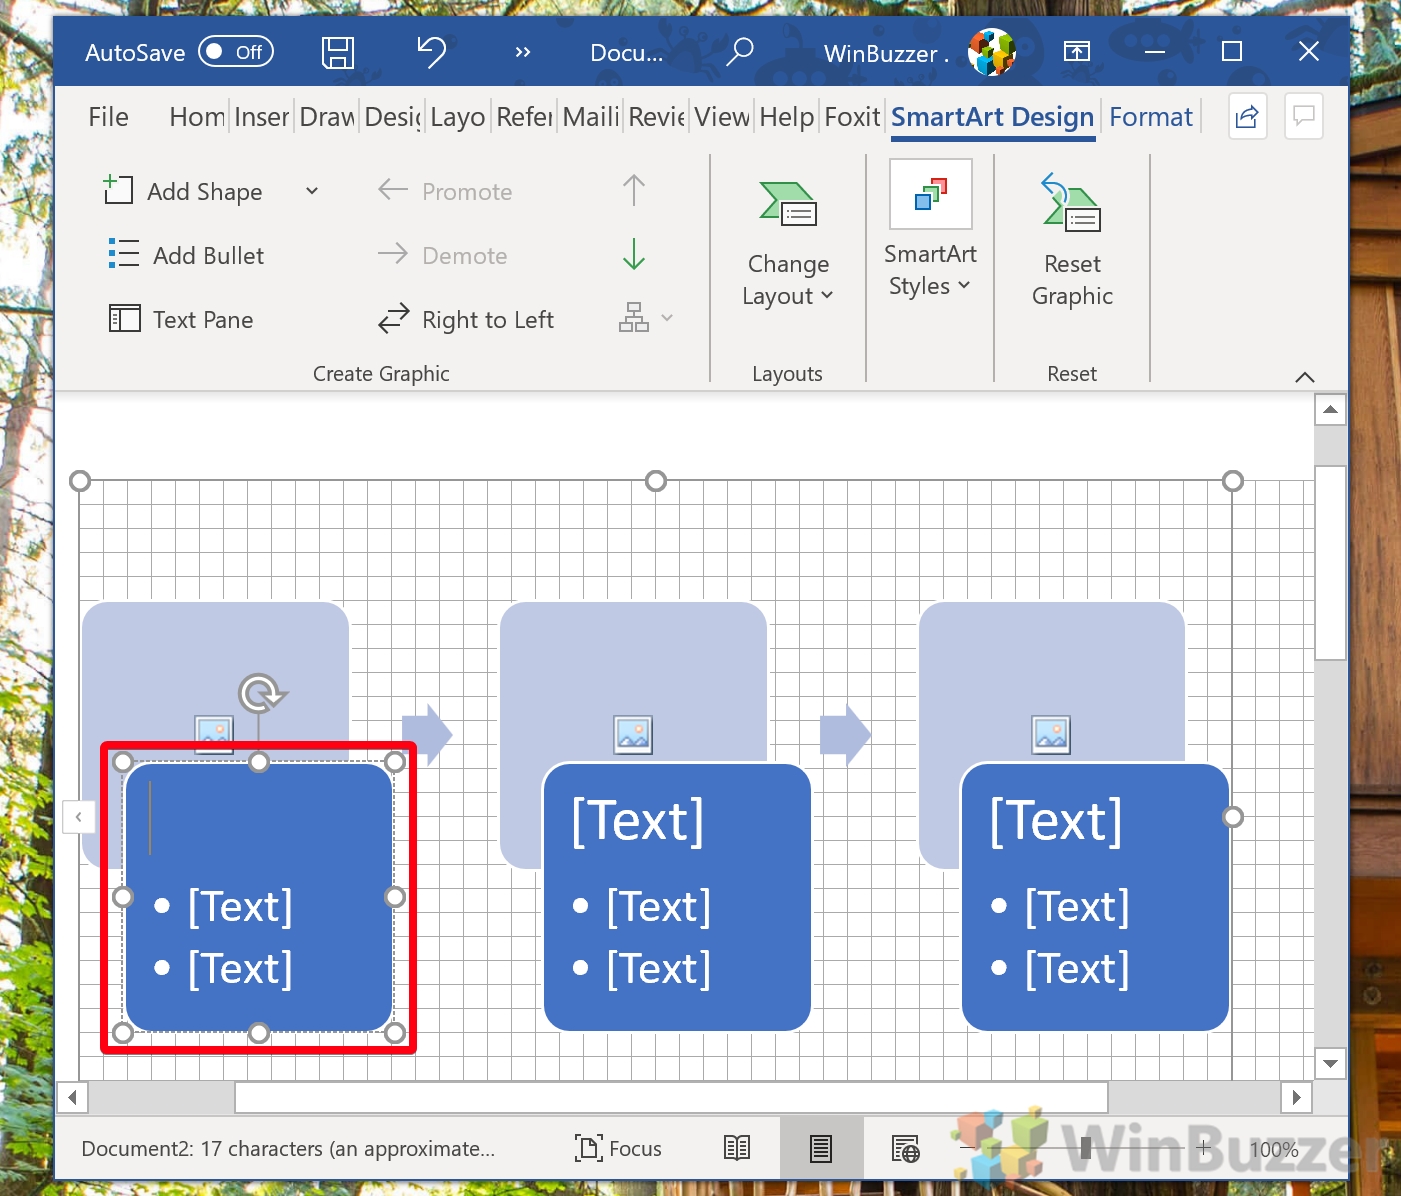
- Add your text
Simply click on a shape to modify the existing text to suit your preferences. You can also change the font and color as you would any other writing.
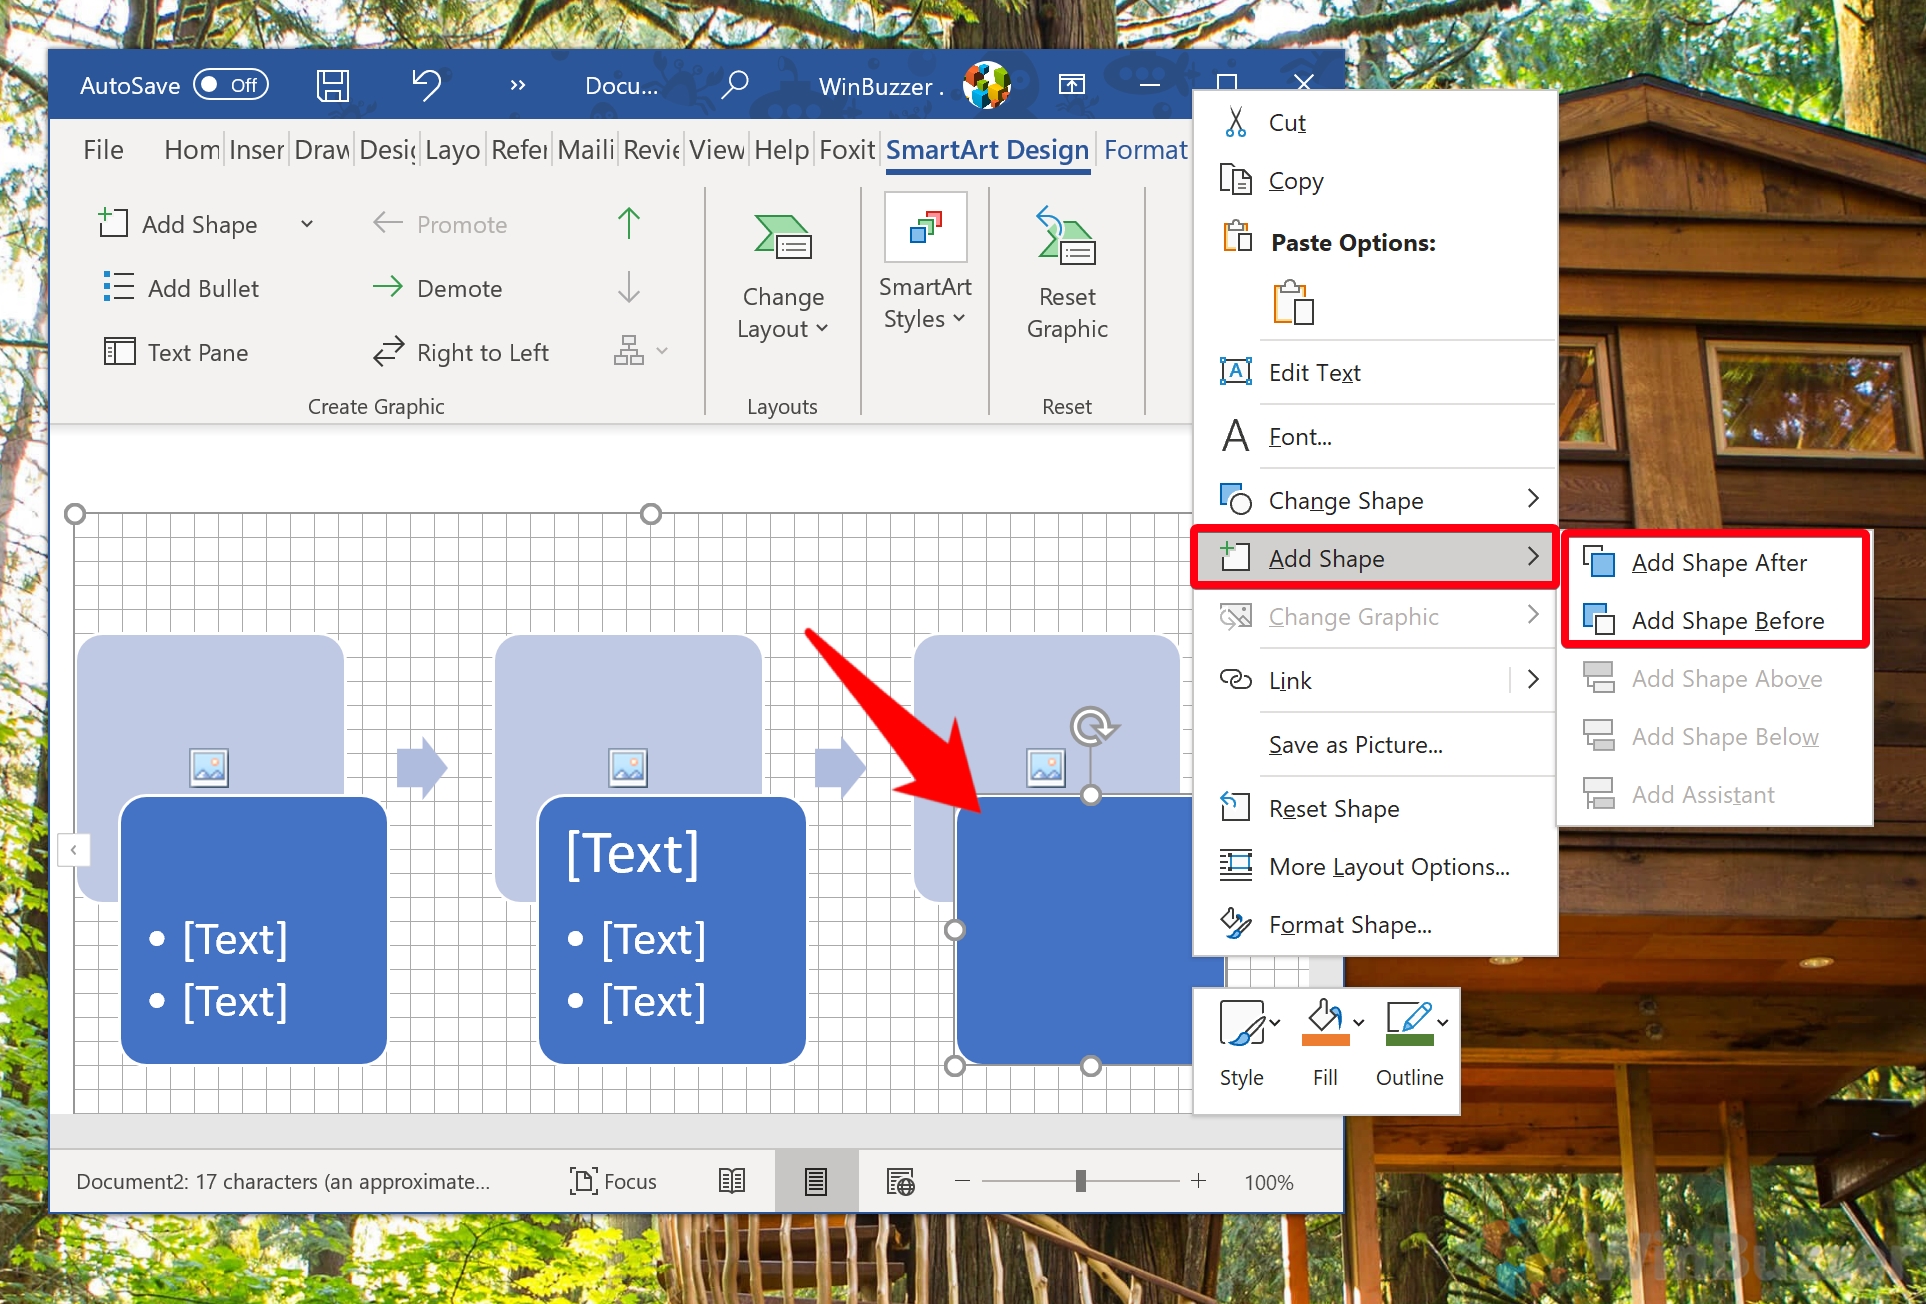
- Add more shapes
Right-click one of the Word SmartArt shapes and press “Add Shape > Add Shape After/Add Shape Before” to expand your flow. You can keep doing this until your entire process is mapped out. You can also delete objects you don't need with the delete key and add custom ones using the shapes method above.
That about wraps up this tutorial. You should now be able to make a flowchart in Word in just a few minutes. If you want to change your background color you can do so via our dedicated Word background color tutorial. If you're a regular flowchart builder, you may also want to customize your Word ribbon for easy access to the tools in the future.


