

Contents
- 1 How to Use AutoFormat to Insert a Line in Word
- 2 How to Use the Horizontal Line Tool to Draw a Line in Word
- 3 How to Insert a Horizontal or Vertical Line in Word
- 4 How to Draw a Line in Word with the Shapes Tool
- 5 How to Make a Vertical Line in Word and Separate Text into Columns
- 6 Insert a Vertical Line in Word Using a Bar Tab
- 7 How to Insert a Horizontal Line in Word Online
- 8 Extra: How to Draw in Word
- 9 Extra: How to Add a Page Border in Microsoft Word
Vertical and Horizontal lines have many uses in a document. They can help to split up content, draw the eye to a particular place, or just provide visual flavor. In this guide, we're going to show you how to insert a line in Word using a variety of methods that often have slightly different outcomes.
Vertical and horizontal lines in Word are useful
For example, you can add lines to a Word document by using symbols on your keyboard, the table tool, borders, shapes, drawing tools, or tabs.
Typically, you'll find that it's harder to make a vertical line in Word than a horizontal one, but it's still very much possible. You can even have the vertical line automatically split your text into two columns, which is useful if you're making a newspaper or leaflet.
We'll show you this and more below:
How to Use AutoFormat to Insert a Line in Word
One of the easiest ways to insert a horizontal line in Word is by taking advantage of the symbols on your keyboard and Word's AutoFormat capabilities. The software will automatically turn certain symbols into a continuous line when you string them together:
- Type three hyphens, equals, asterisk, underline, tilde, or hash symbols and press Enter
Word will draw a line across your page automatically, stopping the margins. You can remove the line at any time by adjusting the “Borders” section of the “Home” tab.

How to Use the Horizontal Line Tool to Draw a Line in Word
It's tucked away, but Microsoft Word has a dedicated horizontal line tool that you can use to quickly add a horizontal line across your document. Here's where to find it:
- Open the Home ribbon and press “Paragraph > Border icon > Horizontal line”

- The horizontal line will appear wherever you placed your cursor

- Double-click the line to adjust its width, thickness, and color, then press “OK”

How to Insert a Horizontal or Vertical Line in Word
One of the methods we showed so far to create horizontal lines in Word made indirect use of the border feature. If we use the border tool directly, however, we can insert a vertical line in Word, too. Here's how:
- For horizontal lines: Place your cursor and insert a bottom border
After placing your cursor where you want the line across the page, open the “Home” tab of your ribbon, click the border icon, then press “Bottom Border”.

- The line will appear wherever you placed your cursor

- For vertical lines: insert a left or right border
You can add a vertical line in Word at the left or right edge of your document. Bear in mind that this can only be a maximum of 31px from the edge of your page. If you'd like it further away or in the center, use one of the methods below instead.
Select your text, open the “Home” tab of your ribbon, then press the border icon, followed by “Left Border” and/or “Right Border”.

- The vertical line will follow your text down the page

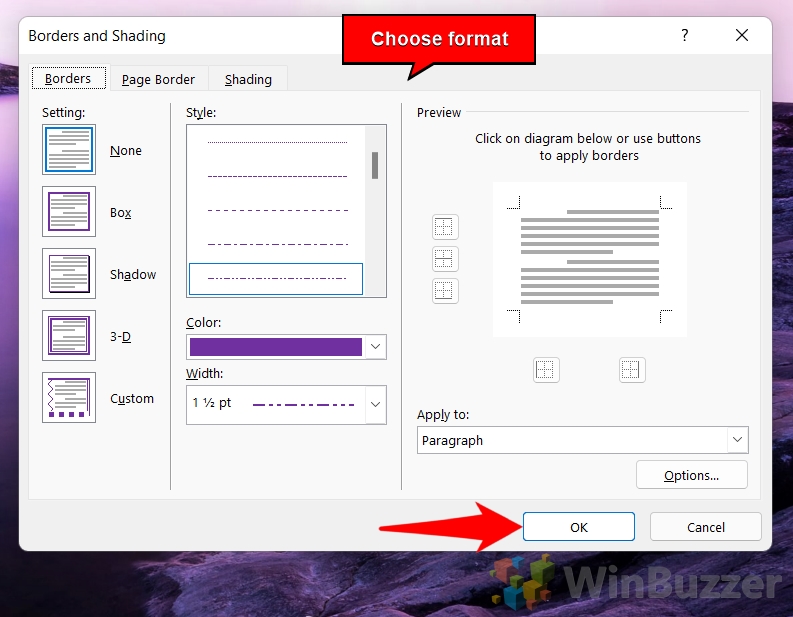
- Press “Home > Border icon > Borders and Shading…” to adjust its style
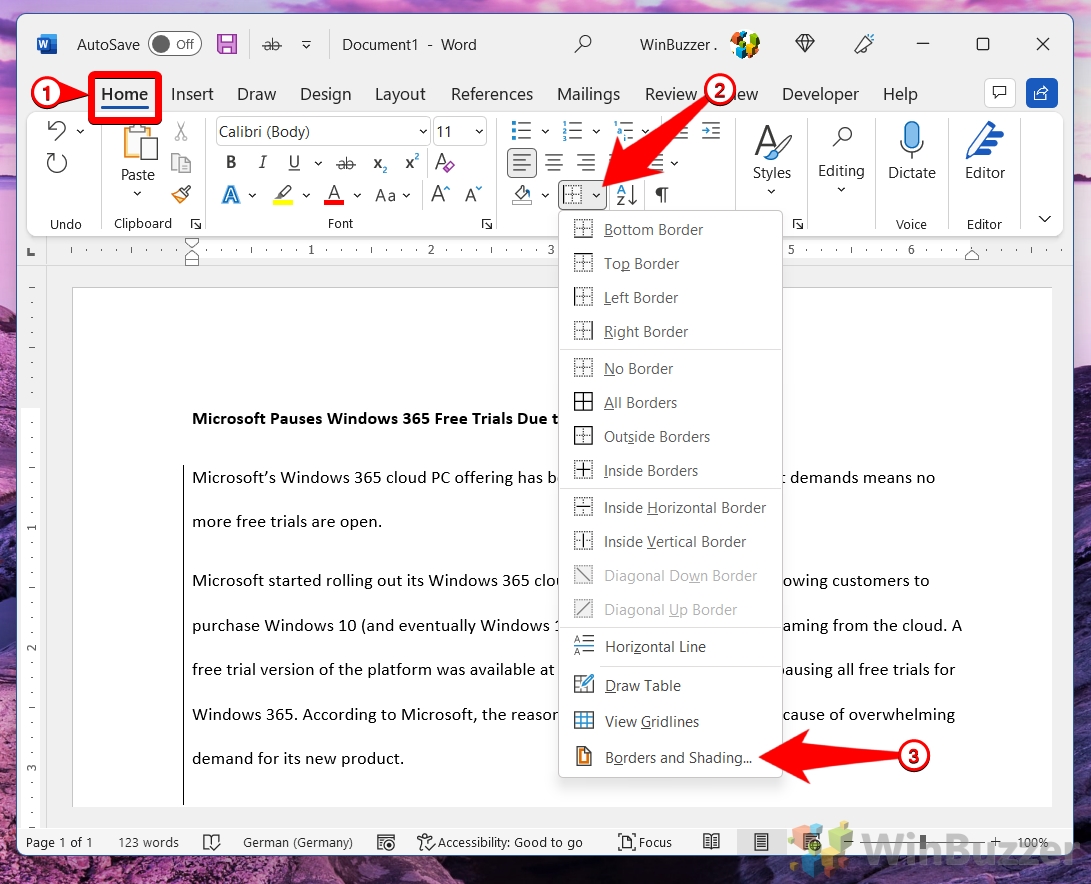
- Choose the line type, color, and width of your vertical line, then press “OK”
You can also press the “Options” button to change the spacing of your border.
- Check how the style looks in your document

- Press “Home > Border icon > No Border” to remove the line

- Your line will no longer show on your document

How to Draw a Line in Word with the Shapes Tool
If you want complete freedom over where you add lines to a Word document, the shapes tool is your friend. It'll let you draw anywhere on your document and even have options to allow you to shift text to make space for it. This is you'd use it:
- Open the “Insert” tab of your ribbon and press “Shapes > Lines > Line”

- Click and drag your cursor across the page to draw a line

- Change your formatting in the “Shape Format” tab with the line selected
You can also press the
 icon next to the line to change how the text interacts with your shape.
- Right-click your line and press “Format Shape…” for more options

- Change the line formatting options to your liking
The line will update instantly on your page as you make the changes.

How to Make a Vertical Line in Word and Separate Text into Columns
If you're making a newspaper or leaflet, it may be beneficial to separate your text into multiple columns with a vertical line between them. With a few clicks, it's completely possible to do this in Word.
- Select your text, open the “Layout” tab, then press “Columns > Two”

- Click on a column and press “Columns > More Columns…” in the “Layout” tab

- Check the “Line between” box and press “OK”

- Word will place a line between your columns for visual clarity

Insert a Vertical Line in Word Using a Bar Tab
Bar tabs aren't just a way to streamline your alcohol purchases. In Microsoft Word, they act as a line you can place at any point along your ruler. They're very much hidden away, though, so you'll want to follow along to see how to use them:
- Select your paragraph, open the “Home” tab and press the “Paragraph Settings” icon in the “Paragraph” section of the ribbon

- Press the “Tabs…” button in the bottom-left of the “Paragraph” pop-out

- Set your tab stop position, tick “Bar” in the “Alignment” section, and press ” Set > OK”
The Tab stop position determines the position at which Word will place the vertical line on your page. You can set negative values here to place the line outside of your page margins.
Check the ruler of your document so you can get an accurate measurement.

- Word will add the vertical line to your document

- Remove the line by opening paragraph settings and pressing the “Clear” button in the “Tabs” section

How to Insert a Horizontal Line in Word Online
Word Online's features are significantly pared back compared to the desktop app, but you can still insert a horizontal line with a bit of creativity. We like to use the table and drawing features:
- Open the “Insert” tab of the ribbon and press “Table > 1×1 Table”

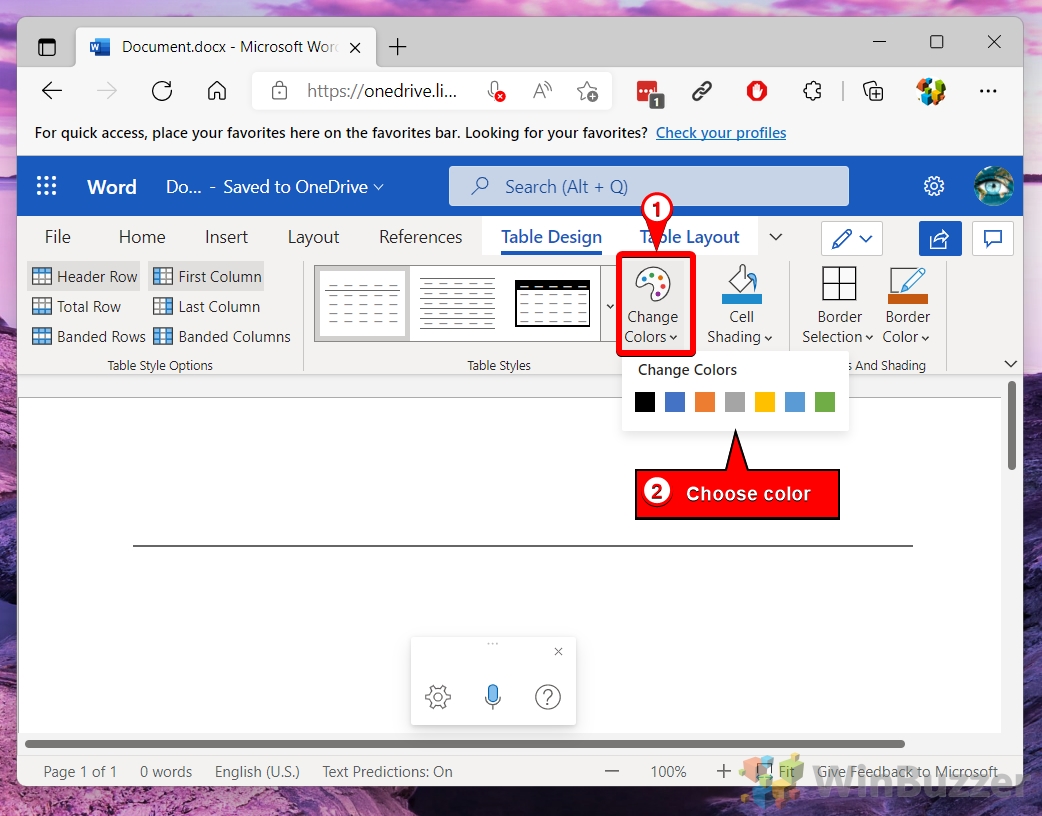
- Press the dropdown next to the “Table Styles” section of the ribbon

- Select the first option under “List Tables”

- Press “Change Colors” and choose a color for your line
- OR: Press the “Drawing” button in the “Insert” tab

- Press the “Shapes” button in the drawing preview and select the “Line” tool

- Click and drag to make your line

- Adjust the line as necessary using the handles on the edges

- Press the three dots in the toolbar and choose color, weight, and style options for your line

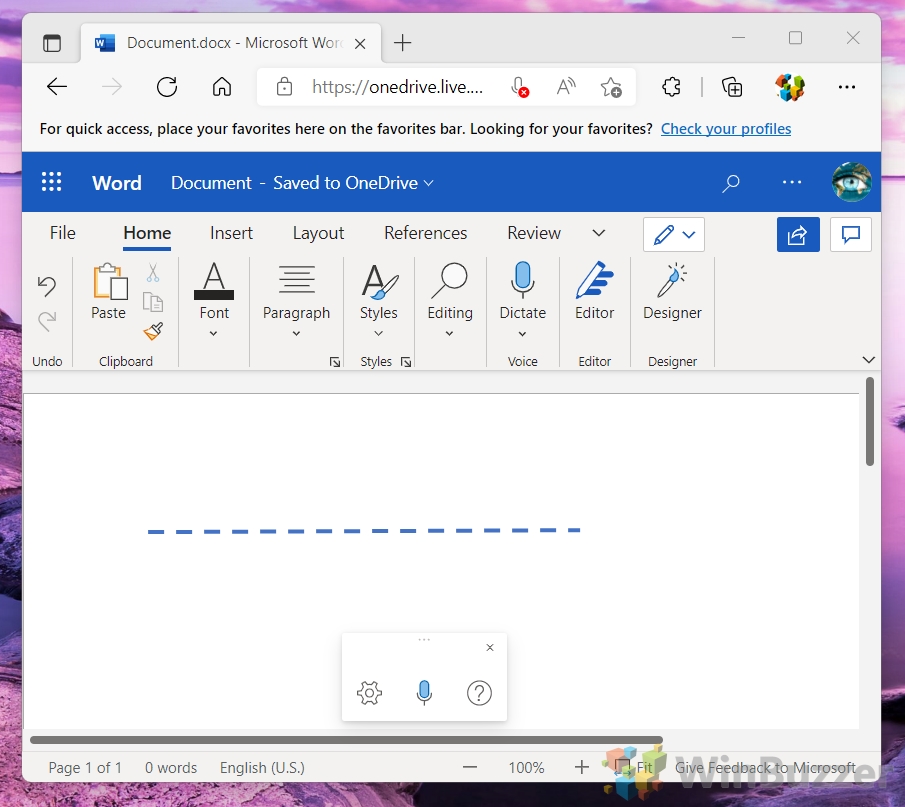
- Press “Save and Close”

- Your horizontal line will now appear in your document
Extra: How to Draw in Word
If you'd like to go further than just basic lines, follow our how to draw in Microsoft Word guide. It'll walk you through adding various preset shapes and drawing freehand.

Extra: How to Add a Page Border in Microsoft Word
If you're looking to add horizontal and vertical lines around the entire perimeter of your document, check out our how to add a page border guide instead. It'll get you where you need to be in a few short minutes.


