

Contents
If you uploaded pictures from your camera or phone to your PC, there's a good chance you're wondering how to make a slideshow with them to present to family and friends. This guide will show you how to create and view one in Windows 10 using four of its in-built tools.
Viewing pictures in Windows 10 by creating a slideshow
First, we'll cover how you can view pictures as a slideshow on your desktop, before moving on to File Explorer, Windows Photo viewer, and Microsoft Photos. Each has its own benefit, with Photos letting you quickly browse through all your photos and File Explorer allowing additional slideshow controls.
You can create a Windows 10 slideshow from any pictures, but the most important thing is that you have them in their own folder. You may want to take the time to look through and get rid of the ones that are in portrait orientation or are low resolution. Ideally, they should be a widescreen aspect ratio, too.
Now that you have a folder prepared, let's dive into how to create your Windows 10 slideshow.
How to Make a Slideshow Display as Your Desktop Background
Windows 10 allows you to easily set a slideshow as your desktop background so you can have a constant reminder of your favorite moments. Here's how:
-
-
- Open Settings
Press the “Start” button, then click the settings cog, above the power button. Alternatively, press Windows + I.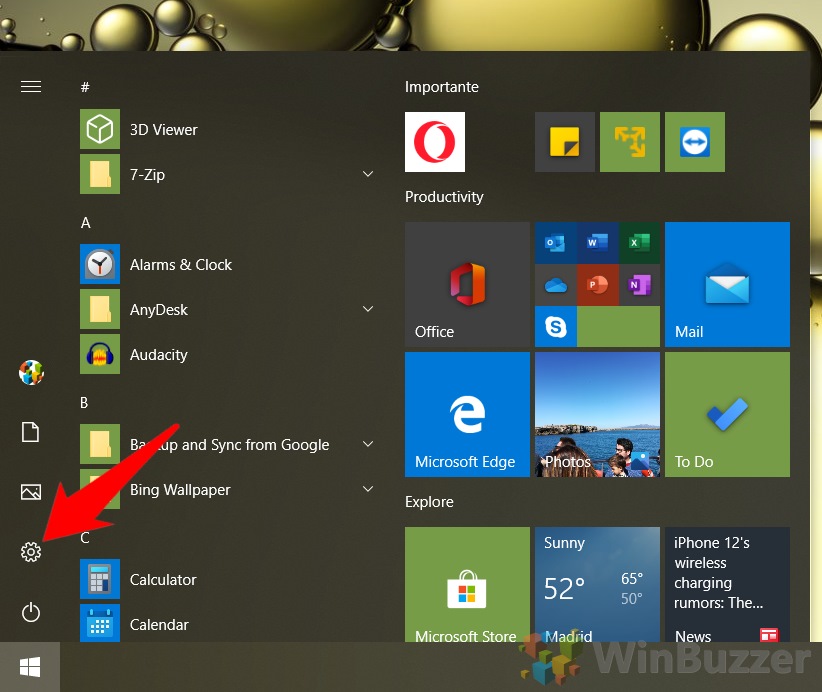
- Open Settings
-
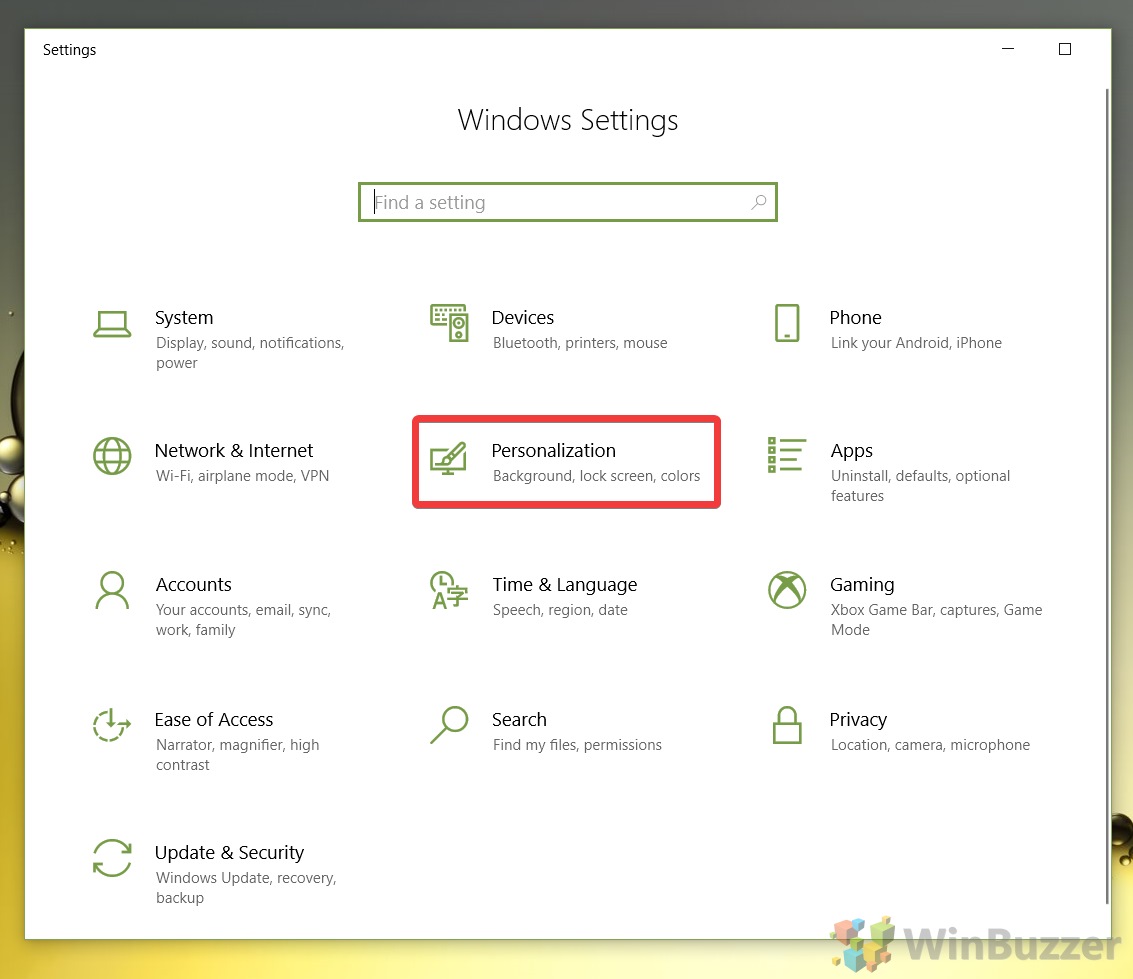
- Click “Personalization”
- Change your background to a Windows 10 slideshow
In the Settings sidebar, click “Background”, then change the “Picture” dropdown under “Background” to “Slideshow”.
Make sure you change your slideshow settings to suit your preferences, browsing to the correct folder and adjusting the “Change picture every” and “Shuffle” settings.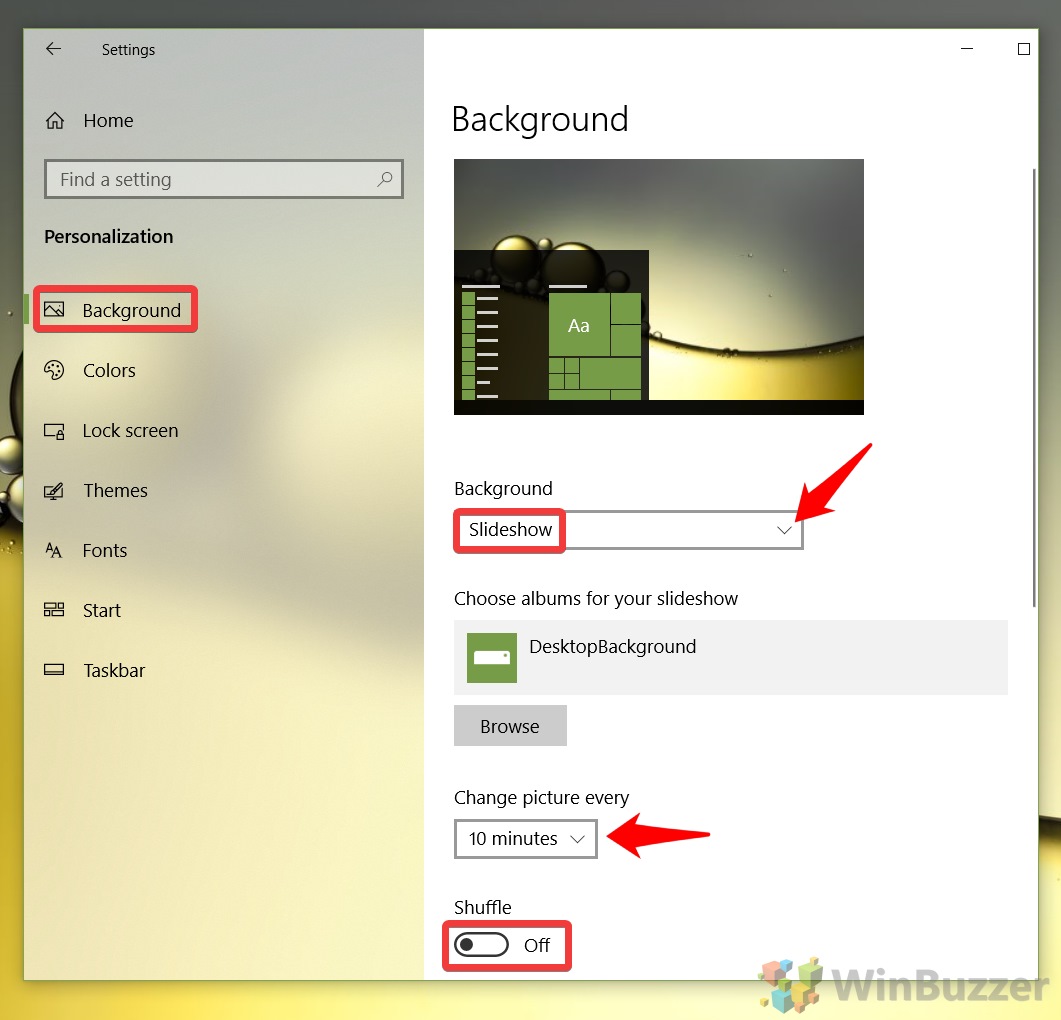
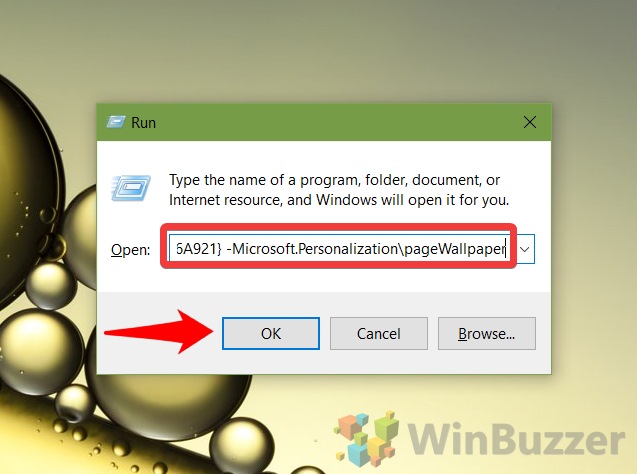
- Optional: enable classic desktop backgrounds interface
If you prefer the simplicity of the classic desktop background interface, you can open it via Run and use that to view pictures as a slideshow on your desktop.
Press Windows + R to open the run dialog and paste the following into the “Open” field:shell:::{ED834ED6-4B5A-4bfe-8F11-A626DCB6A921} -Microsoft.Personalization\pageWallpaperPress “OK” to open the old personalization app.
- Create a slideshow in the classic app
Either use the pictures in your Windows theme folder or browse to a slideshow folder you prepared earlier via the “Browse…” button. Tick the images you'd like for your Windows 10 slideshow and change the settings to suit your preference. You can change the picture positions, timings, and whether to shuffle images or display them sequentially.
Once you're done, press “Save changes” to apply the wallpaper.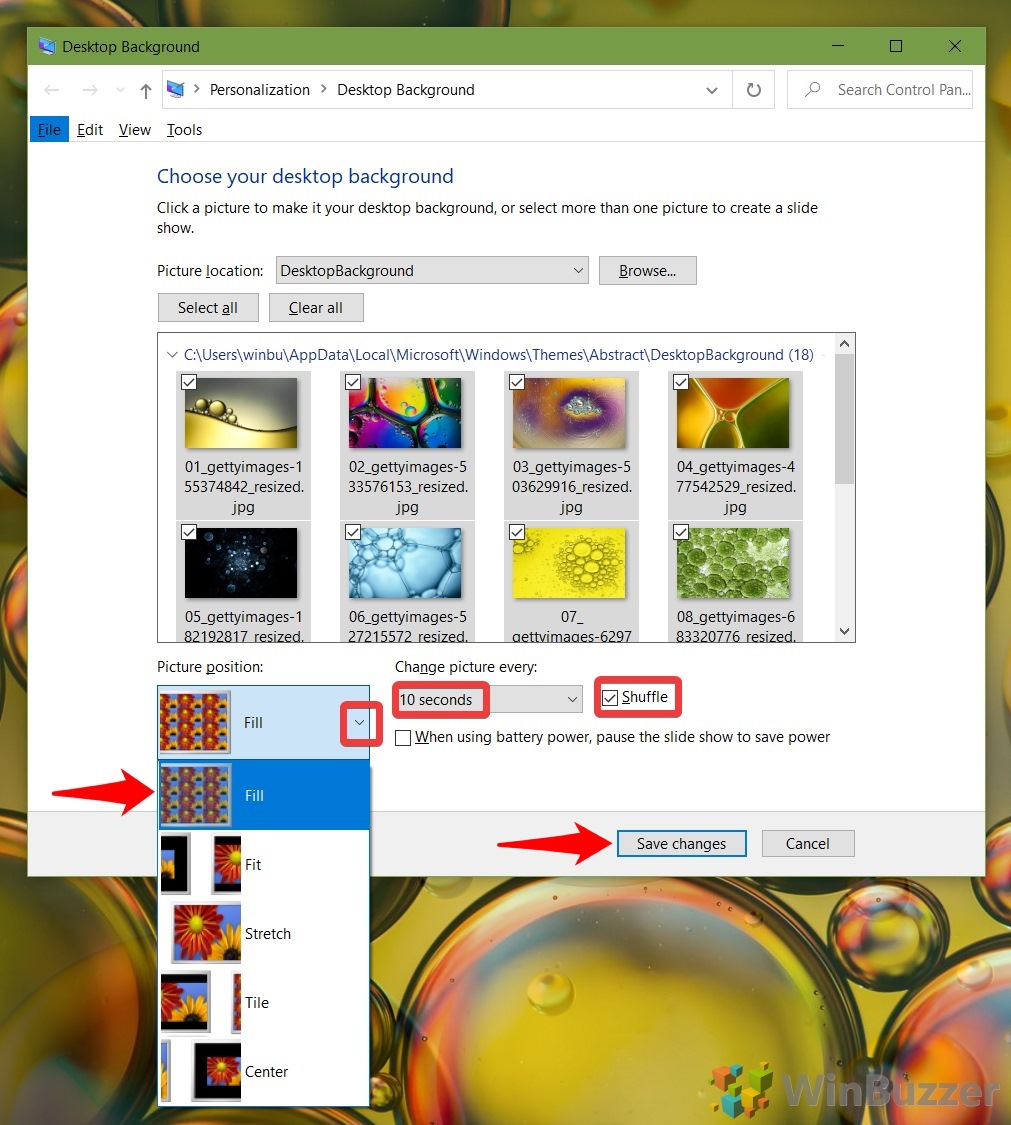
How to Make a Slideshow from Photos in File Explorer
If you already have a folder prepared, you can create an easy slideshow in Windows 10 via File Explorer. This doesn't provide many options, but it gets the job done.
- Select one or more pictures and press the “Slide show” button
You'll find the Slide show button in the “Manage” tab of your File Explorer ribbon.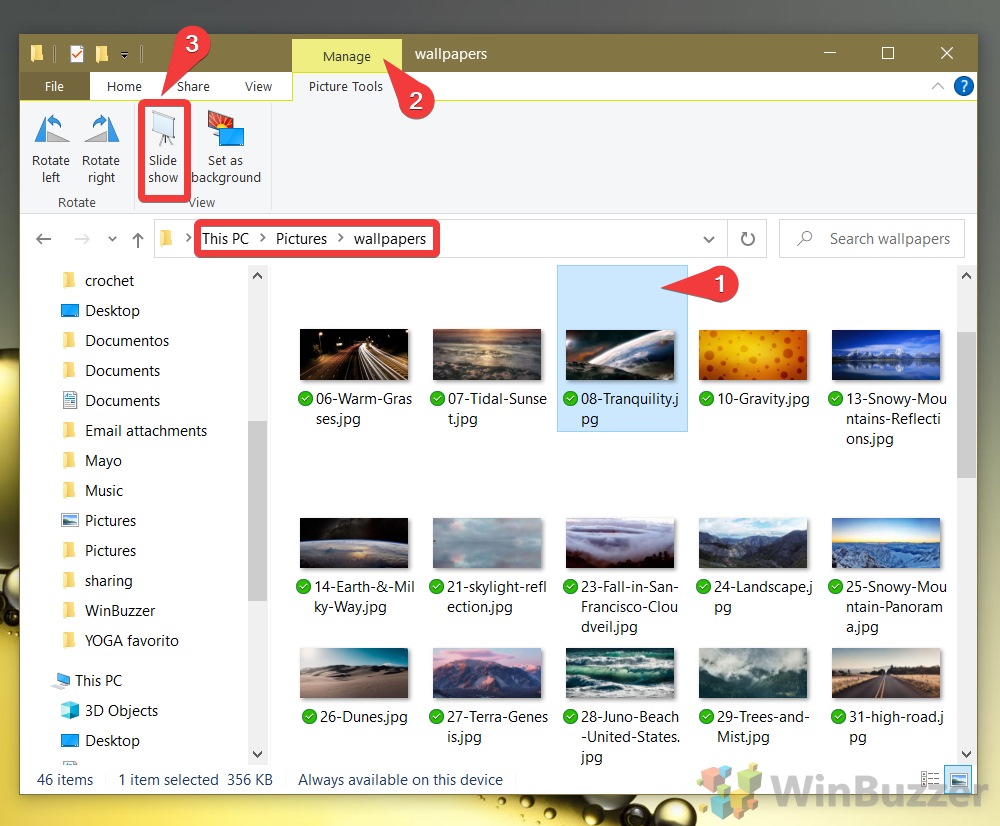
- Adjust your photos' slideshow settings
The slideshow will now start automatically playing images. You can right-click on the Microsoft slideshow window to change settings, including whether to pause, go to the next image, shuffle, and loop. You can also use this menu to adjust timings or exit it altogether.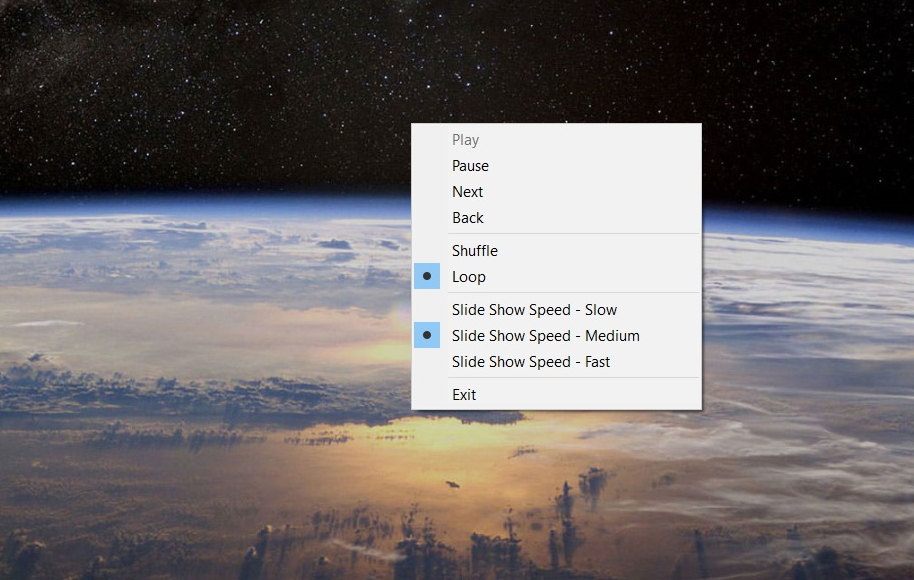
To Make a Slide Show in Windows 10 Photo Viewer
Some of you may prefer to use the old Windows Photo Viewer as a slideshow player. This was the default in older Windows versions, so chances are you're already familiar with it. It's a little more hidden on Microsoft's latest OS, but you can still use it – you just have to enable it first.
- View a photo in Windows Photo viewer
Right-click any photo in your slideshows folder and select “Open with > Windows Photo Viewer”.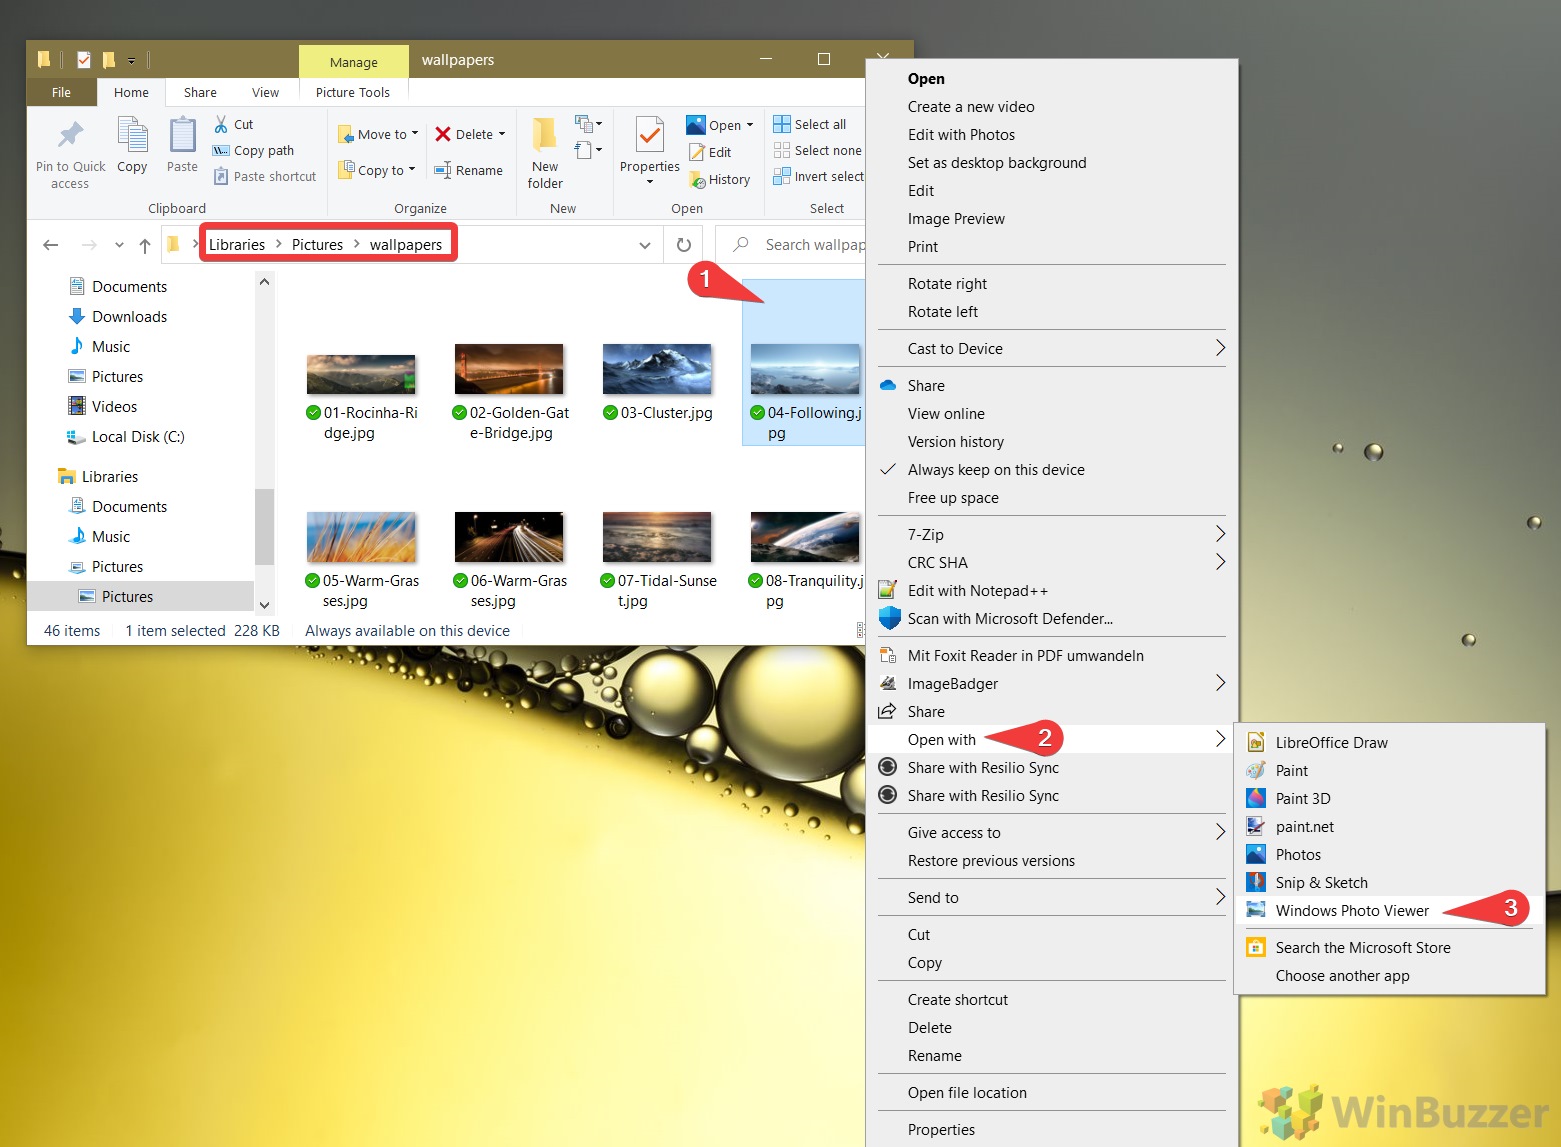
- Press the slideshow player button
It should be large, blue, and smack bang in the middle of your bottom toolbar.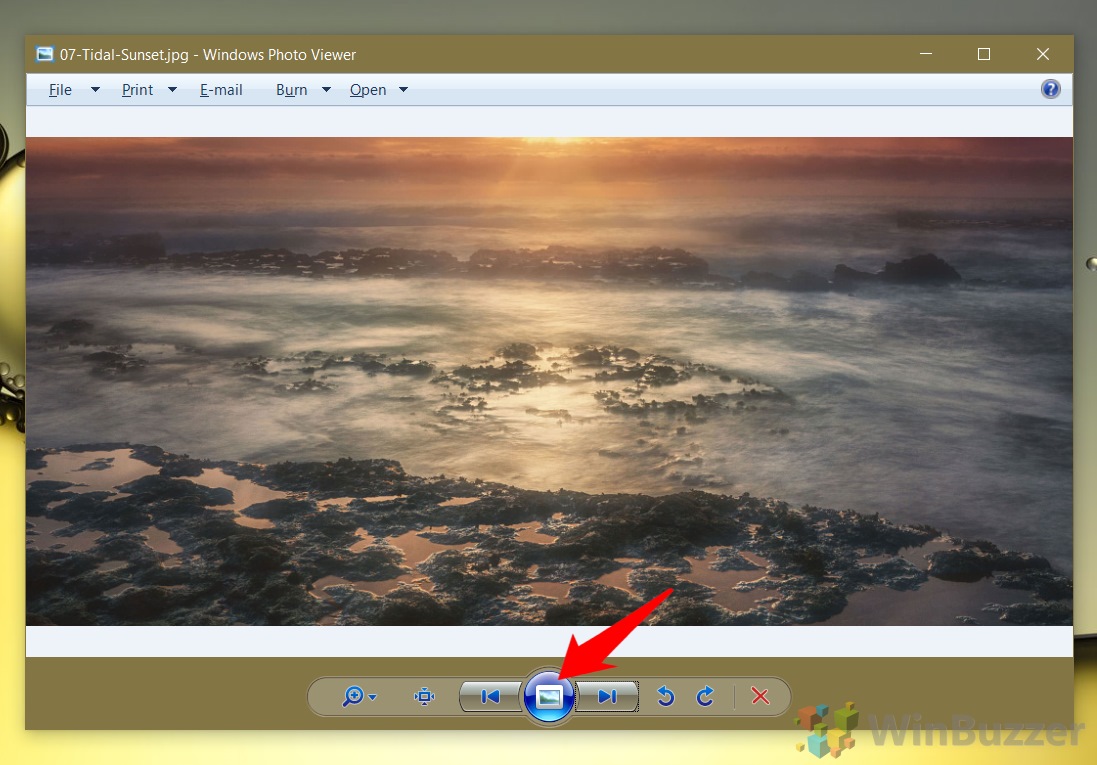
- Change your photo viewer slideshow settings
You can right-click any image to access more controls, including Play, Pause, Next, Back, Shuffle, Loop, and speed. Just click them to use them.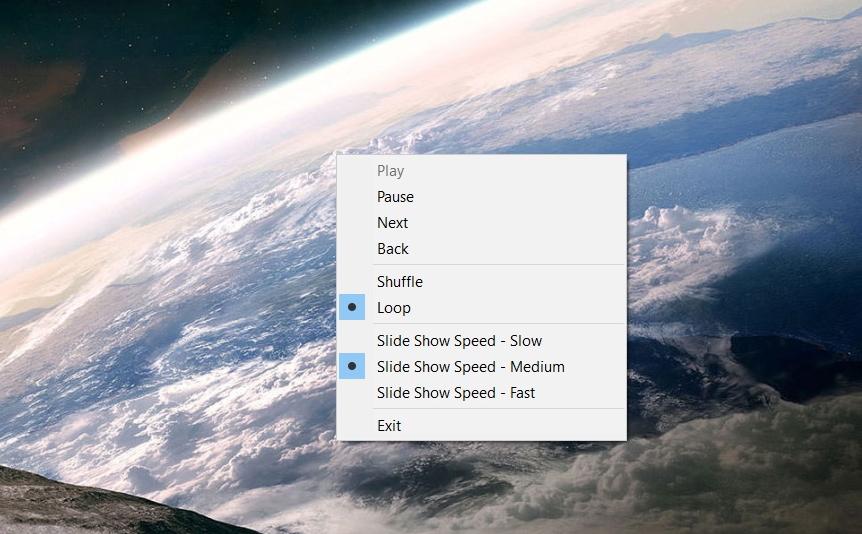
How to Create a Microsoft Photos Slideshow
If like me, you prefer the modern Microsoft Photos, you can use that for slideshows too. It requires an extra button press, but you can use a handy hotkey to speed up the process if you wish.
- View a photo in Microsoft Photos
Right-click the photo you want the slideshow to start on and select “Open with > Photos”.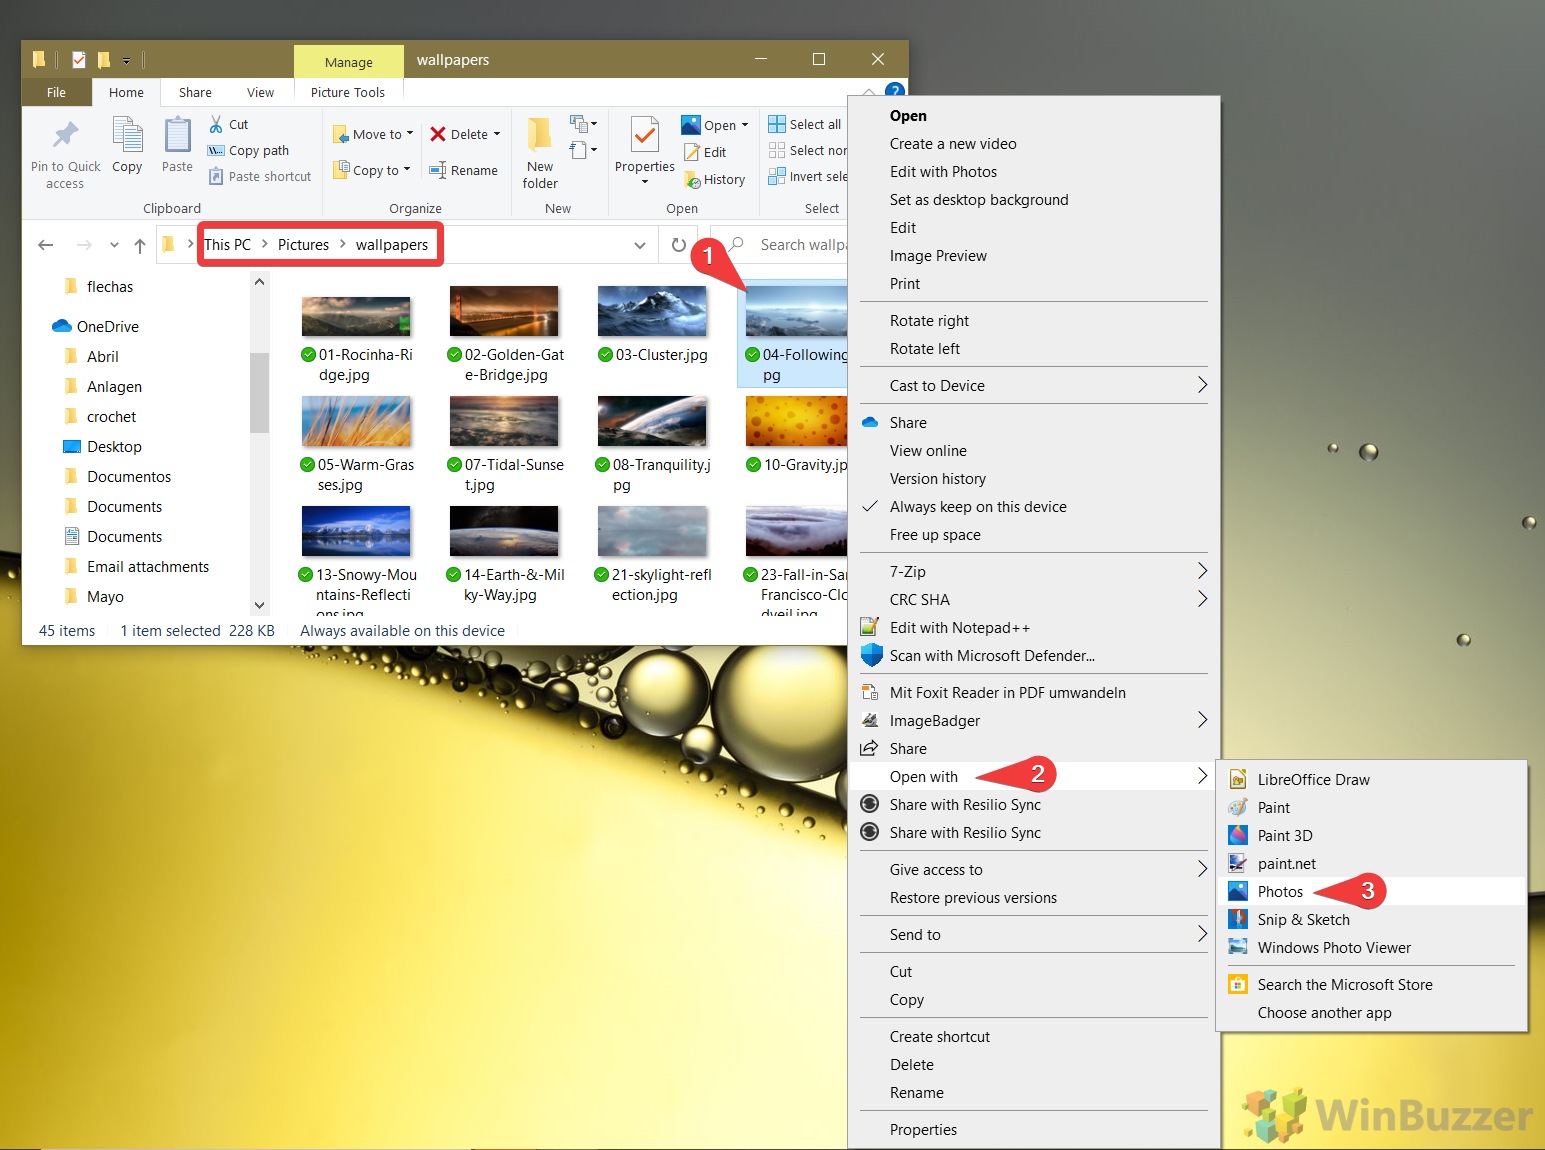
- Start your Microsoft Photos slideshow
Click the three-dots in the top-right corner to do so and click “Slideshow”, or simply press F5 on your keyboard.
Once you are in slideshow mode, you can use the arrow keys to go to the next or previous image. To access Photos slideshow settings, move your mouse to the top of your screen and click the menu button that appears.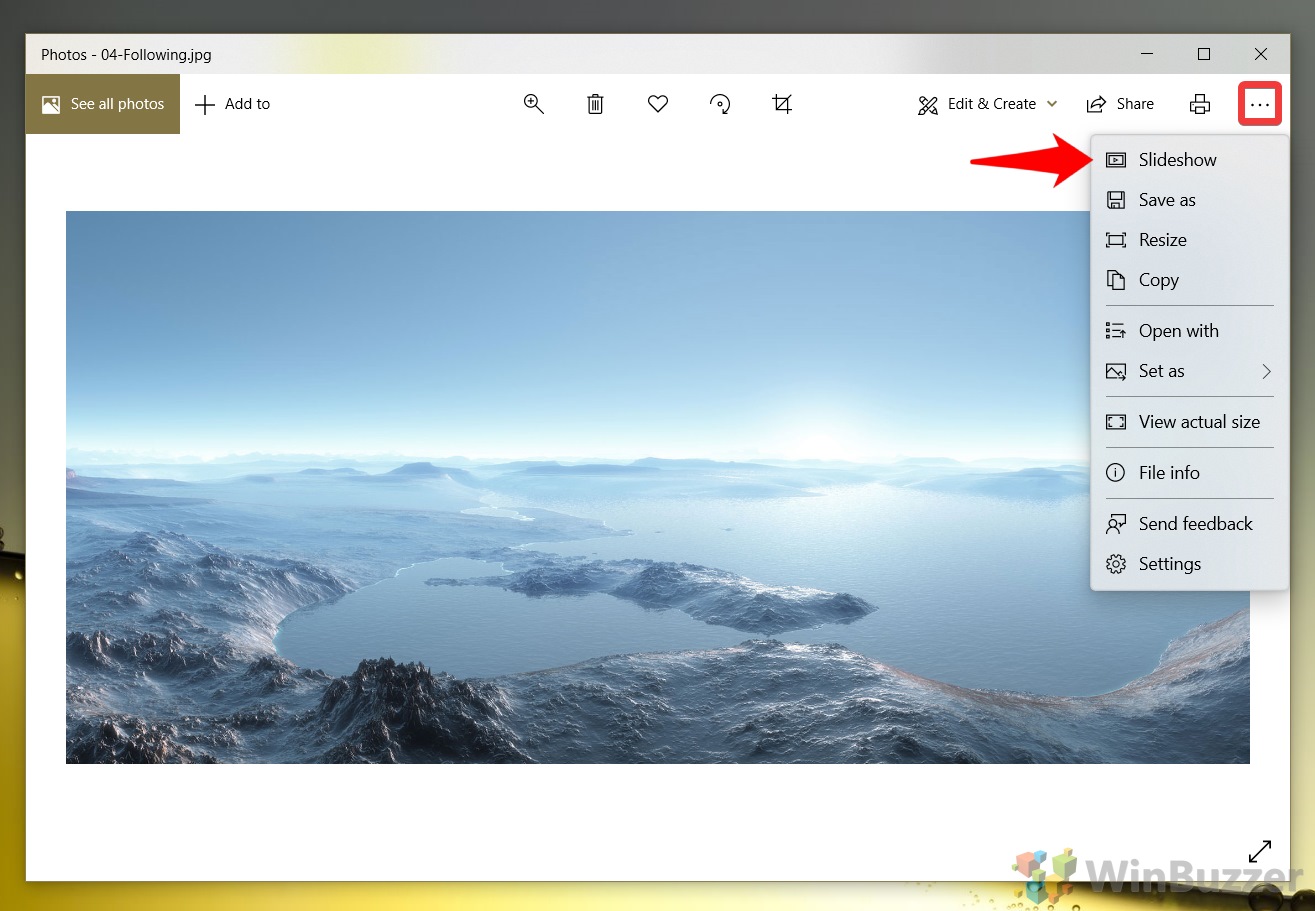 That's all for this tutorial, but you may want to check out some of our others. We've already covered how to set a slideshow as your lock screen background, for example, as well as a video.


