

Contents
If you've been combining multiple data sources, you can quickly end up with duplicate rows or cells in Excel. Whether it's due to an accidental copy and paste or a typing error, this can be time-consuming to remedy. Thankfully, though, there are several tricks you can use to find duplicates in Excel and remove them.
Creating duplicate content is so common that Microsoft's spreadsheet software has an in-built Remove Duplicates tool. This isn't always the best way to delete duplicate rows in Excel, however – sometimes the find and replace or advanced filtering options will be more efficient.
Finding duplicates in Excel
As a result, today we're going to show you how to use Excel to delete duplicate rows using all three methods. Knowledge of these three different duplicate checks will help you to make the right choice for your scenario. Let's get started:
How to Find and Remove Duplicates in Excel with the Remove Duplicates Tool
The duplicate remover is a very handy built-in tool that will do all of the heavy lifting for you. It'll automatically find any cells with the same text. Here's how to use it:
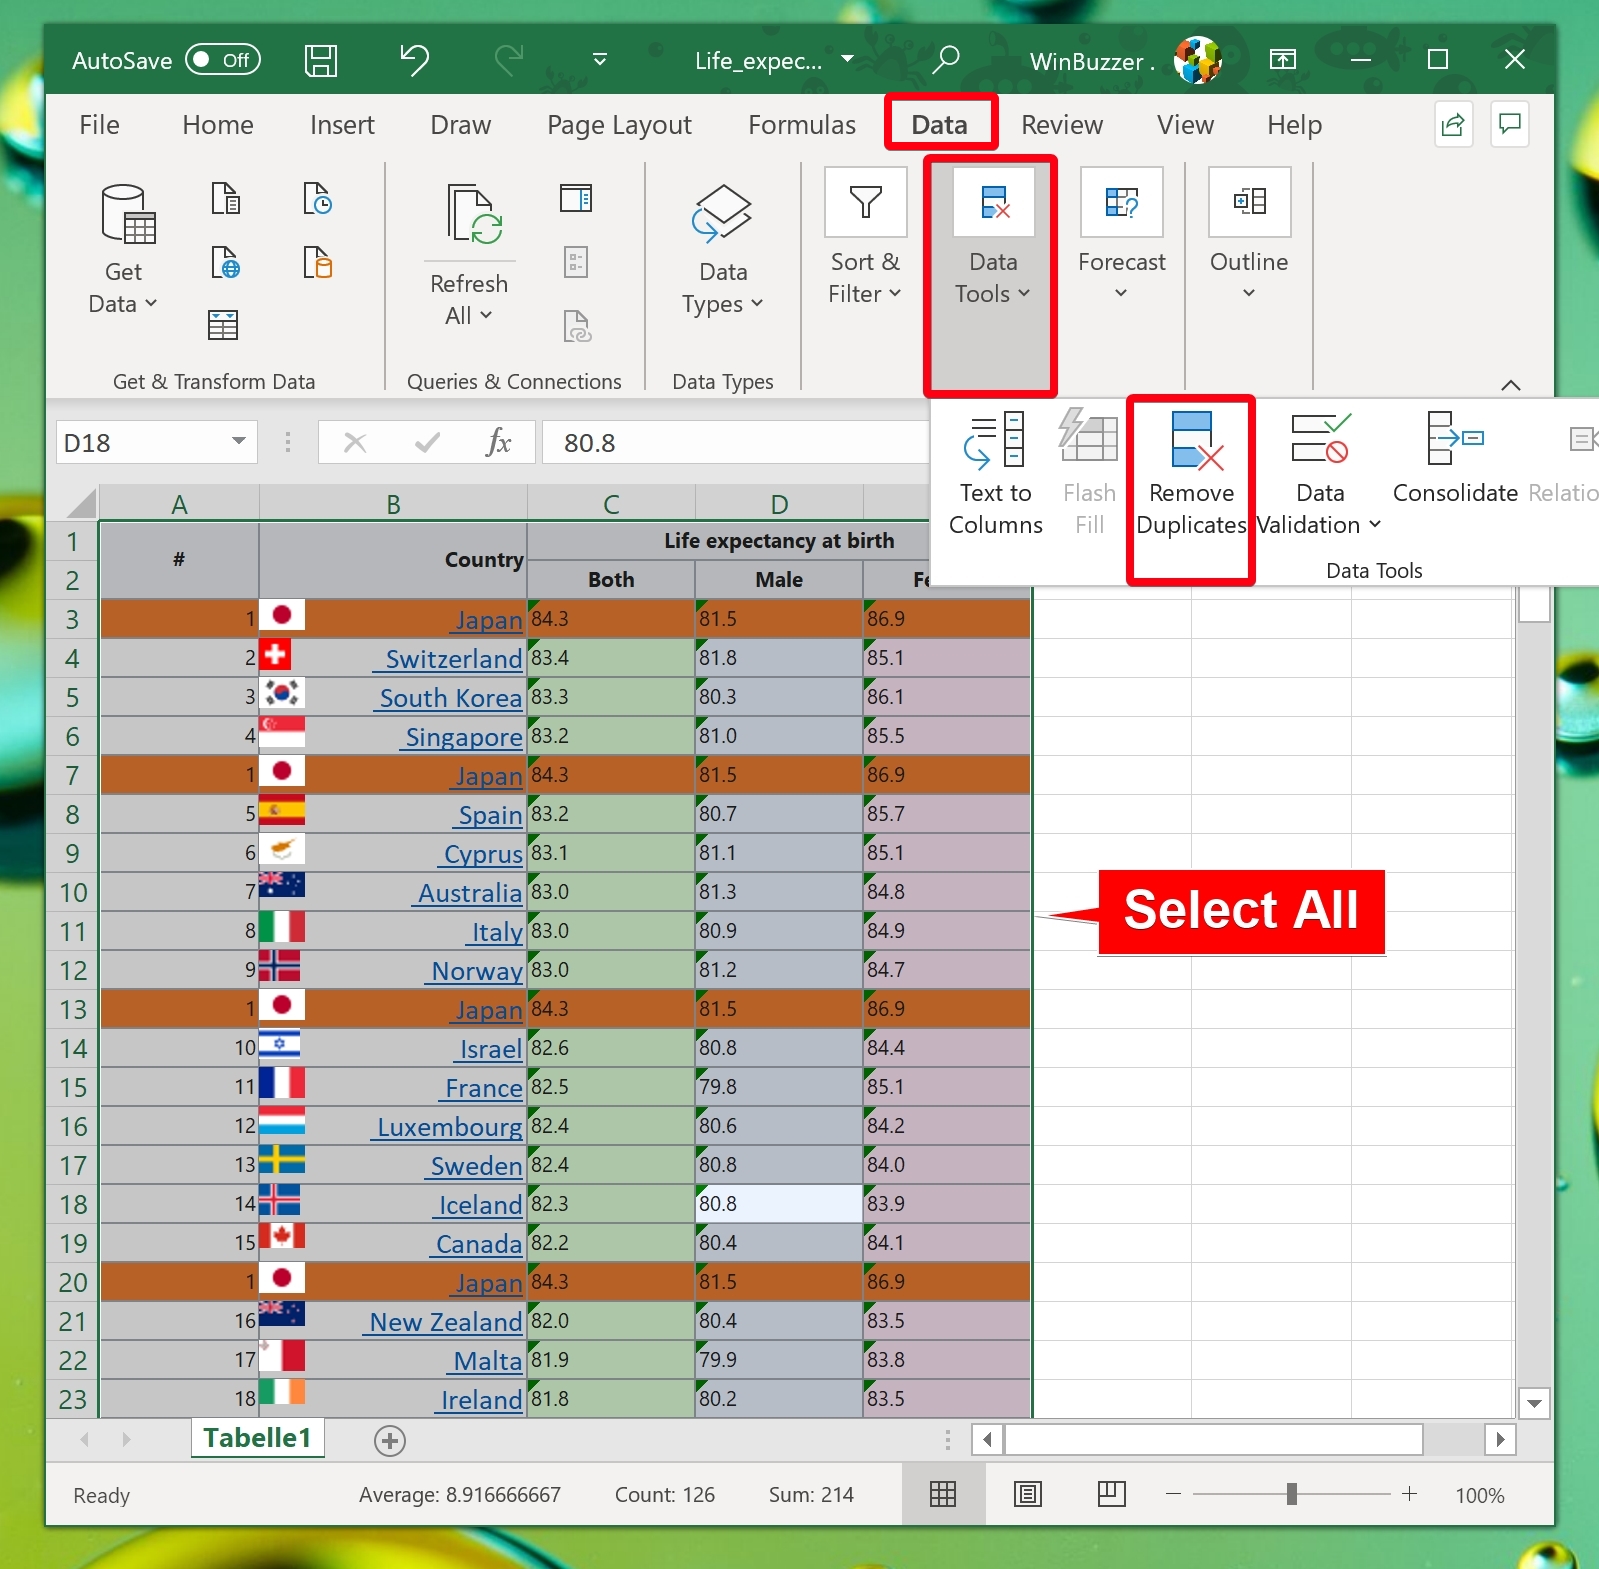
- Select your entire table
Select the area you would like to inspect, or the entire document with Ctrl + A, and switch to the “Data” tab in your ribbon. While there, click “Data Tools > Remove Duplicates”.
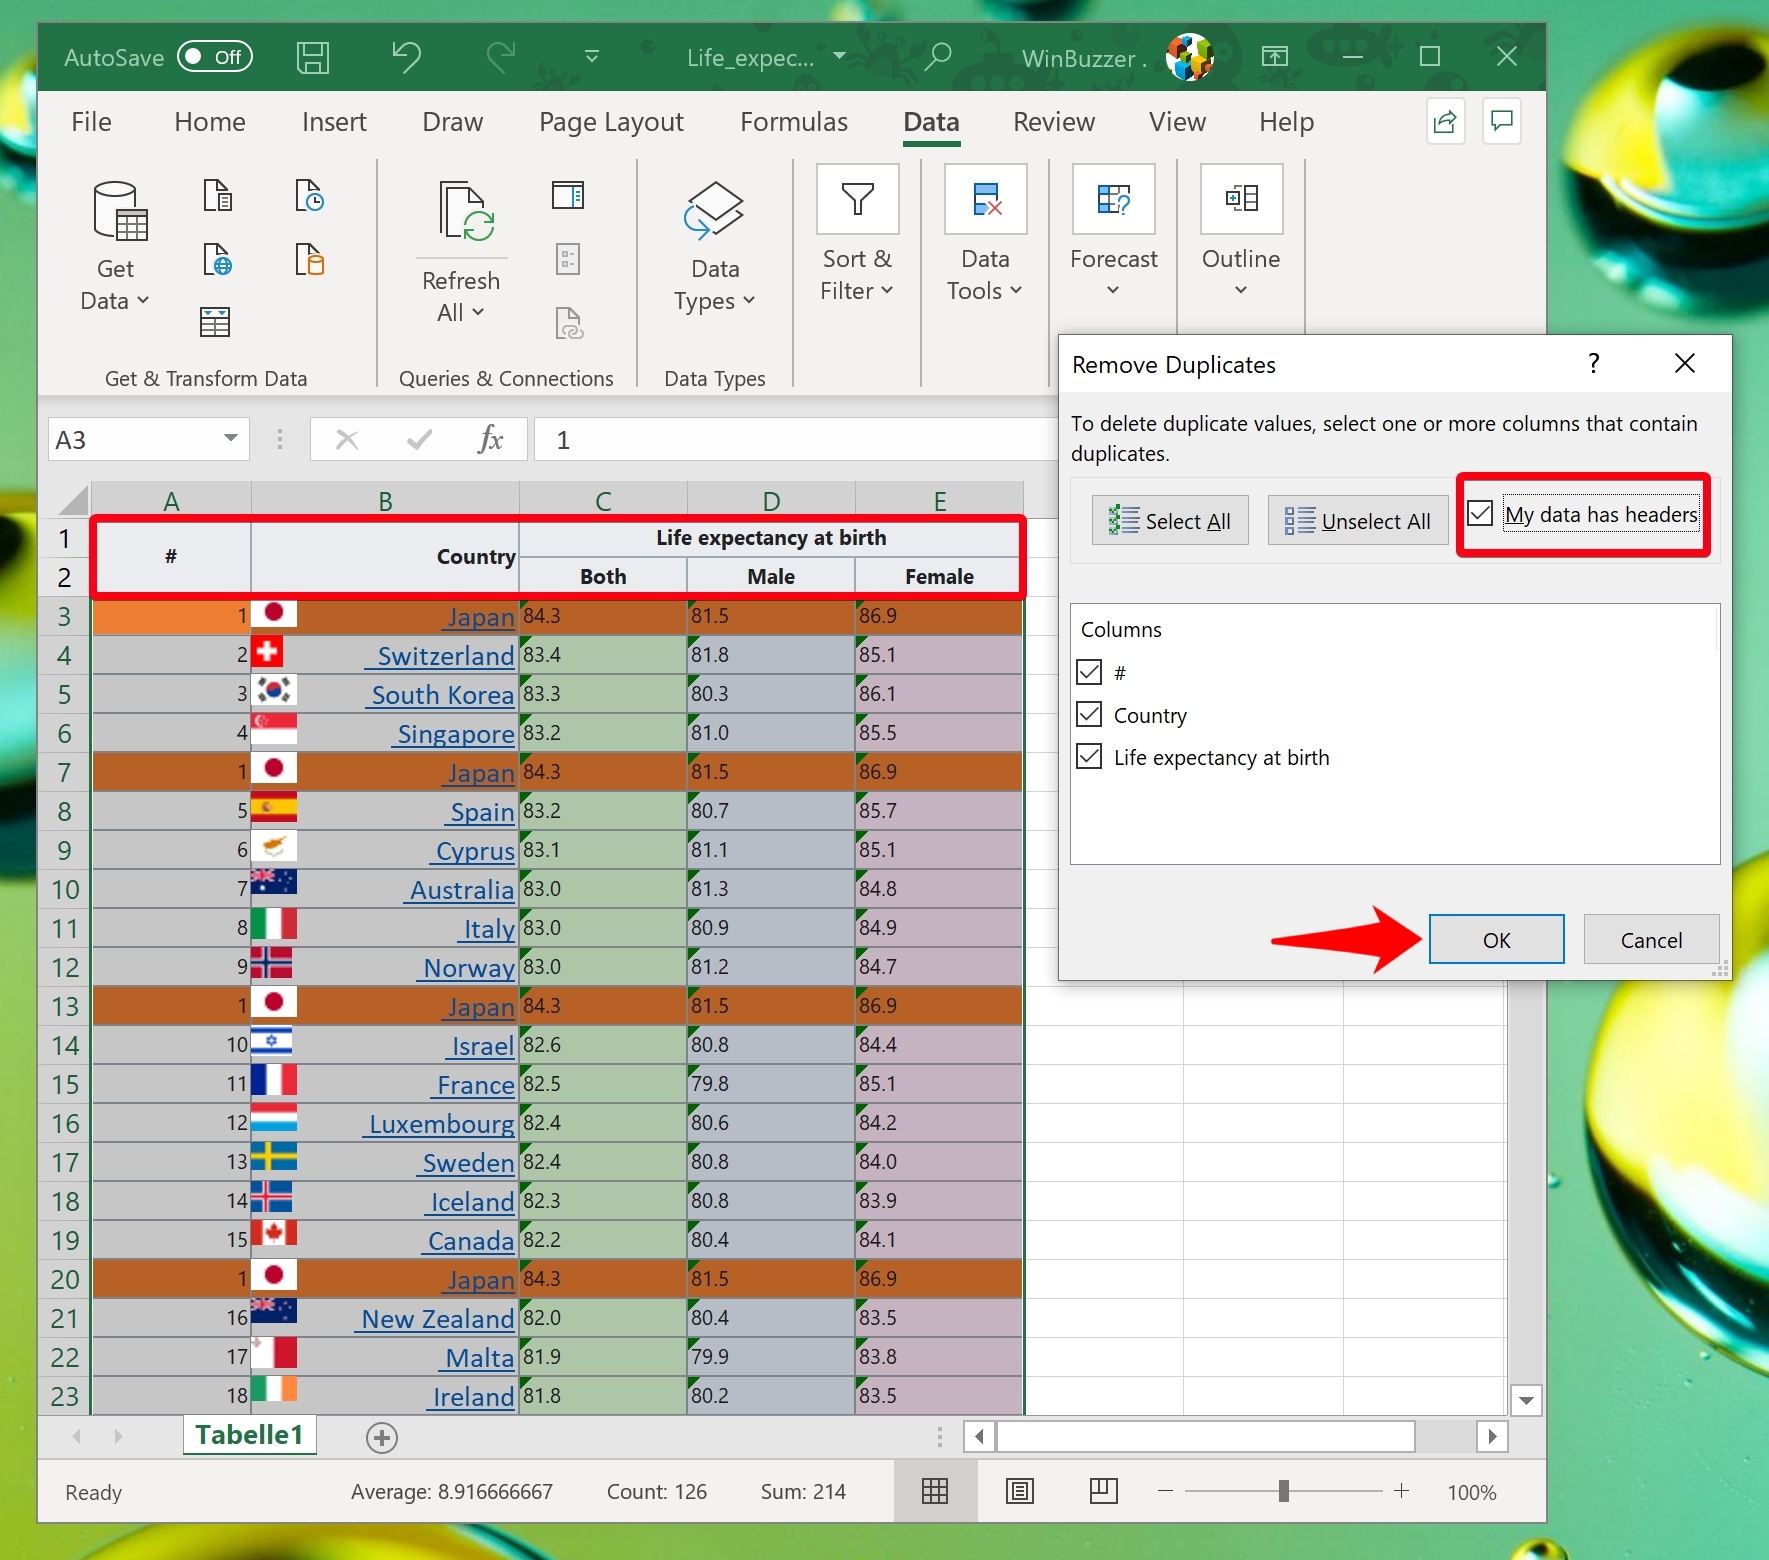
- Tick or untick “My data has headers”
If your table starts at row 1, you can untick “My data has headers” otherwise, leave it on and you'll see your columns ticked in the window below. Press “OK”.
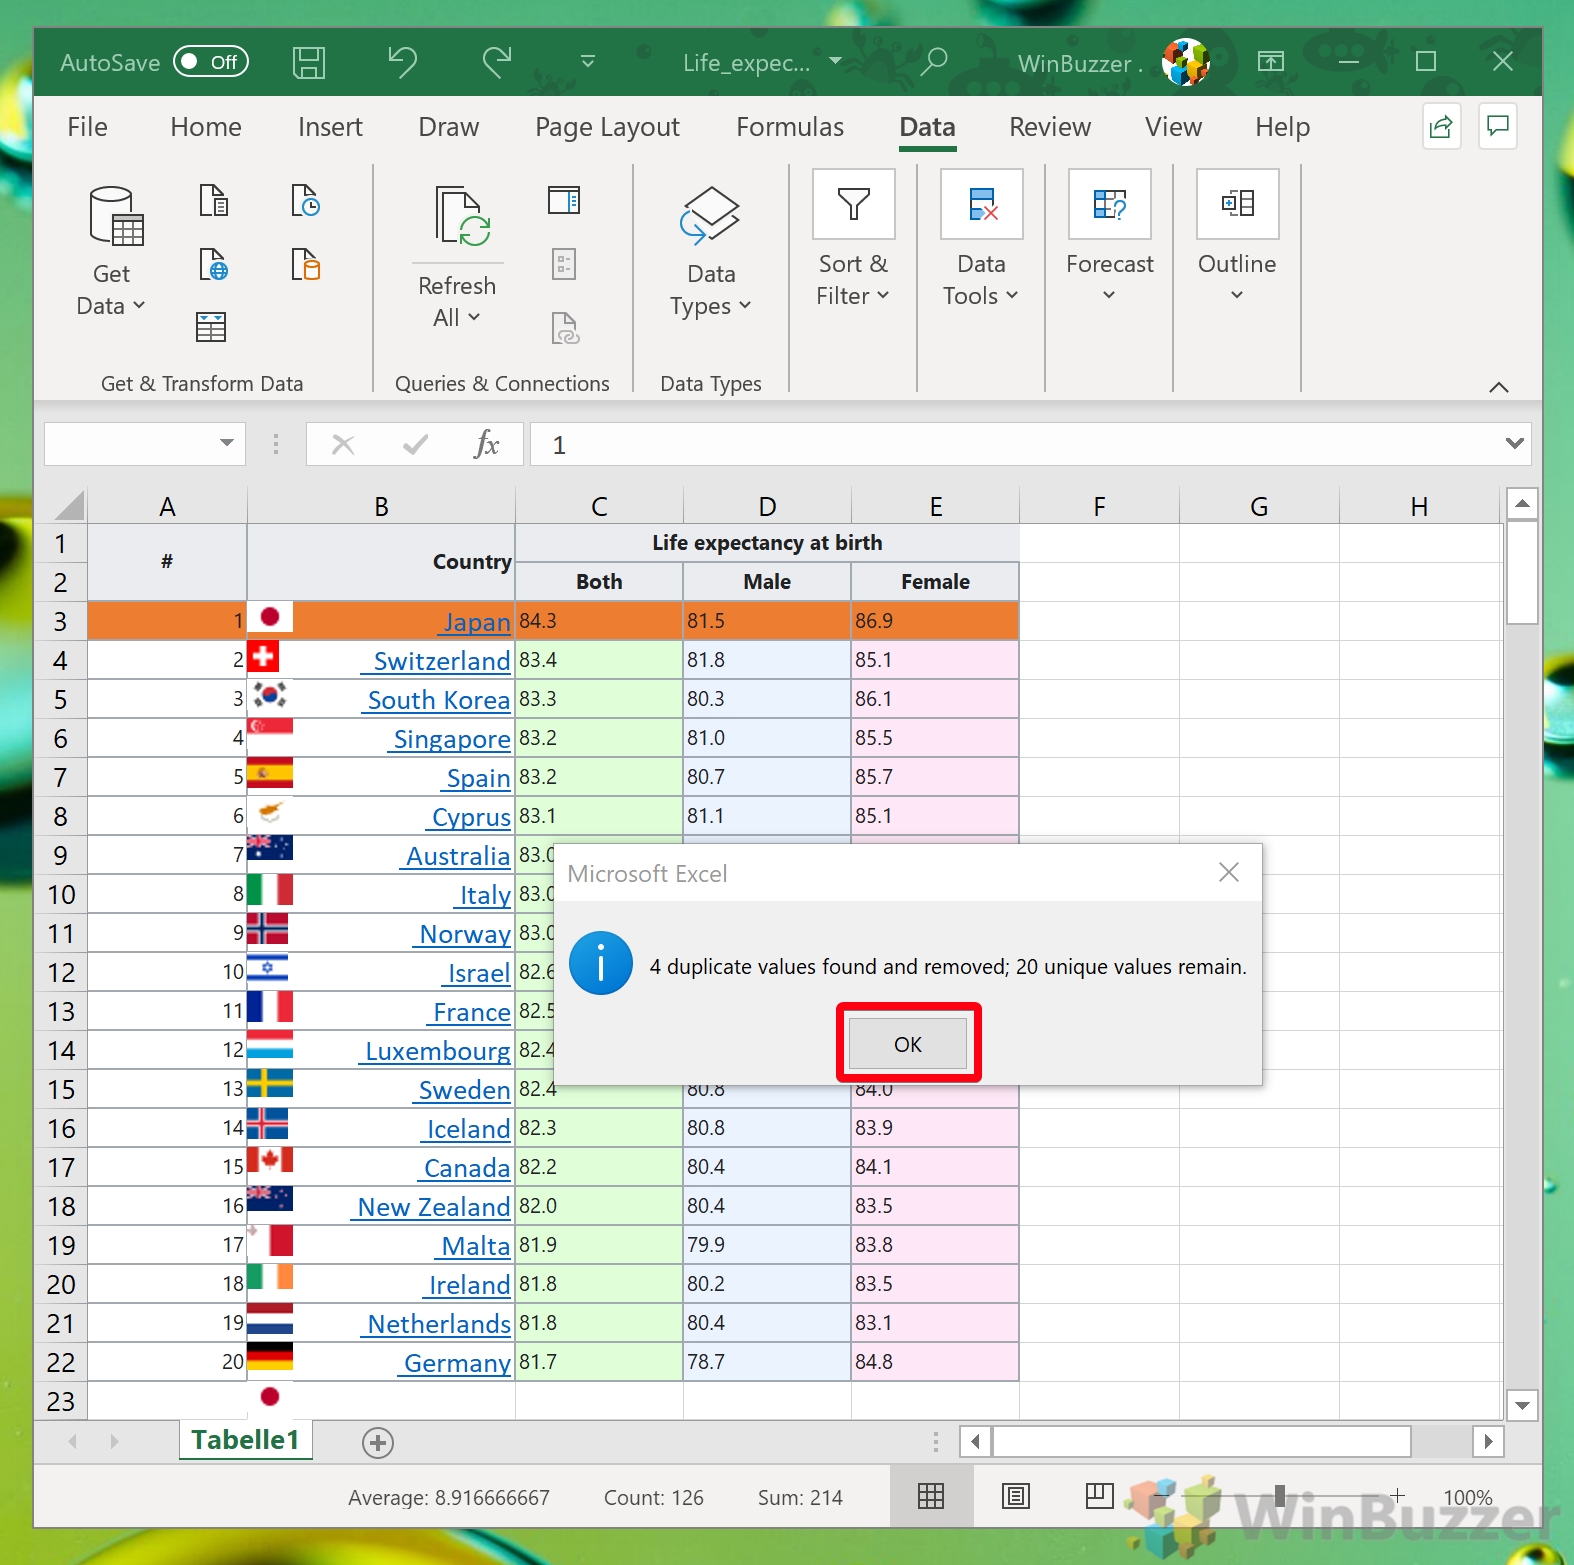
- Wait for Excel to delete duplicate rows
The in-built Excel duplicate formula will try to find genuine duplicates and automatically remove them. Once it's done, you can press “OK”. You can see that we have used to delete duplicate rows of the “Japan” entry.
How to Find Duplicates in Excel with Advanced Filtering
If you don't trust Excel's duplicate remover to do its job properly, you can use Advanced Filtering instead. This tool will help you to perform a quick duplicate check but will hide duplicate rows rather than removing them.
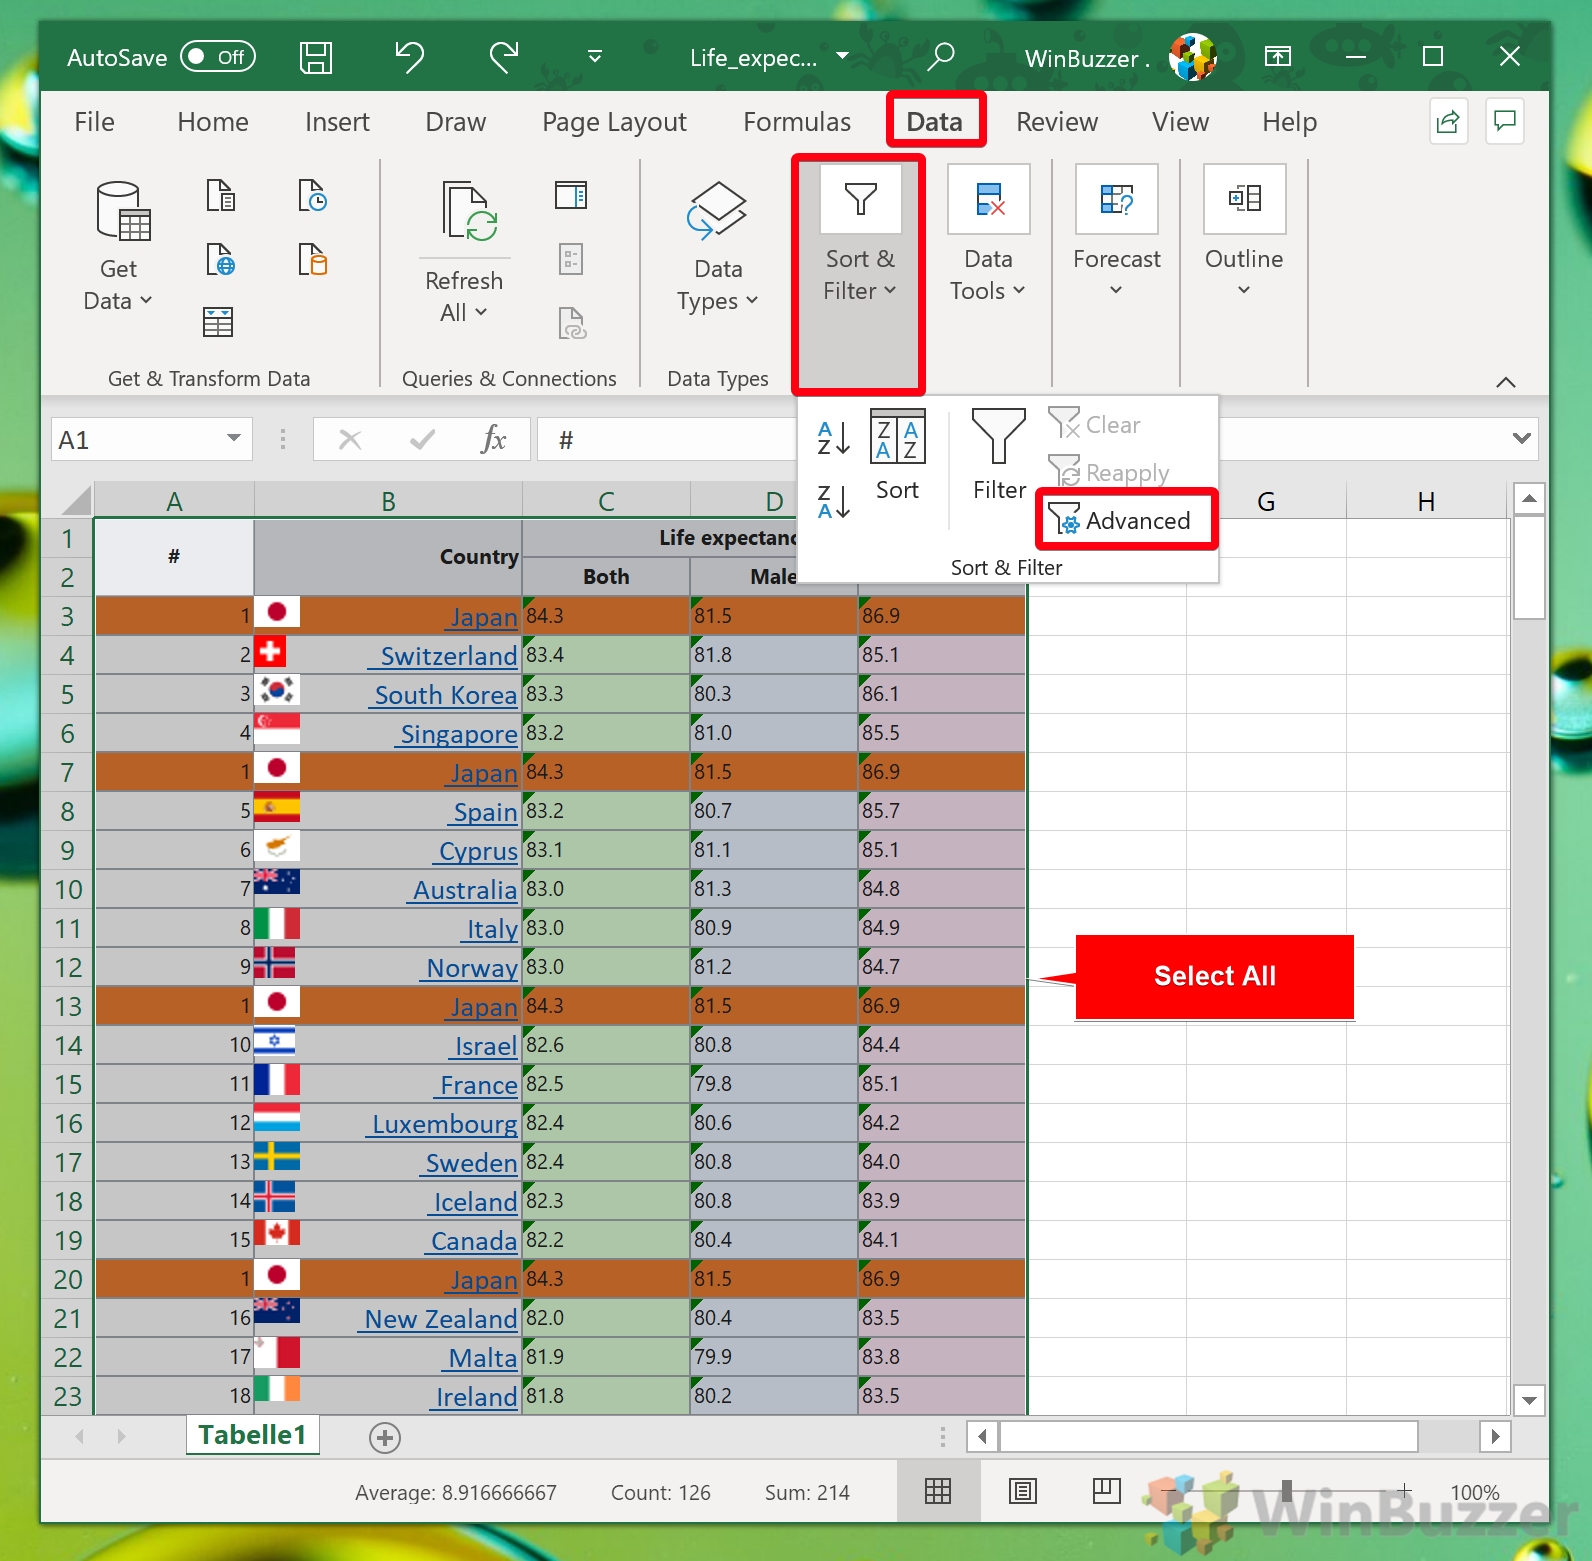
- Run the Advanced Filtering tool
Select the data you want check. Then, in your Excel ribbon, switch to the “Data” tab, and click “Sort & Filter > Advanced”.
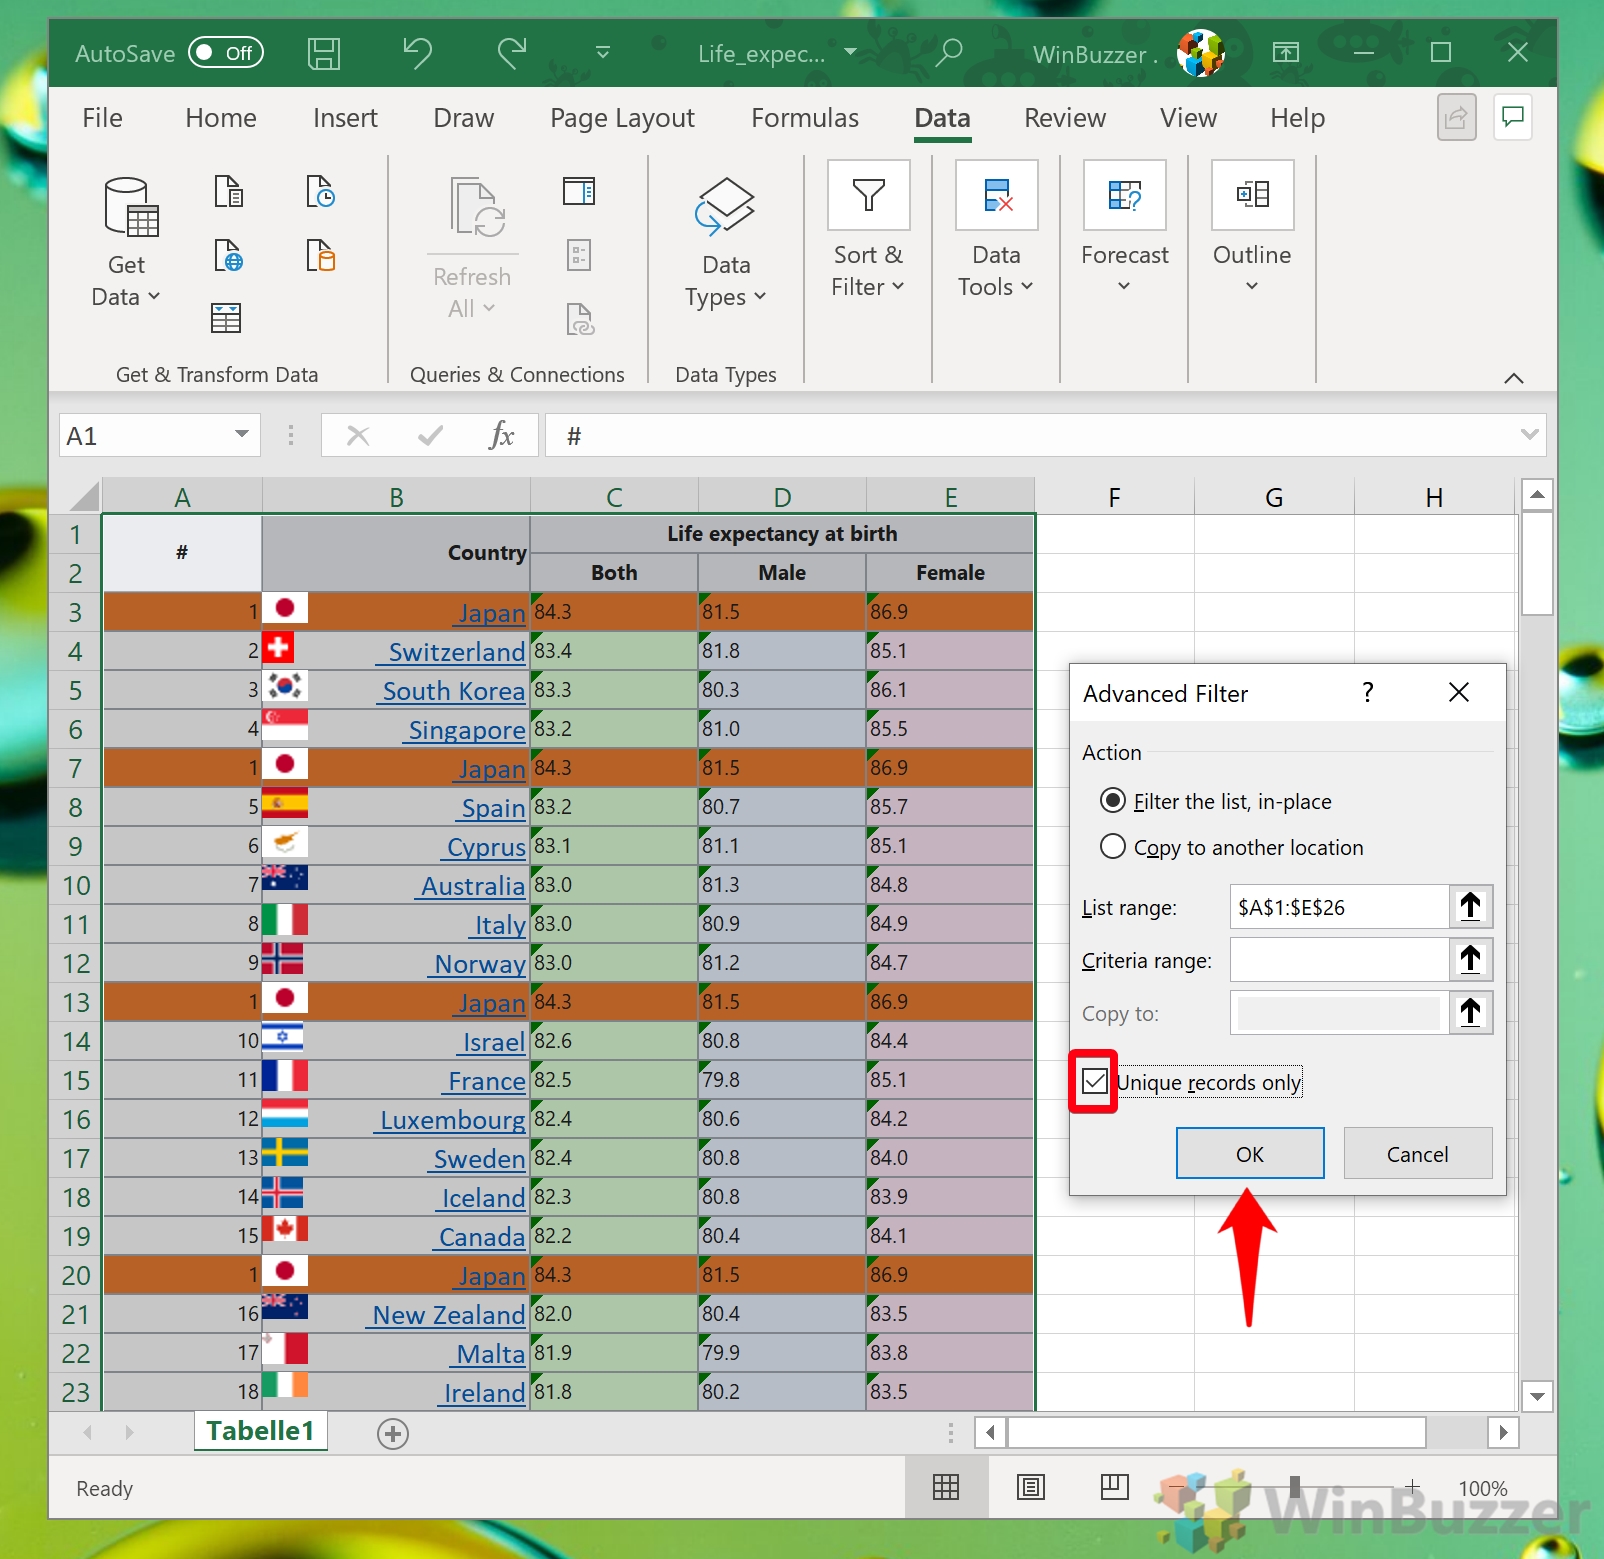
- Tick “Unique records only” and press “OK”
The unique records box will ensure only rows that are different to each other will be displayed in your documents.
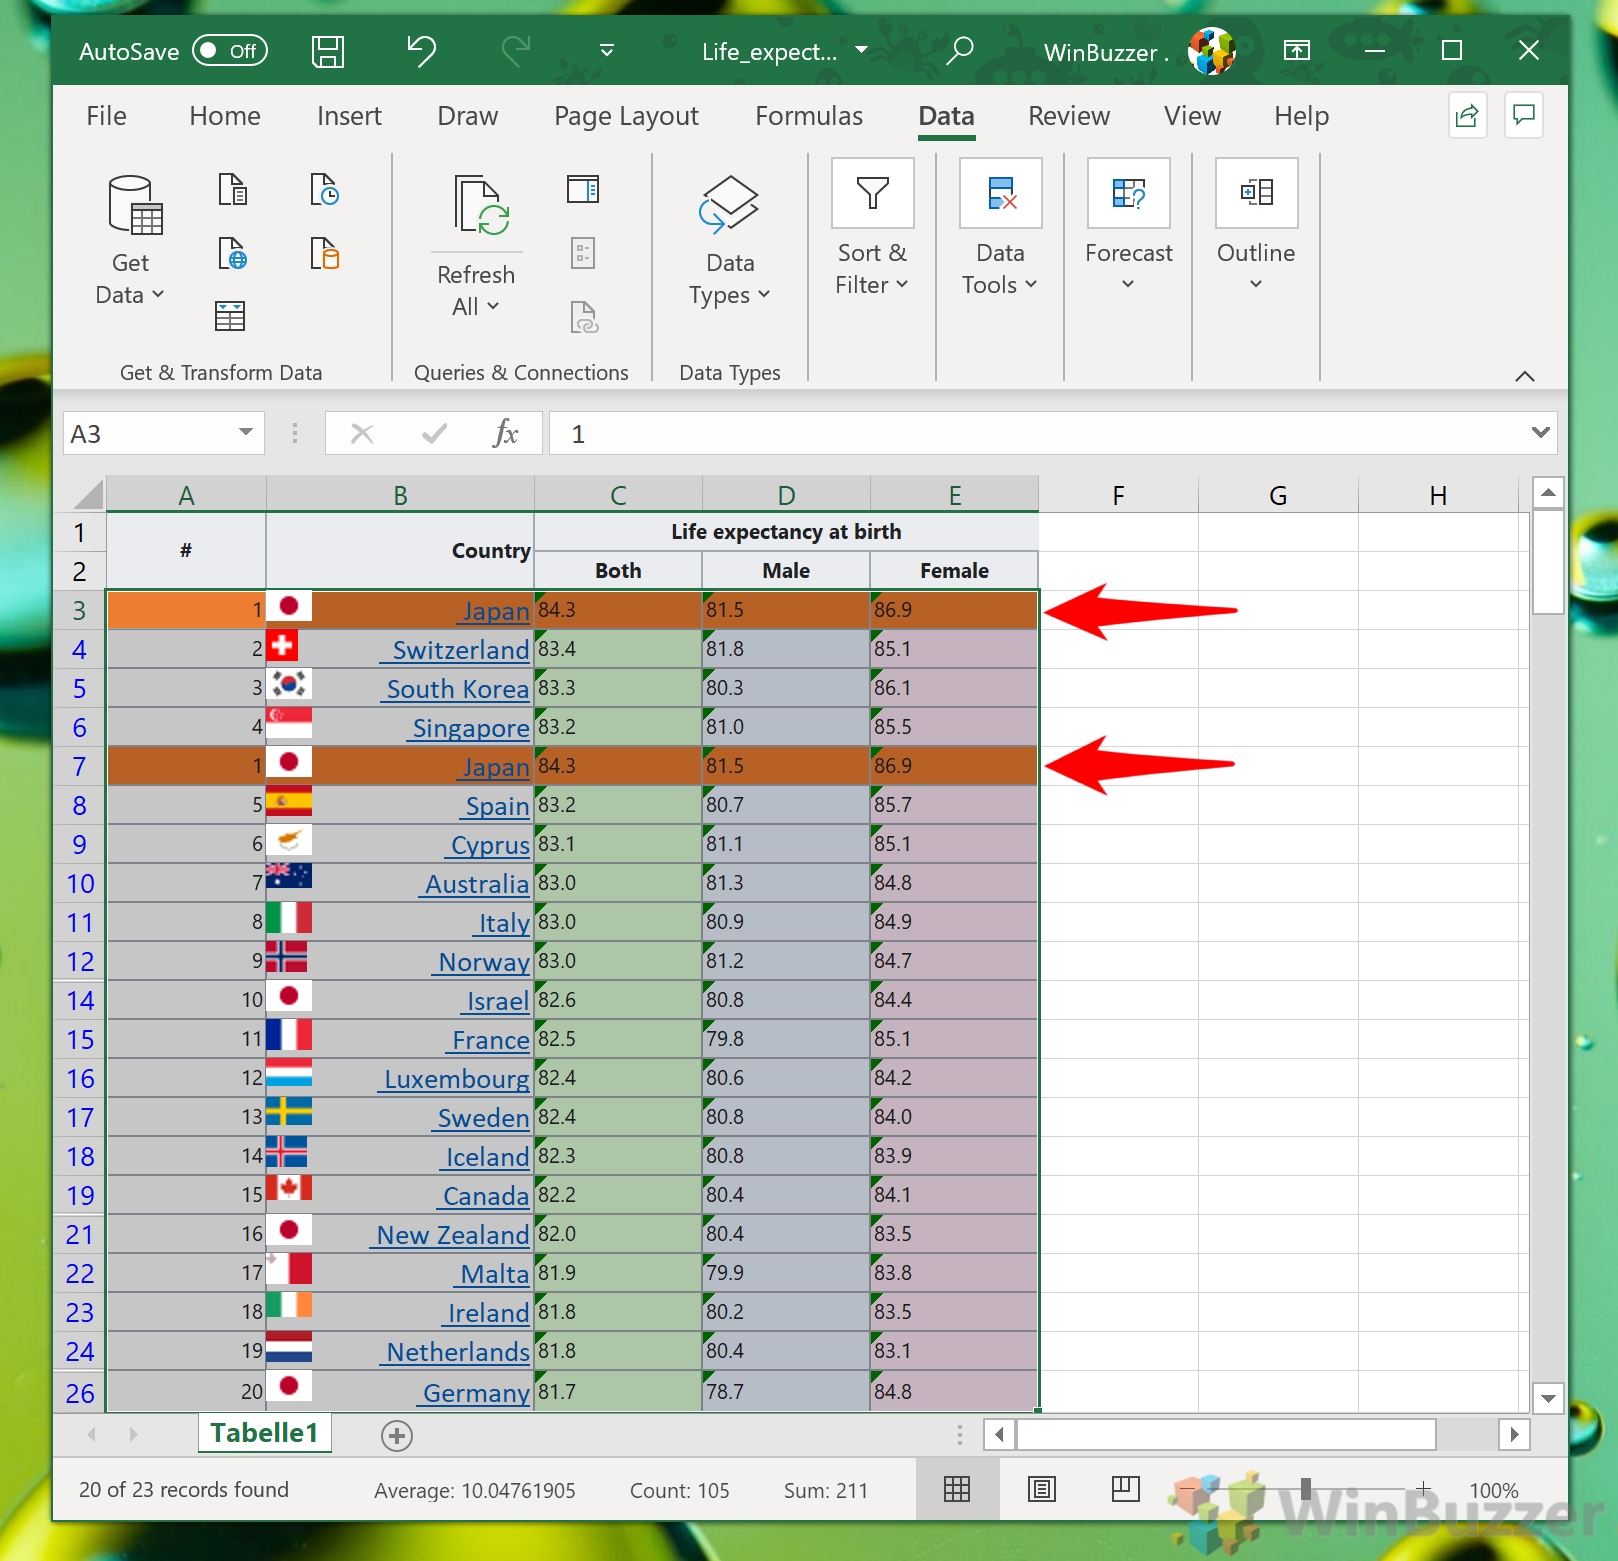
- Delete or hide any remaining duplicates
By default, Excel's Advanced Filtering will assume that there are headers in your table. This means that whatever is in the top row you selected will stay there. Because of this, you may find you still have a single duplicate row in your Excel document. Delete or hide it manually if required.
How to Find Duplicates in Excel and Replace Them
So, you know how to delete duplicate rows in Excel, but what if you want to replace them with entirely different text. The best method for this, unsurprisingly, is the Find & Replace tool. Here's how you can use it for this function:
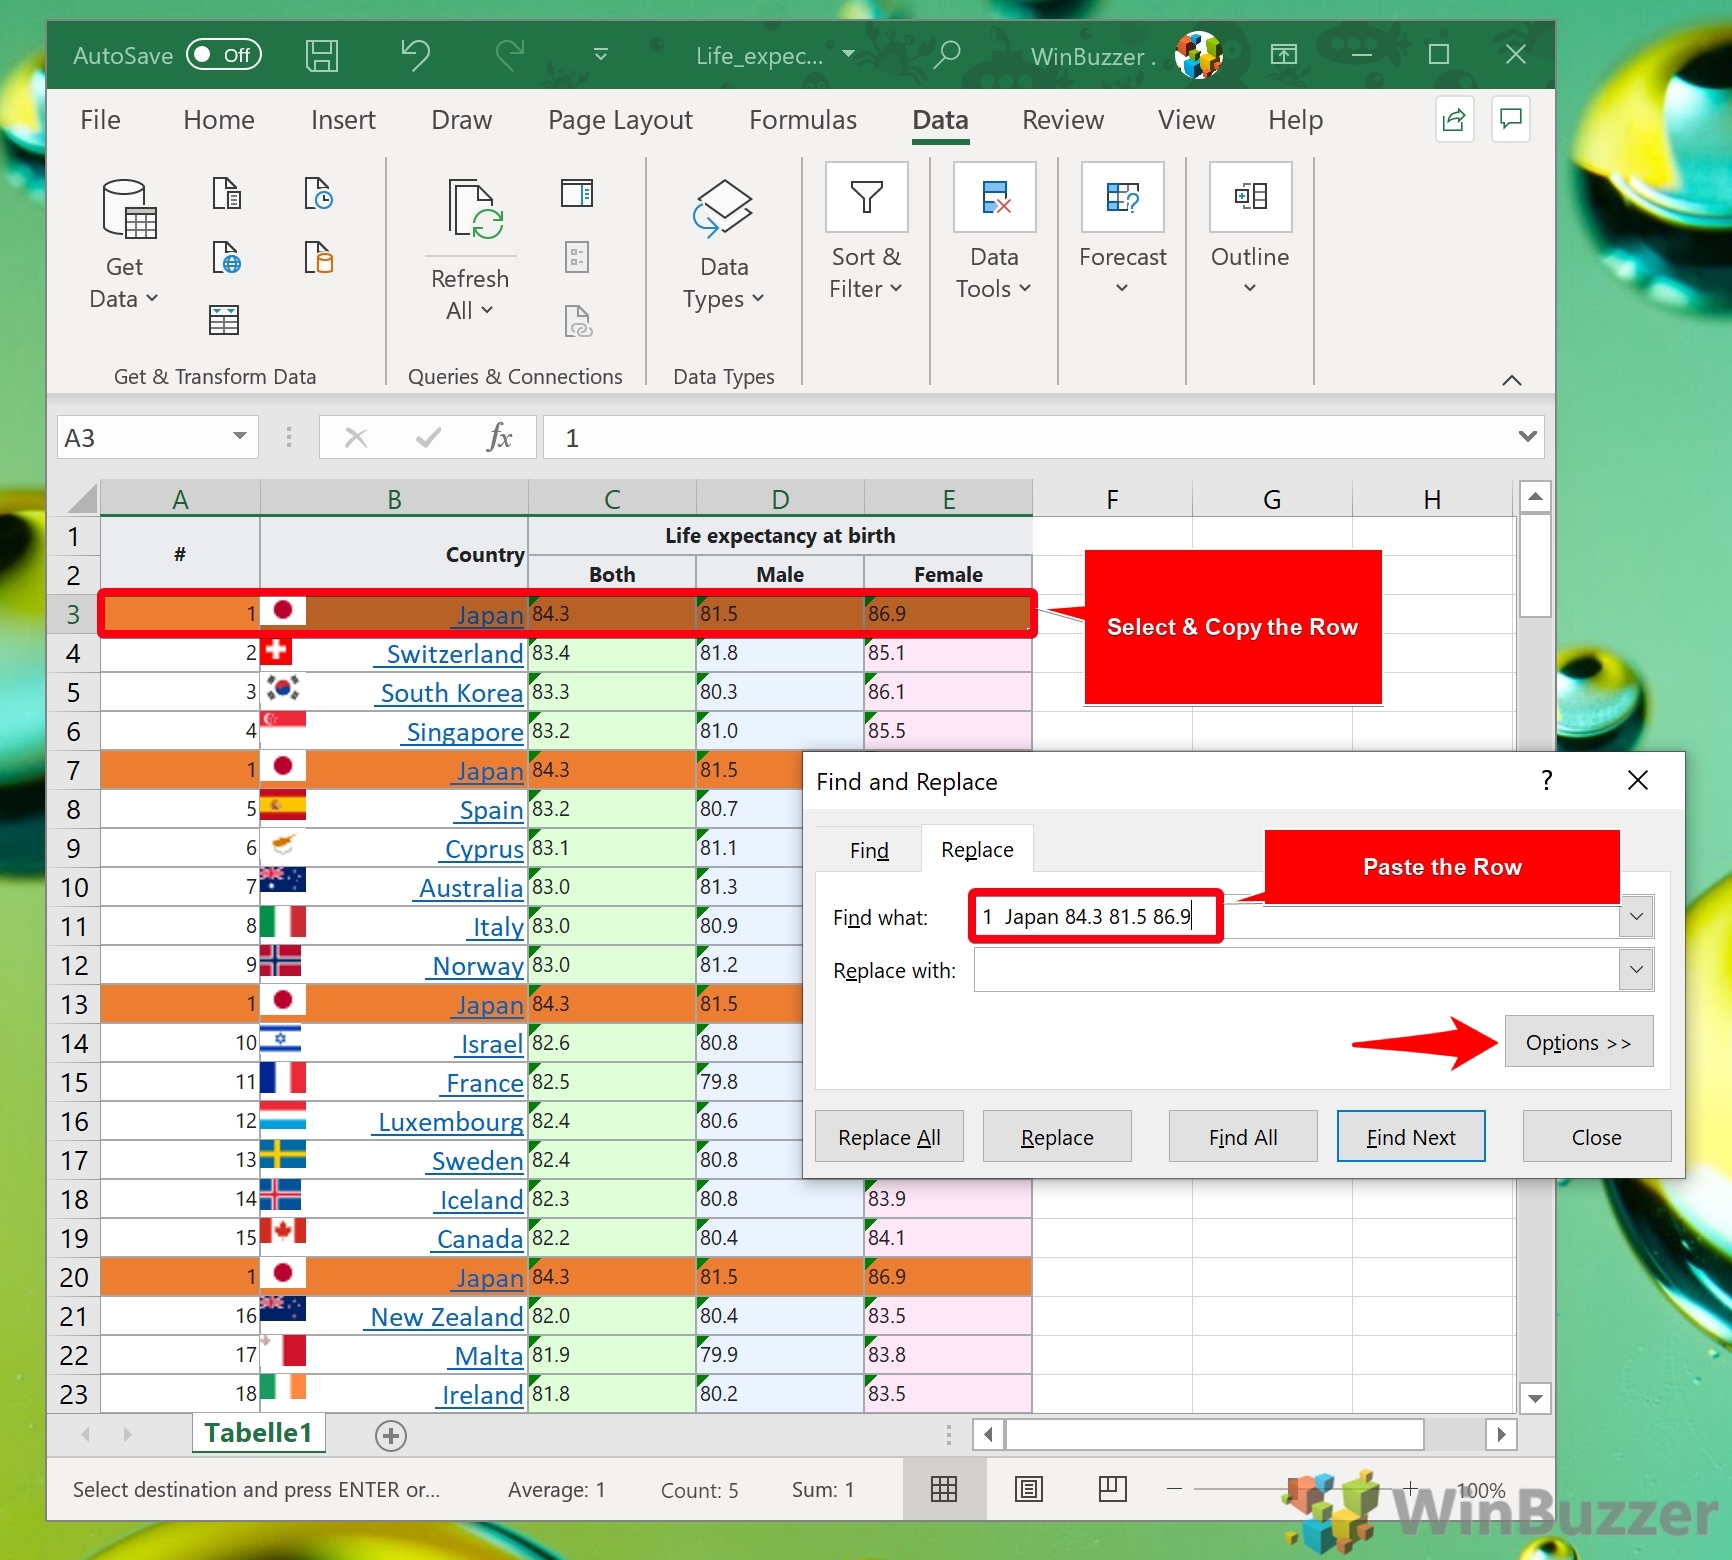
- Copy the row that's been duplicated
Select the row that you suspect has been duplicated and press Ctrl + C to copy its contents. Then press Ctrl + F and switch to the Replace tab. Paste your row into the “Find what” field with Ctrl + V and click the “Options >>” button.
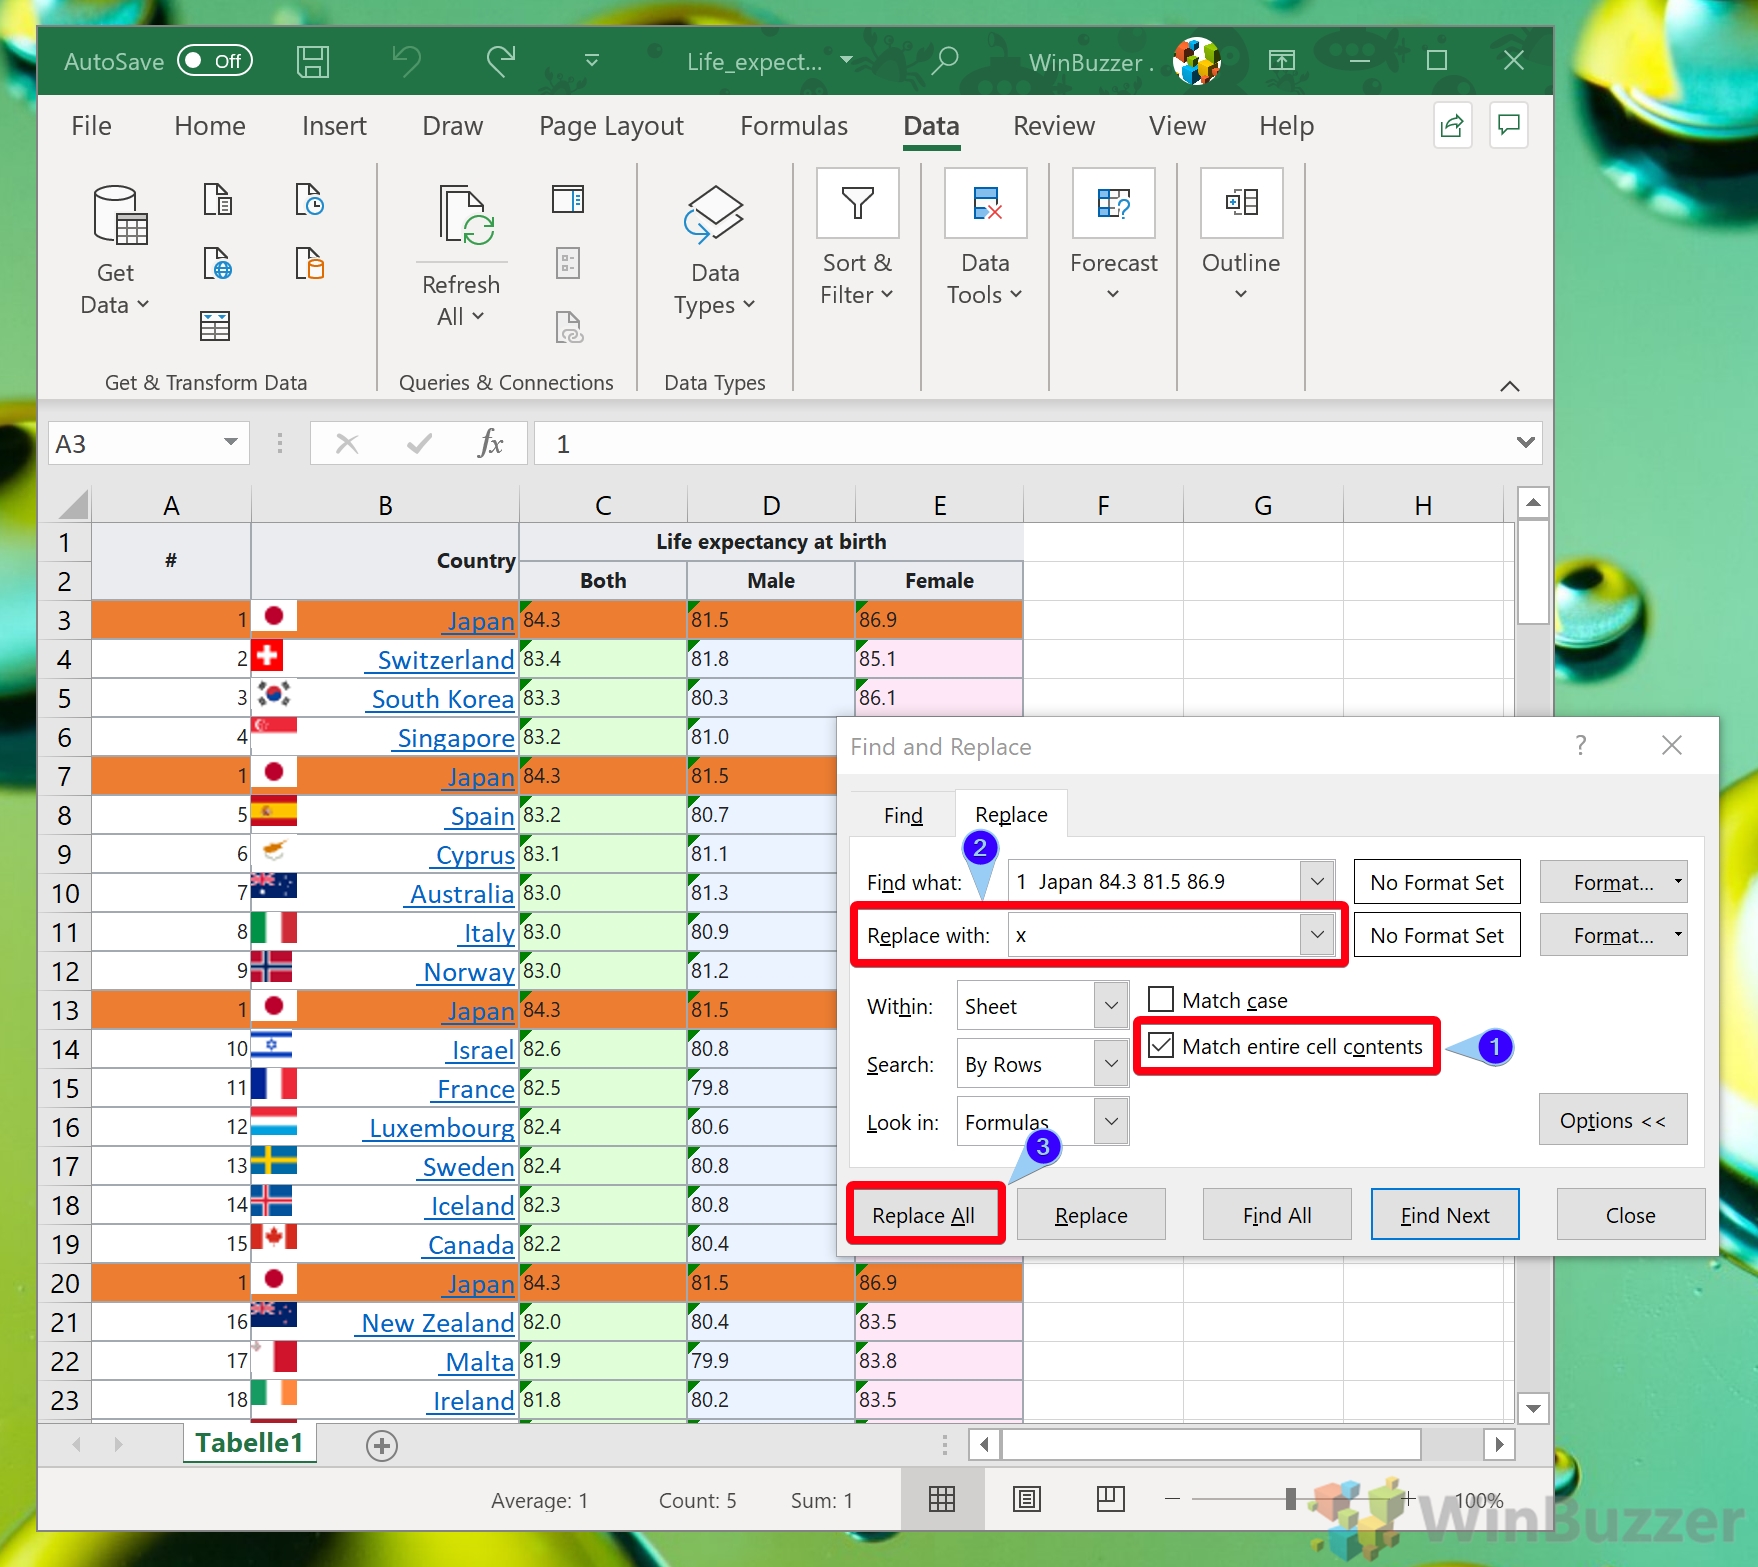
- Match the cell contents and find and replace the row
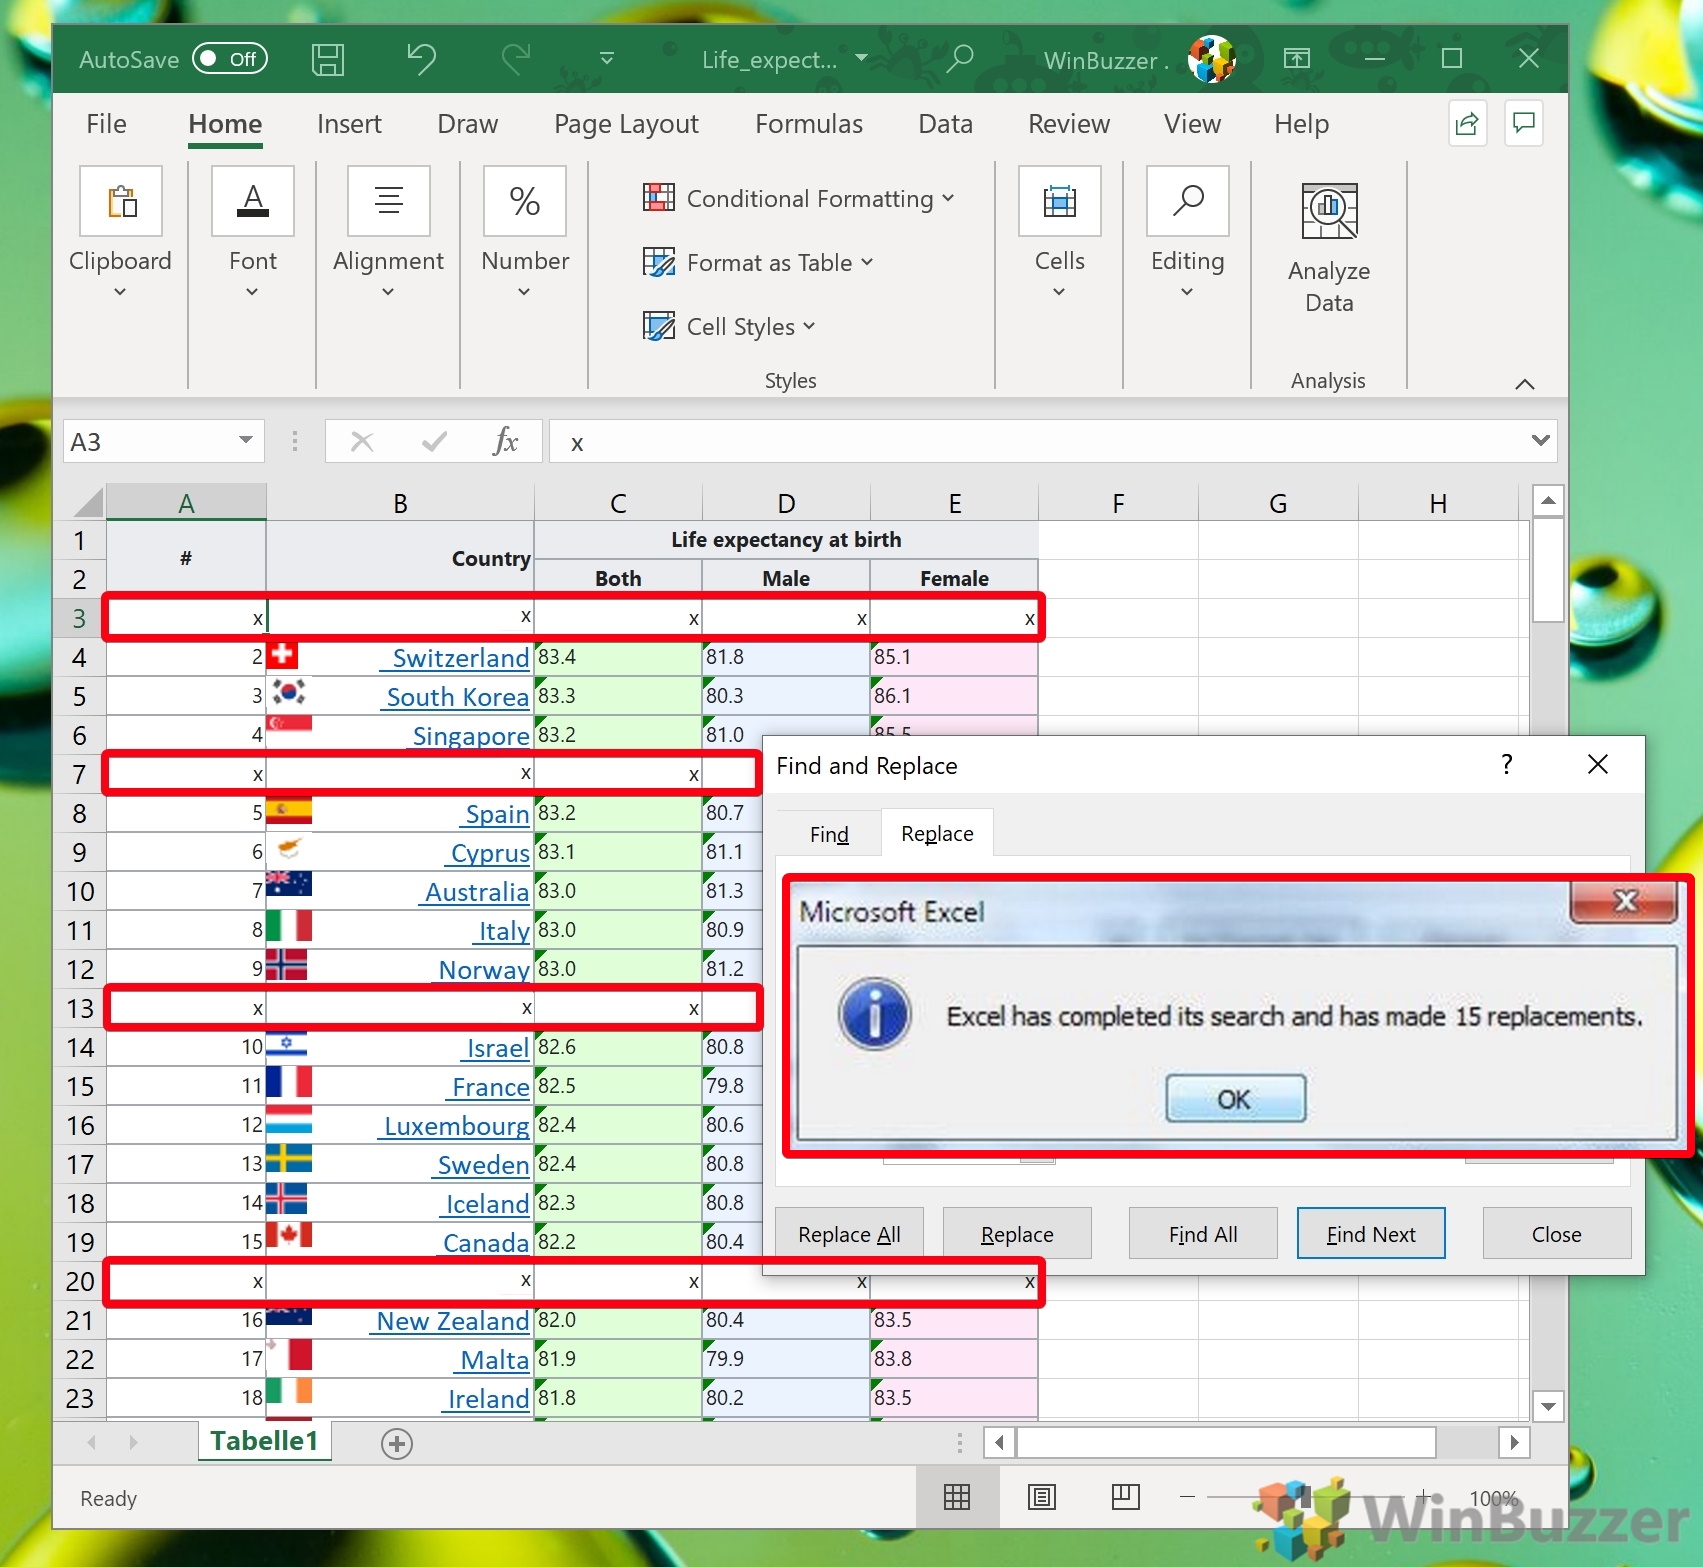
It's important that you then tick “Match entire cell contents” to ensure only exact duplicates are removed. You can then enter the text you want to replace the duplicates with and click “Replace All”.
- Wait for Excel to delete duplicate rows
Once the process is complete, you'll get the message “Excel has completed its search and has made x replacements”. You'll notice that each cell of the row you deleted has been replaced by the text specified. Press “OK” and close the find and replace window.
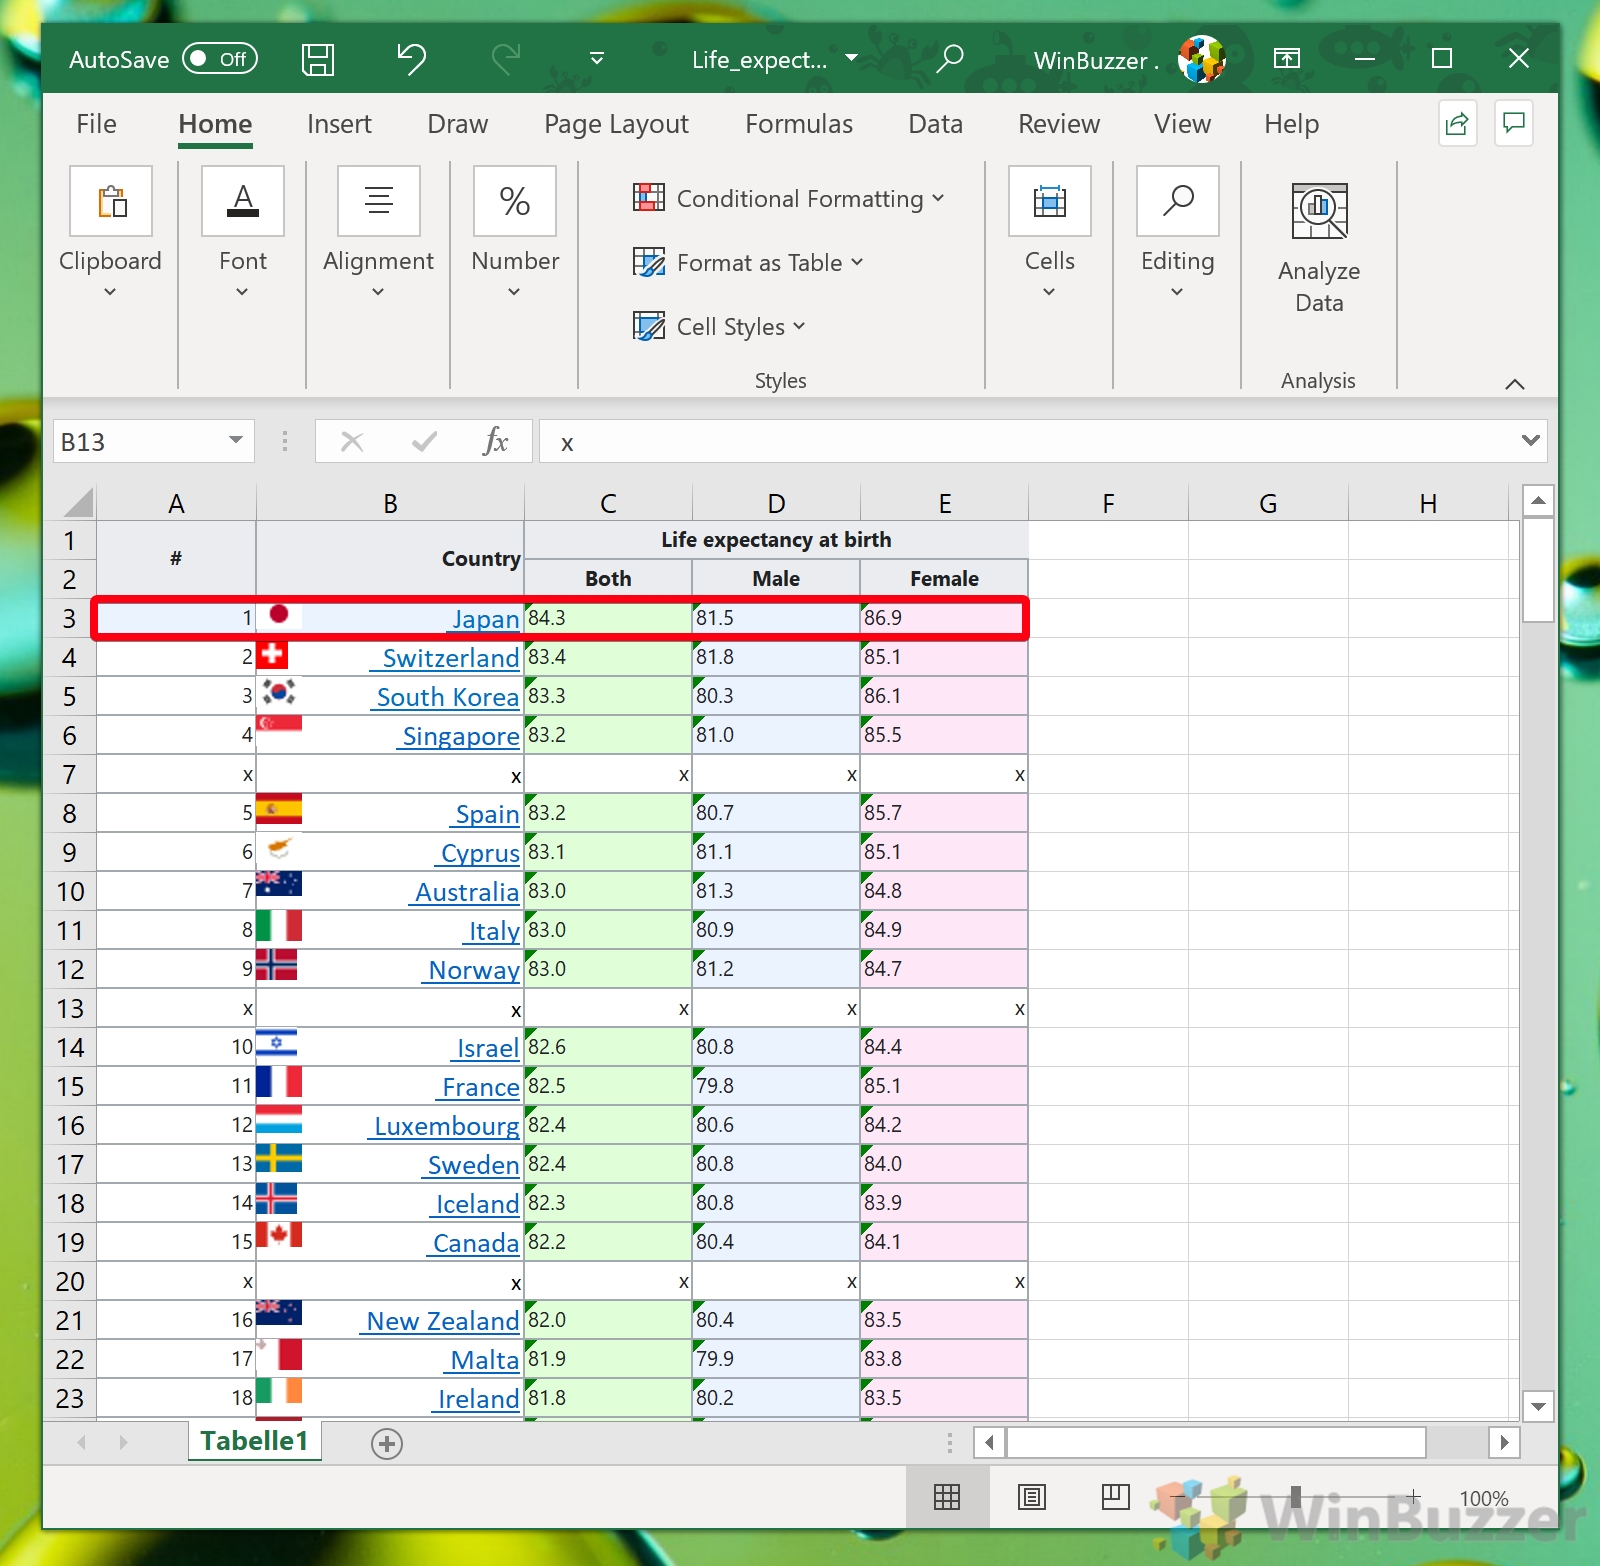
- Paste your original row back in
Excel's find and replace removes all content that matches its query, including your original row. You can use the data you already have in your clipboard to paste it back in its original position.
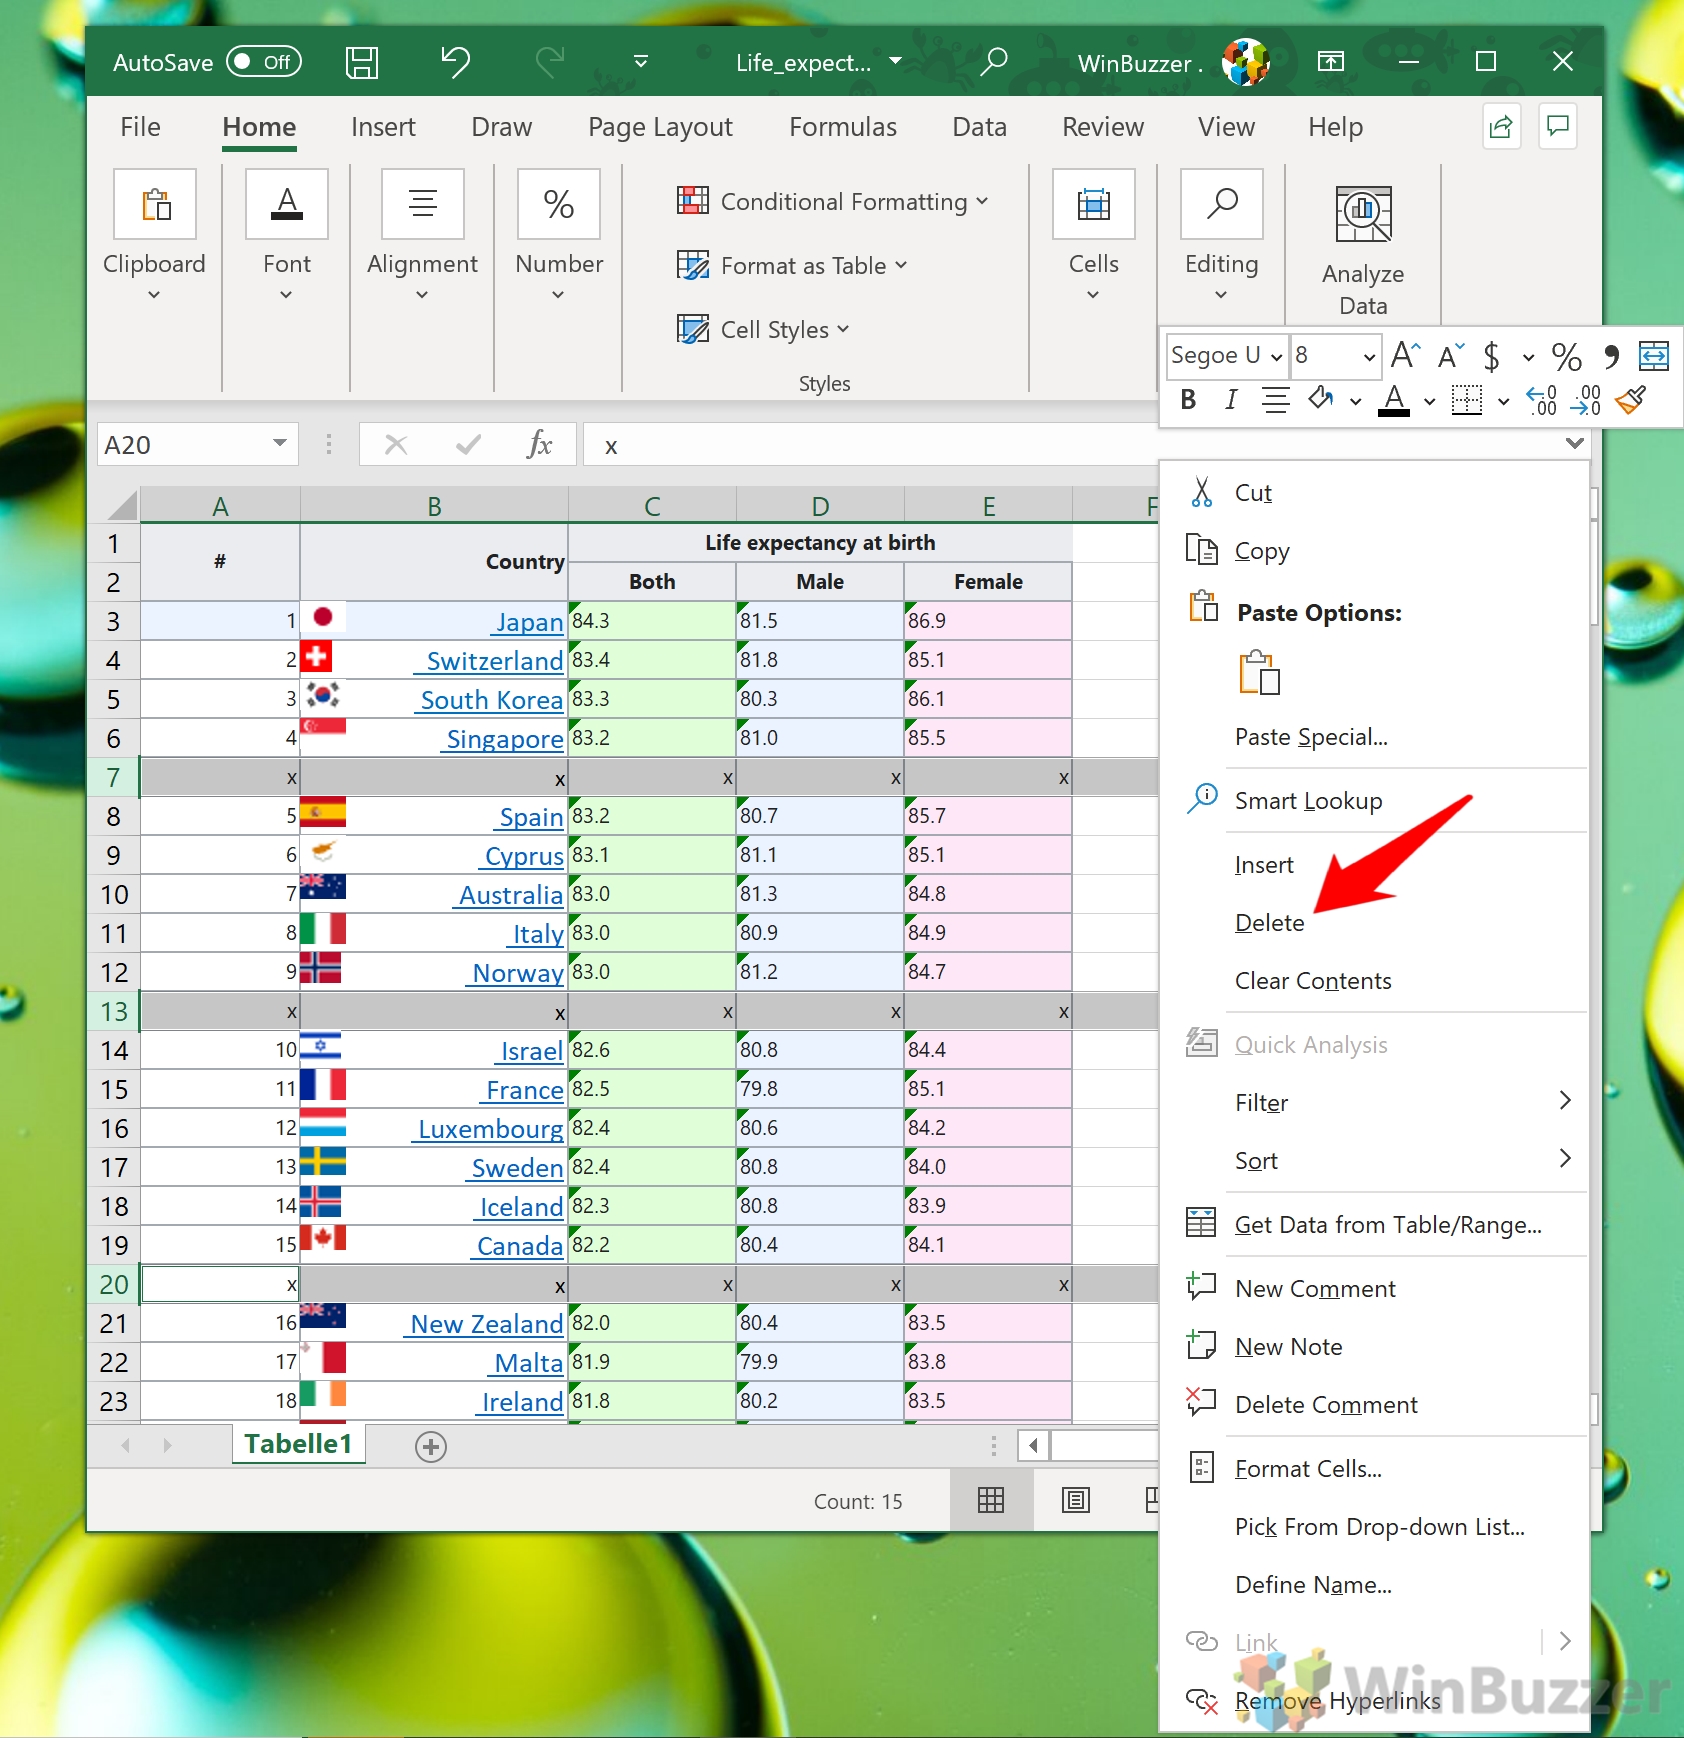
- Delete the replaced rows if necessary
To do so quickly, Ctrl + click the cell number to the right of each row, then right-click one and select “Delete”. This will delete them all in one go.
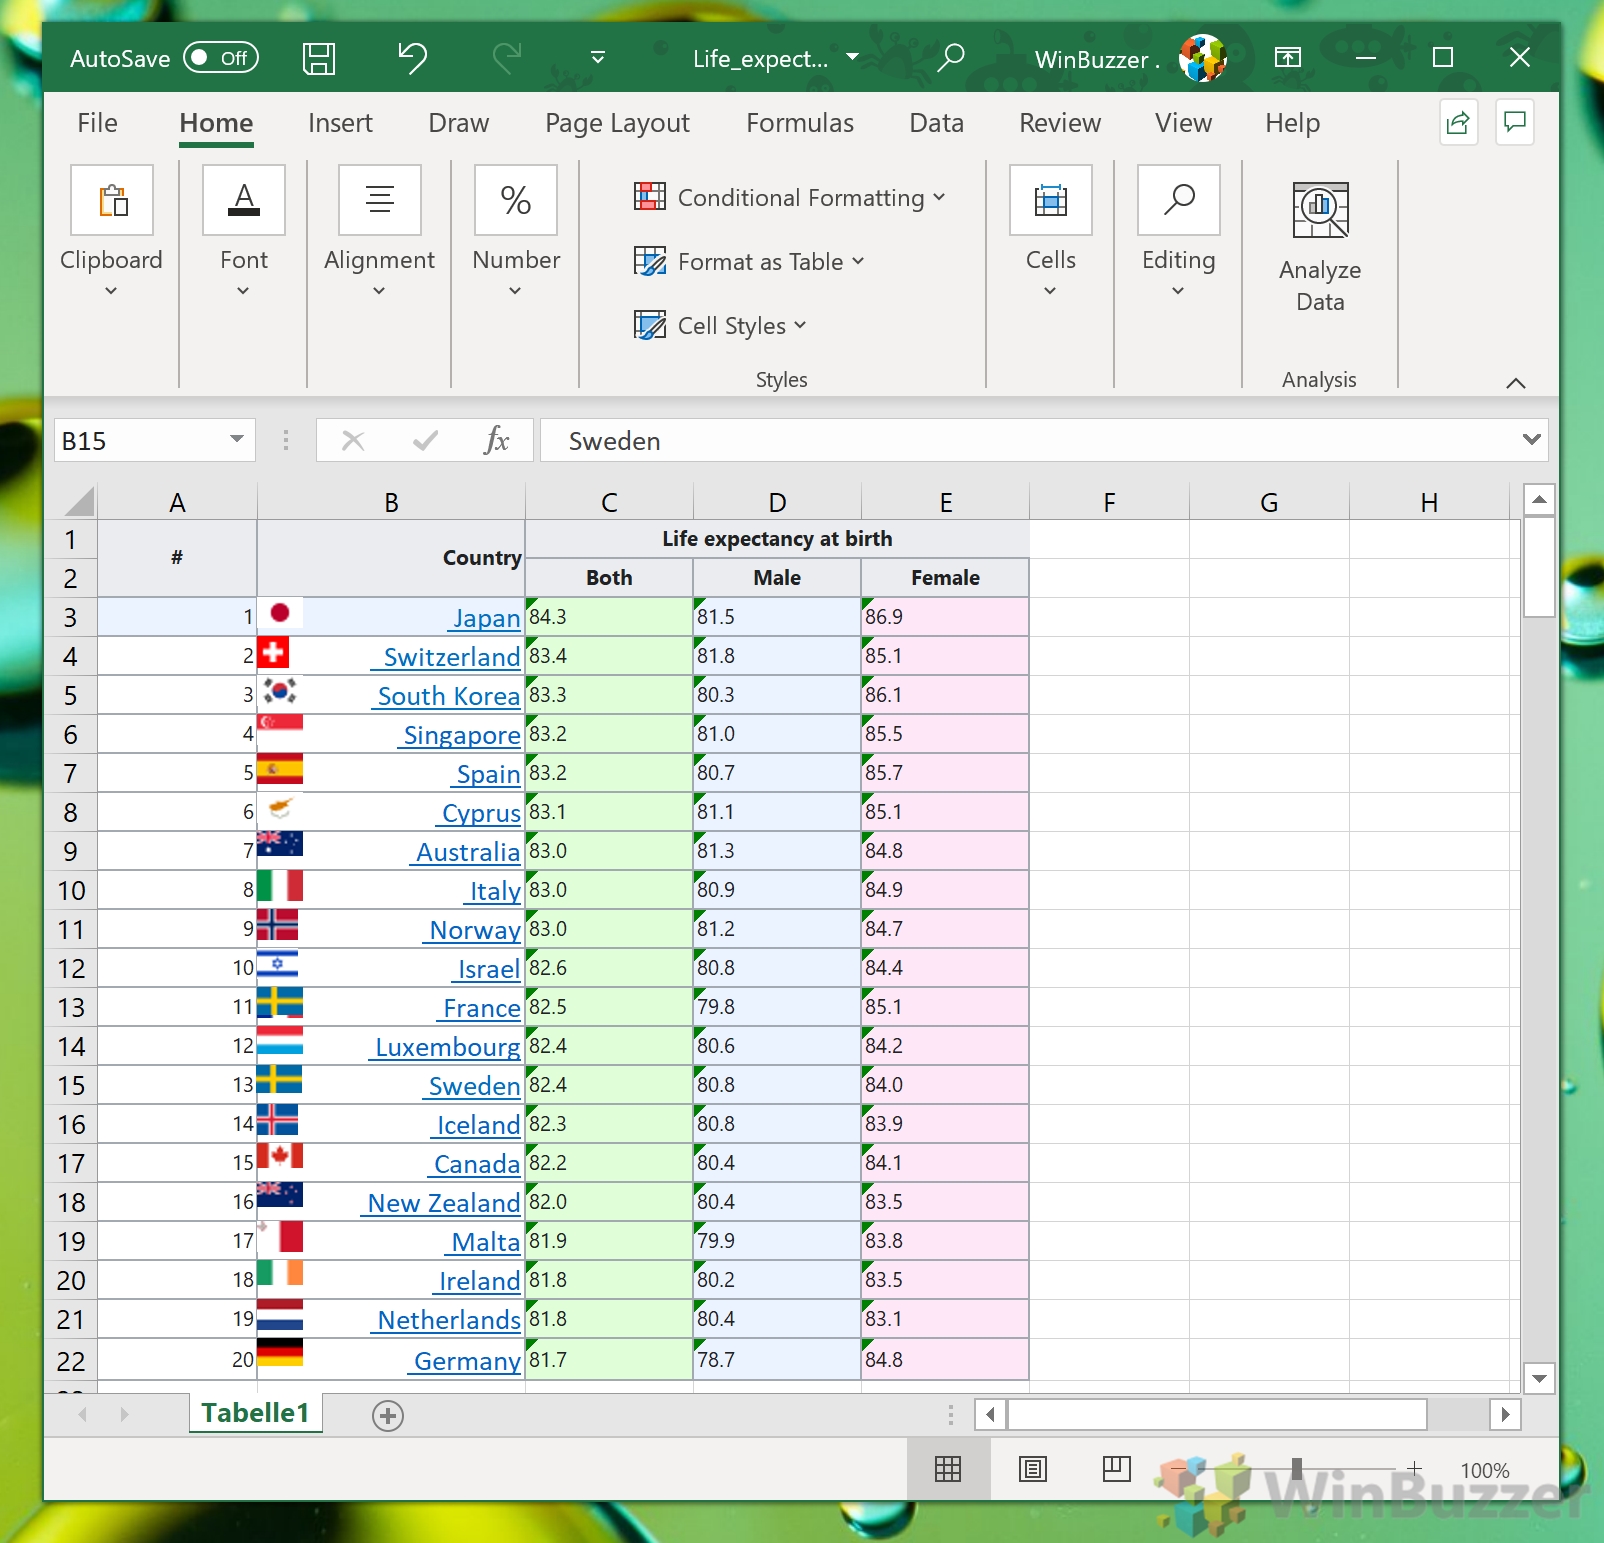
- Check for any remaining duplicates
The find and replace in Excel should delete all duplicate rows but check again just to be sure. If you accidentally added an additional letter to one, it wouldn't match exactly and therefore would not be removed. Save your document when you're done.
So, now you know how to use Excel to find duplicates and delete duplicate rows. However, there are many more Excel tricks that can speed up your workflow. Why not try our recent tutorial on the Concatenate formula or customize your Excel ribbon to increase productivity?


