

Contents
- 1 How to Disable Automatic Updates Using Windows Settings
- 2 How to Disable Automatic Updates in Windows 11 / Windows 10 Permanently Using Group Policy
- 3 How to Disable Automatic Updates Using Windows Registry
- 4 How to Turn Off Automatic Updates in Windows 11 / Windows 10 Using a Metered Connection
- 5 Extra: How to Turn off Automatic Updates for Microsoft Store Apps
Automatic updates in Windows 11 / Windows 10 are a feature that allows your PC to download and install the latest security patches, bug fixes, and feature enhancements from Microsoft. Automatic updates help keep your PC running smoothly and securely.
However, sometimes they can cause problems such as blue screen errors, missing drivers, incompatible applications, or server configuration issues. These problems can affect your device's performance, stability, or functionality. If you encounter any of these problems after updating Windows 11 / Windows 10, you can try some troubleshooting steps to fix them.
By Default, When Will Windows Install Software Updates?
By default, Windows 11 / Windows 10 will install software updates at 3:00 A.M. every morning. This is to ensure that the system is up-to-date and secure without interrupting the user's work or leisure time. You can change this setting by adjusting the active hours.
Should I Turn off Automatic Windows Updates?
There are several ways to turn off automatic updates in Windows 10 and Windows 11, such as pausing them for up to 35 days, setting your Wi-Fi as a metered connection, or disabling the Windows Update service. However, be aware that stopping automatic updates can make your system more vulnerable to viruses and malware, so you should always check for updates manually and install them as soon as possible.
One thing to consider regarding Windows Updates when on the go might be the amount of data transferred for downloading the packages. The volume of this “data overhead” for Windows updates depends on several factors, such as the size and number of updates, the settings for delivery optimization, and the network conditions. A typical monthly update can be around 200 MB to 500 MB in size, while a major feature update can be up to 4 GB. However, these numbers may vary depending on how often Windows Update checks for updates and what kind of updates are available.
⚠️ Please note: The methods described below are the same in Windows 11 as in Windows 10. However, bear in mind that we'll be using screenshots from Windows 11, so your UI may look a little different.
How to Disable Automatic Updates Using Windows Settings
Via Windows 11 / Windows 10 Settings you can pause automatic Windows updates for up to 35 days. Once this time has passed Windows updates will be reactivated and downloaded again automatically.
- Click the Windows button or hit the Windows key on your keyboard and open Settings
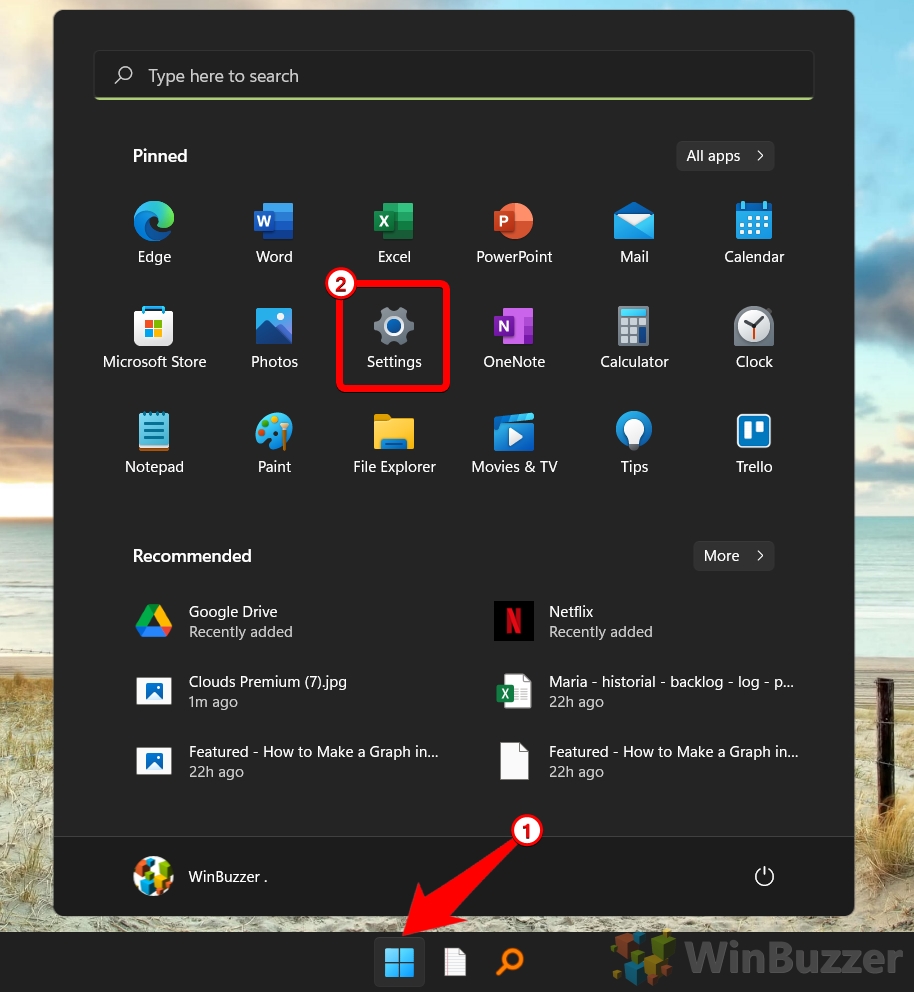
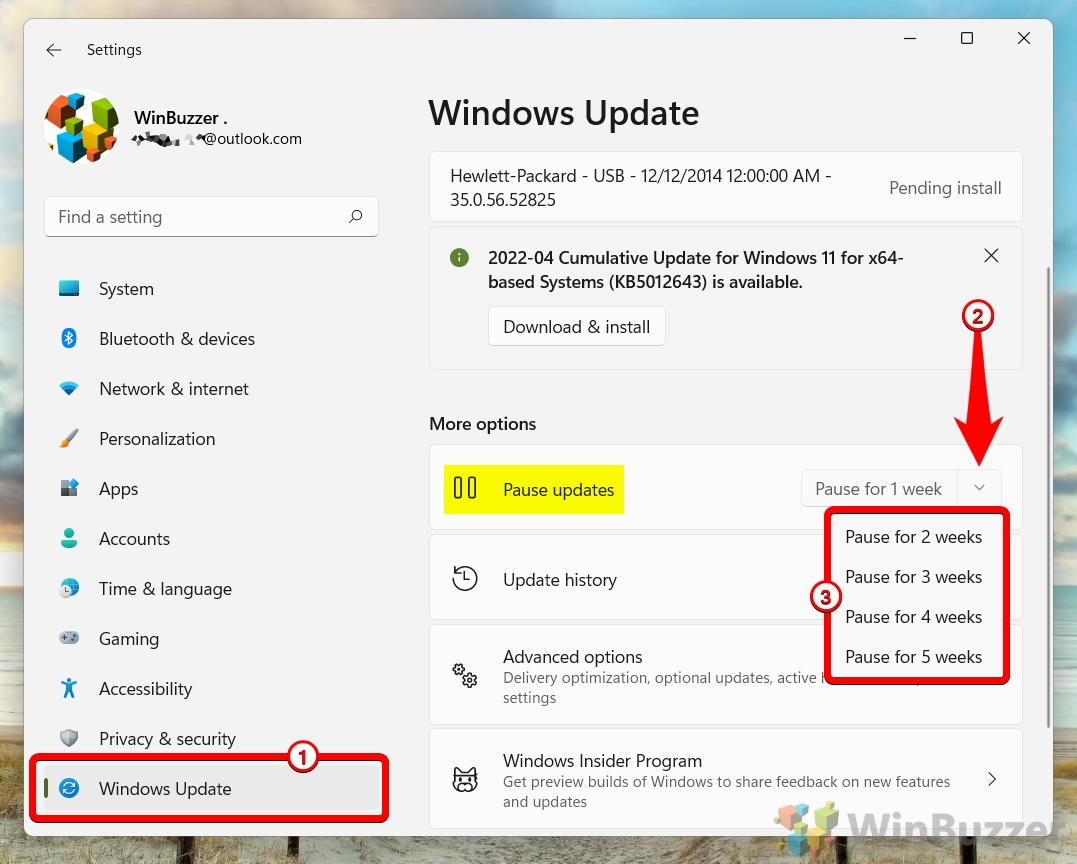
- Switch to “Windows Update” and pause automatic Windows updates as desired
You can turn off automatic updates in Windows 11 / Windows 10 for 2, 3, 4, or 5 weeks. This is the easiest way to block Windows update downloads temporarily.
How to Disable Automatic Updates in Windows 11 / Windows 10 Permanently Using Group Policy
This option requires the Group Policy Editor which is missing in Windows 11 Home if you don´t install it manually.
If you disable automatic Windows updates using Group Policy, you will stop receiving any updates from Microsoft unless you manually check for them or use another method such as Windows Update Assistant. This means that your system may become vulnerable to security risks or compatibility issues over time. Therefore, it is recommended that you only disable automatic windows updates if you have a valid reason and a backup plan for keeping your system updated.
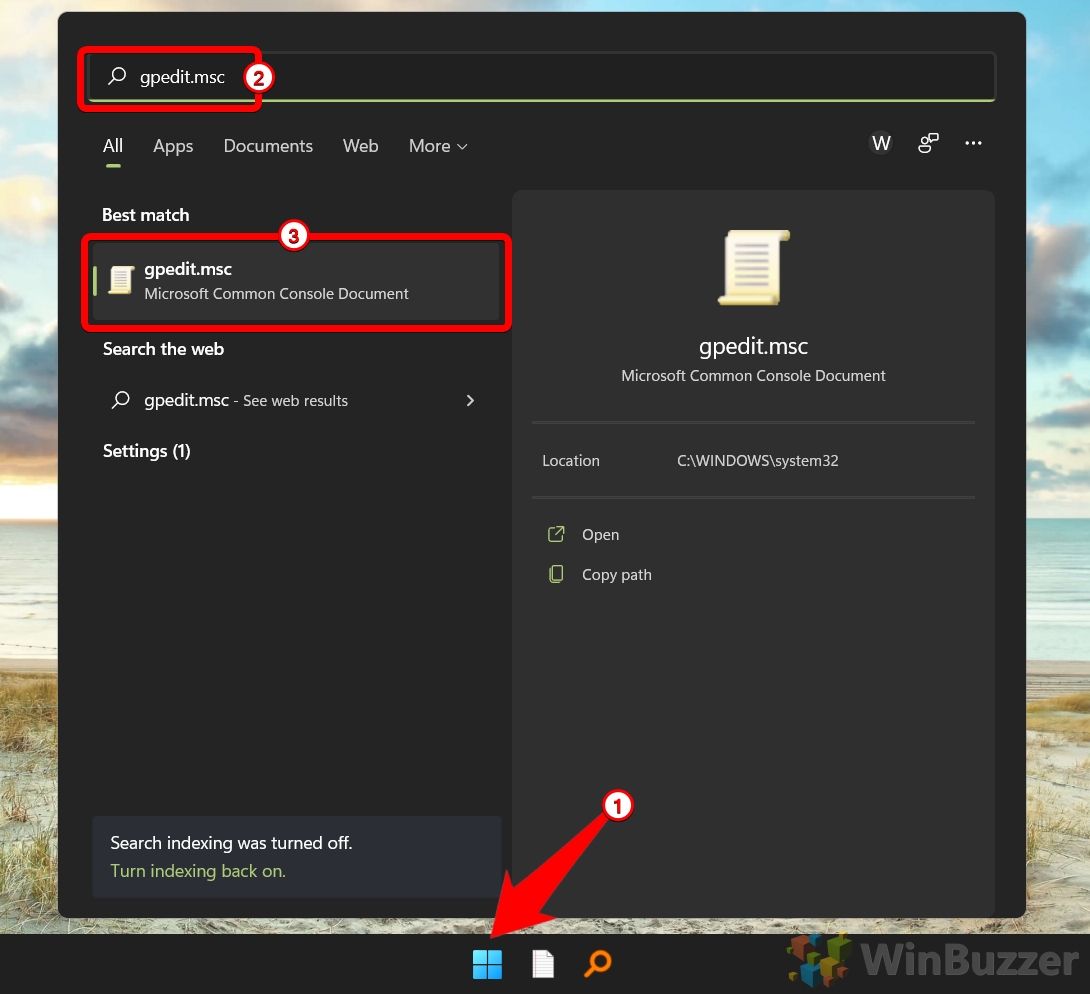
- Open the Group Policy Editor with a search for “gpedit”
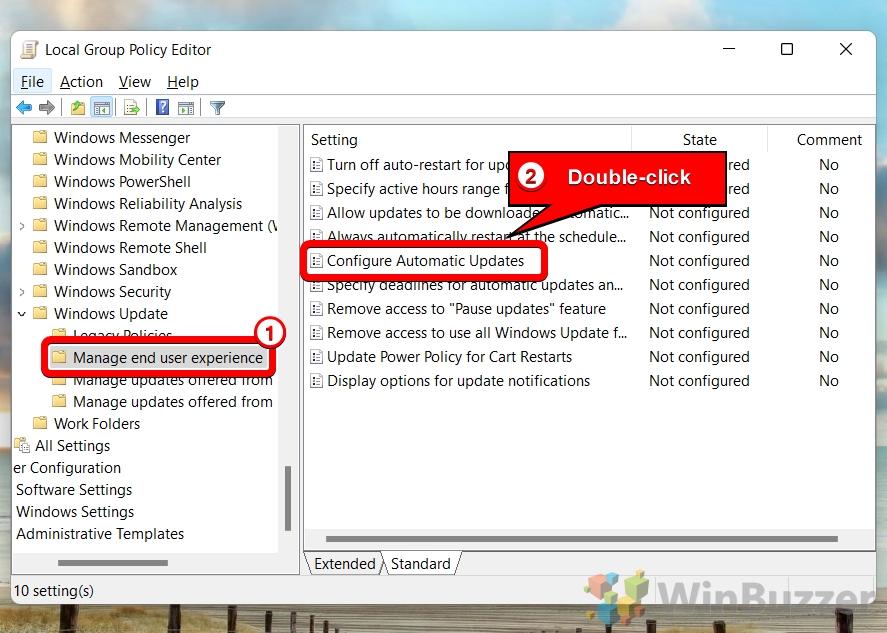
- Open the “Configure Automatic Updates” group policy via double click
The “Configure Automatic Updates” group policy is located in “Computer Configuration\Administrative Templates\Windows Components\Windows Update\Manage end user experience” of the Group Policy Management Console.
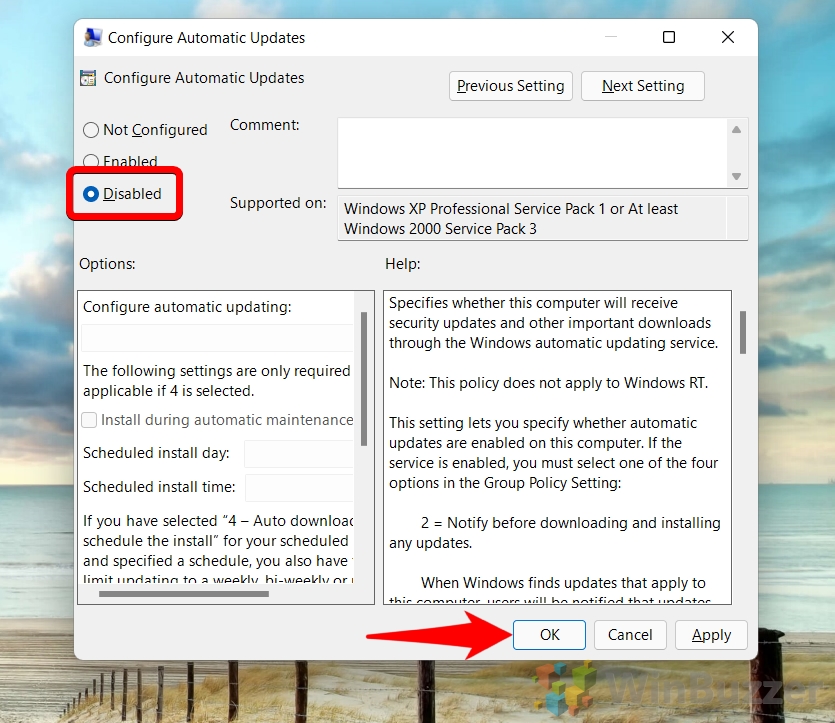
- Turn off the automatic Windows update checker
The “Configure Automatic Updates” group policy has four options: Not Configured, Disabled, Enabled with scheduled installation, and Enabled with notify for download and notify for installation. Choose “Diabled” and “OK” to turn off auto updates in Windows 11 / Windows 10 completely.
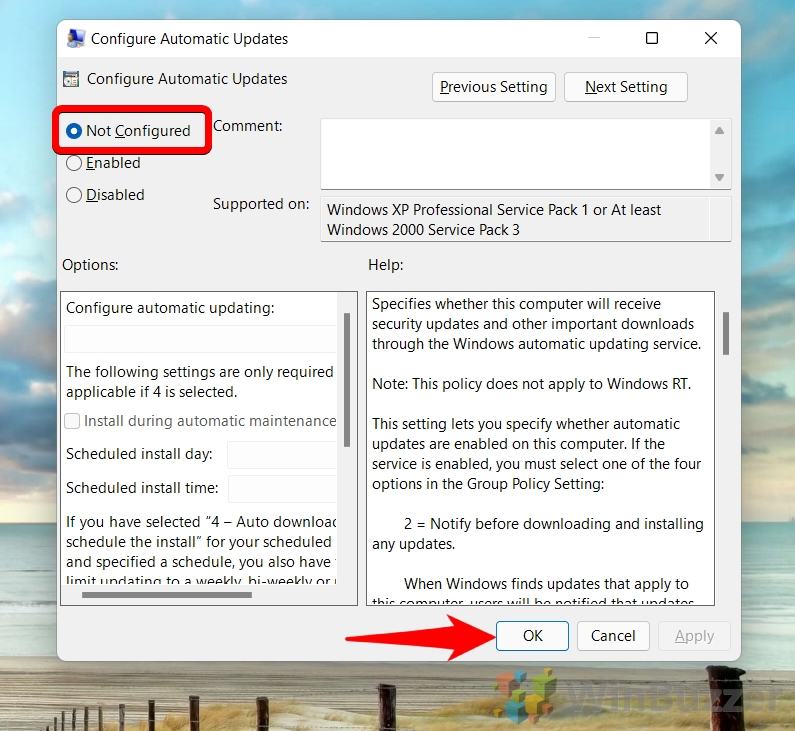
- Revert to “Not Configured” to turn on automatic Windows updates again
If the “Configure Automatic Updates” group policy is set to “not configured”, it means that Windows Update will use the default settings for downloading and installing updates.
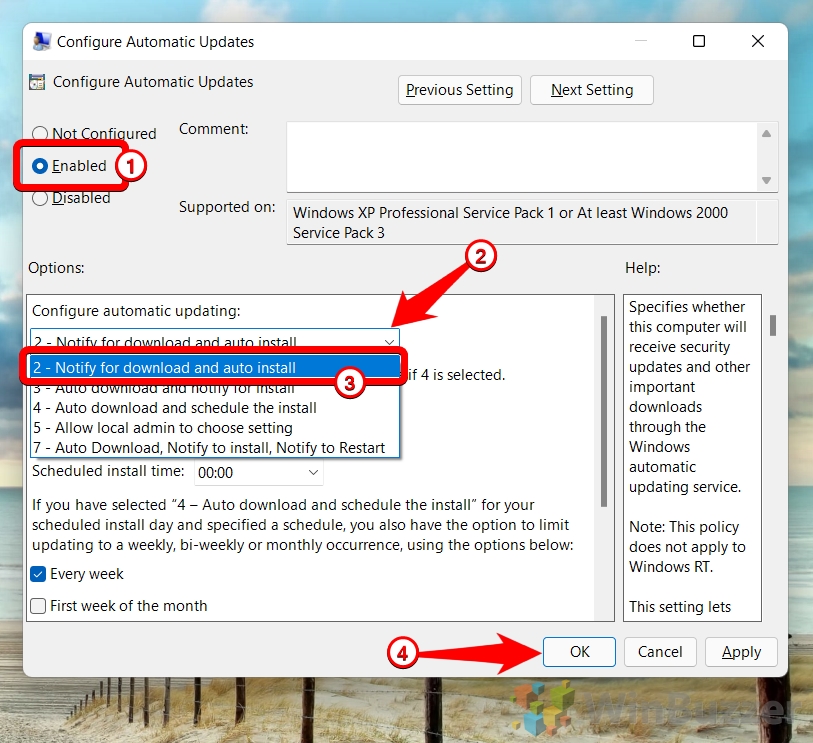
- Select “Enabled” to define the exact update beaviour
When you choose “Enabled” in the “Configure Automatic Updates” group policy, you can specify how and when Windows updates are installed on your computer. You have different options to choose one of the available Windows 11 update methods:
– Option 2 (Notify for download and auto install): This option notifies you before downloading updates and automatically installs them at a scheduled time.
– Option 3 (Auto download and notify for install): This option automatically downloads updates and notifies you when they are ready to be installed.
– Option 4 (Auto download and schedule the install): This option automatically downloads updates and installs them at a scheduled time that you specify.
– Option 5 (Allow local admin to choose setting): This option allows the local administrator to choose one of the above options on each computer.
– Option 7 (Auto download, Notify for install, Notify to Restar ): This option automatically downloads updates, notifies you when they are ready to be installed, and also notifies after installation for you to manually restart the PC
How to Disable Automatic Updates Using Windows Registry
One way to disable automatic updates on Windows 11 is to use the Registry Editor. As the Group Policy Editor is not available in the Home editions of Windows 11 / Windows 10 if you don´t install it manually, this method is the only one available there to turn off Windows automatic updates completely.
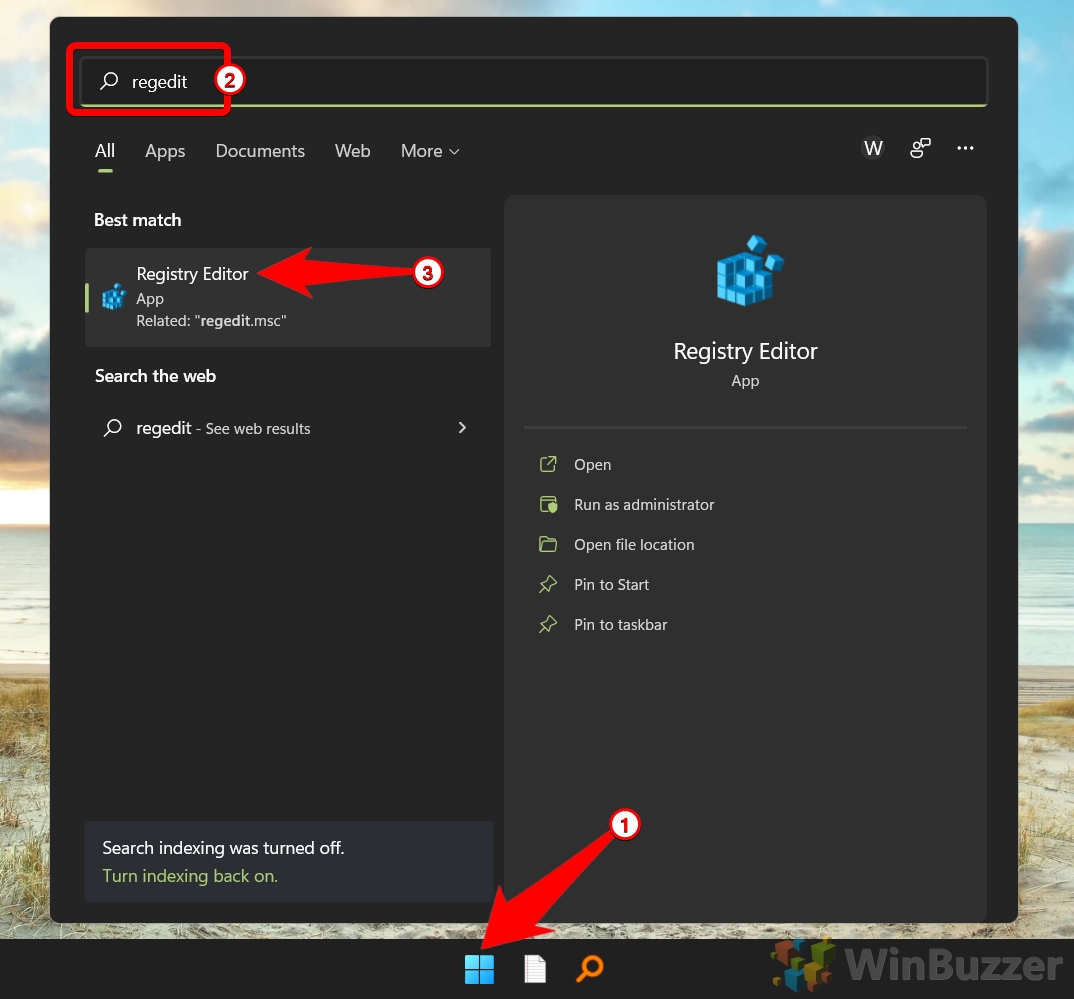
- Open Search by pressing the Windows key or hitting the start button, type “regedit” and start the “Registry Editor”
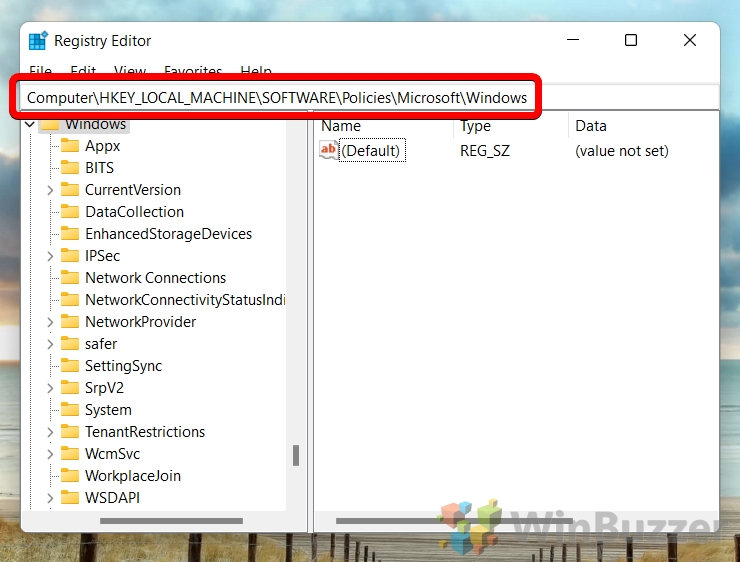
- Navigate to HKEY_LOCAL_MACHINE\SOFTWARE\Policies\Microsoft\Windows
- Right-click on “Windows”, select “New” and then “Key”
This step can be ignored if the registry key folder “WindowsUpdate” exists already.
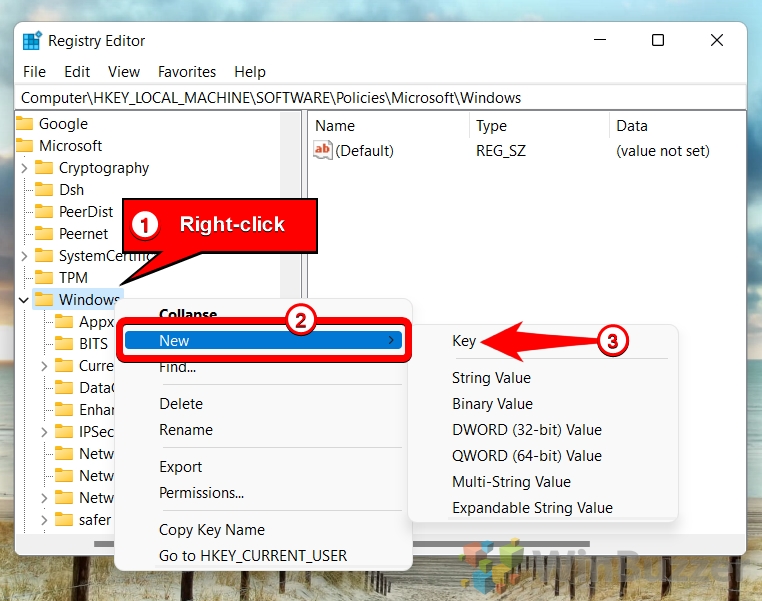
- Name the new registry key “WindowsUpdate”

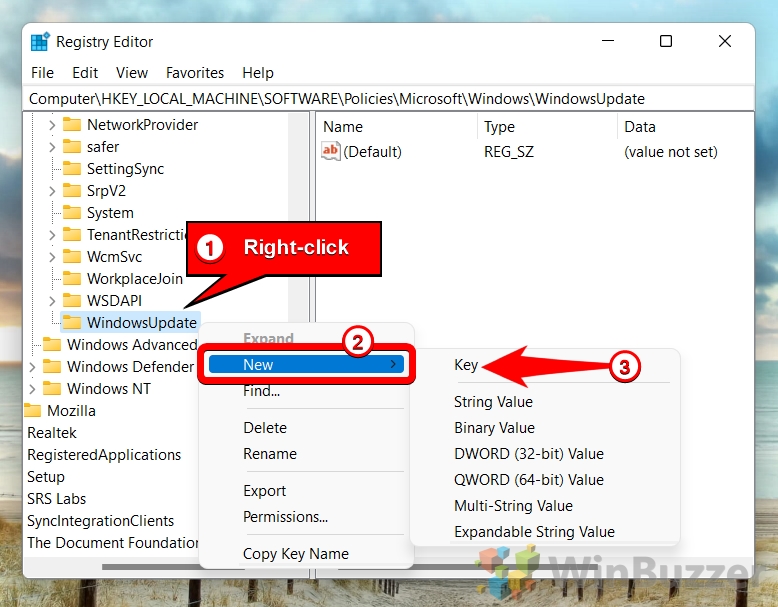
- Right-click “WindowsUpdate”, select “New” and click “Key”
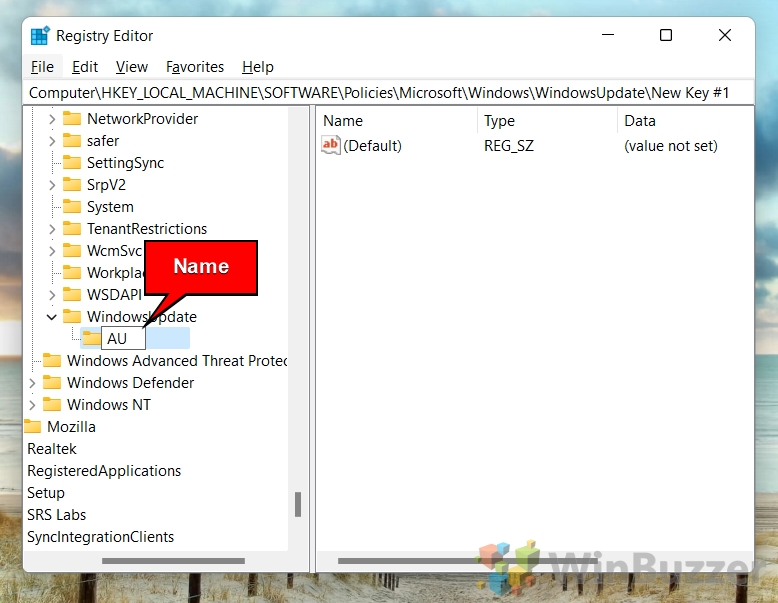
- Name the registry key “AU”
- Right-click in the right pane and choose “New” – “DWORD (32-bit) Value”
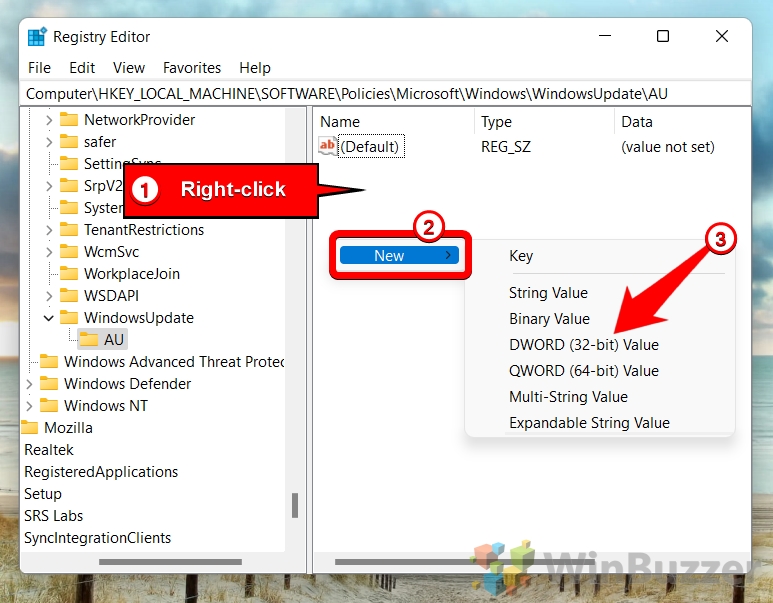
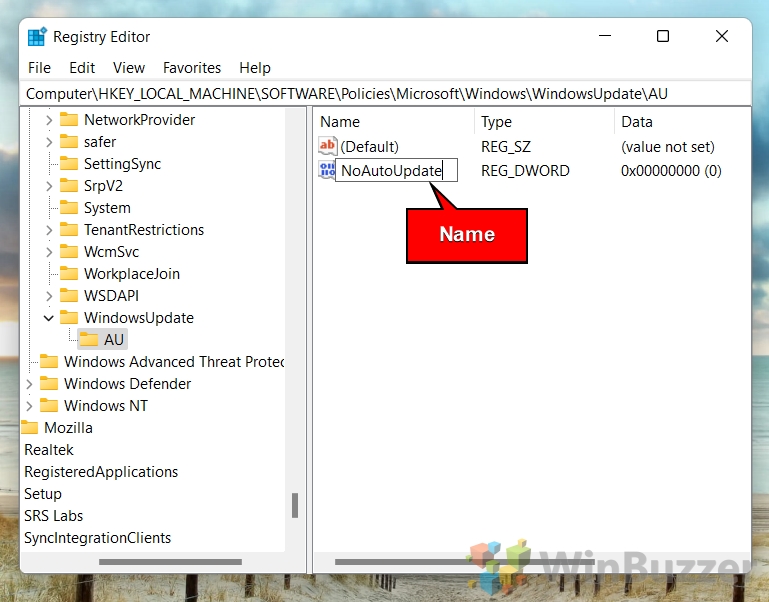
- Name the DWORD “NoAutoUpdate”
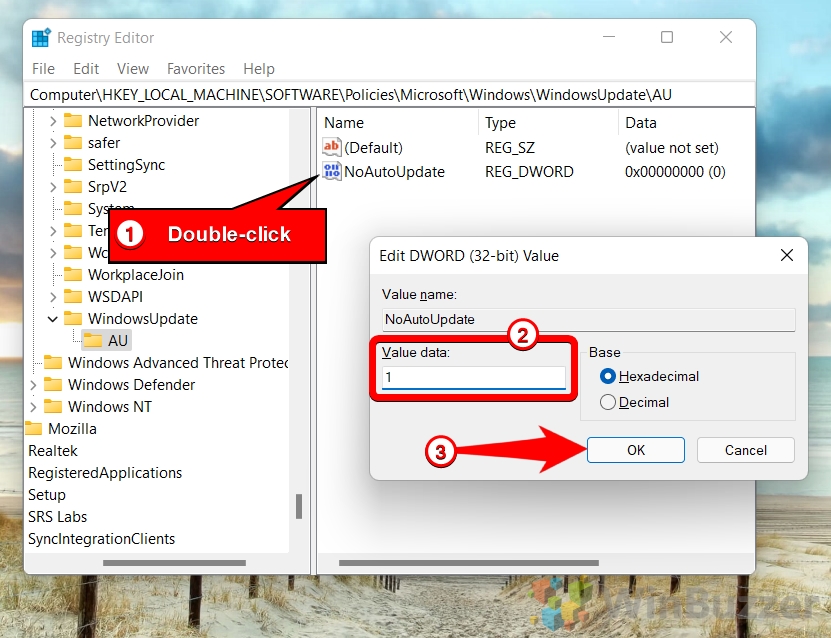
- Disable Windows 11 update downloads and installation
Double-click the DWORD “NoAutoUpdate”, write “1” in “Value data” and save via “OK”.
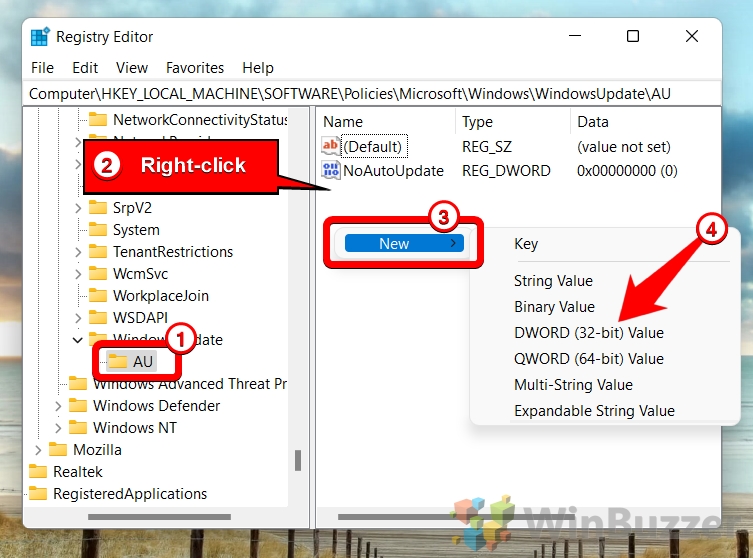
- Optional: Set automatic update behavior
Instead of completely turning off automatic updates in Windows 10 / Windows 11 you can use another registry edit to choose additional settings, just like in the Group Policy Editor. To do that, right-click again in the right pane and choose “New” – “DWORD (32-bit) Value”.
- Name the DWORD “AUOptions”
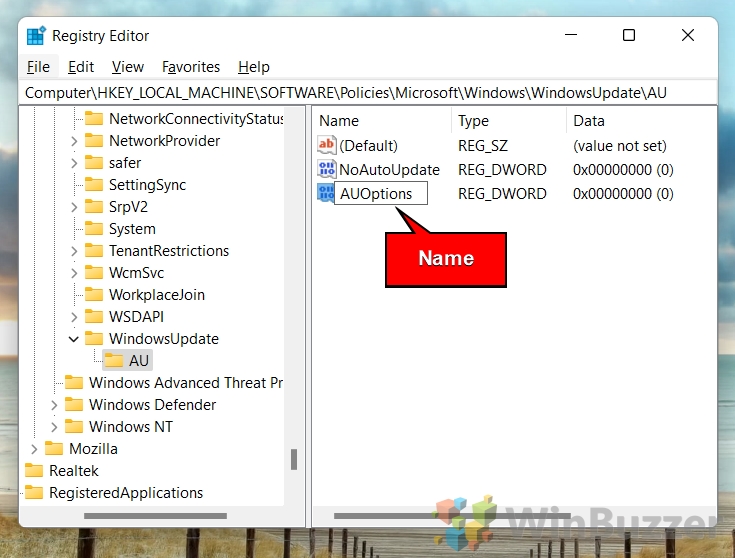
- Set the desired option for Windows updates
Double-click on “AUOptions”, set the desired option in “Value data” and save with “OK”. The value of this DWORD determines the various Windows 11 update methods. According to Microsoft, these are the possible values:
– 2: This option notifies you before downloading updates and automatically installs them at a scheduled time.
– 3: This option automatically downloads updates and notifies you when they are ready to be installed.
– 4: This option automatically downloads updates and installs them at a scheduled time that you specify.
– 5: This option allows the local administrator to choose one of the above options on each computer.
– 7: This option automatically downloads updates, notifies you when they are ready to be installed, and also notifies after installation for you to manually restart the PCBy default, Windows 11 uses value 4. To disable automatic updates, you can change it to value 2 or 3. However, this method is not recommended as it may cause security issues or compatibility problems.

How to Turn Off Automatic Updates in Windows 11 / Windows 10 Using a Metered Connection
You might want to consider to stop automatic updates in Windows 11 / Windows 10 using a metered connection for specific environments. A metered connection is an internet connection that has a data limit associated with it. Setting a metered connection in Windows can help reduce your data usage by preventing some apps and updates from using too much bandwidth. You can set a metered connection for Wi-Fi, Ethernet, or Cellular networks in Windows 10 by following some simple steps . This can be useful if you have a limited or expensive data plan, or if you want to save data for other purposes.

Extra: How to Turn off Automatic Updates for Microsoft Store Apps
The Windows Store's ability to update apps automatically can be a very useful tool, but it can also be a nuisance. Often, users will notice that the service host network service is taking up a lot of their bandwidth and slowing things down. Like automatic Windows updates, you might want to turn off automatic updates for apps, as shown in our other guide.


