

Contents
- 1 How to Make a Table of Contents in Word
- 2 How to Customize a Table of Contents in Word
- 3 How to Update a Table of Contents in Word
- 4 How to Remove a Table of Contents in Word
- 5 Extra: How to Add Page Numbers in Word and Modify Them If Needed
- 6 Extra: How to Insert a Vertical or Horizontal Line in Word and Word Online
- 7 Extra: How to Add a Table of Contents in Google Docs and Update It Afterwards
A table of content in Word provides a list of headings and subheadings that summarizes a document's main topics and sections. It helps readers to navigate the document and find the information they need quickly and easily. A table of content is usually placed at the beginning of the Word document, after the title page, and before the introduction.
Should You Insert a Table of Contents in Word?
Not all documents need a table of content. A table of content is useful for documents that are longer than 10 pages, have multiple chapters or sections, or contain complex or technical information.
Examples of document types that deserve a table of content:
– Reports
– Manuals
– Handbooks
– Guides
– Theses
– Dissertations
– Books
– Journals
A table of contents is not necessary for short, simple, or linear documents such as:
– Letters
– Memos
– Emails
– Flyers
– Brochures
– Articles
When you create a table of contents in Word, it´s good to follow some best practices. First, apply the appropriate heading styles to the titles and subtitles of your document sections. Also, don´t forget to update your table of content in Word whenever you make changes to your document. In this guide, we show you how to make a table of contents in Word and how to update or delete it when necessary.
Available Options in Word for a Table of Contents
Microsoft Word offers several options for creating a table of contents in a document.
One option for creating a TOC is to use the built-in styles in Word, such as Heading 1, Heading 2, and so on. These styles are formatted to appear in the table of contents automatically when the user inserts a table of contents from the References tab. The user can customize the appearance and layout of the table of contents by choosing from different formats and options.
Another option for creating a table of contents is to use custom styles or manual formatting for the headings and subheadings. In this case, the user needs to mark each heading or subheading as an entry for the table of contents by using the Mark Entry command from the References tab. The user can also specify the level and page number of each entry. Then, the user can insert a table of contents from the References tab and choose from different formats and options.
A third option for creating a table of contents is to use hyperlinks instead of page numbers. This option is useful for online documents that do not have fixed page numbers. The user can create hyperlinks from each heading or subheading to its corresponding location in the document by using the Insert Hyperlink command from the Insert tab. Then, the user can insert a table of contents from the References tab and choose an online format that does not include page numbers.
How to Make a Table of Contents in Word
Here we show the most common methods to insert a table of contents Word by selecting section headings, choosing a table of contents style and how to place it in your document. We also show you how to create a table of contents manually and where you can select the depths/levels of chapters, subchapters and sections you want to be included.
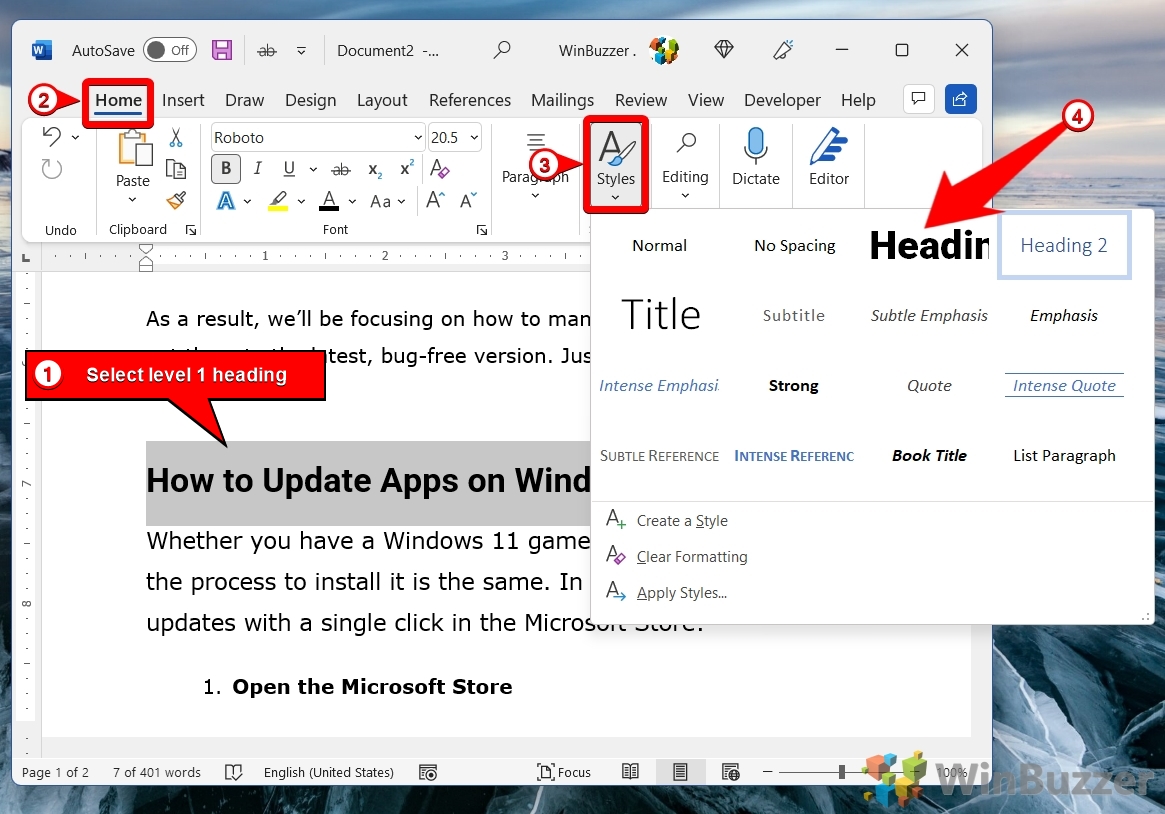
- Format level 1 headings by choosing a Word heading style
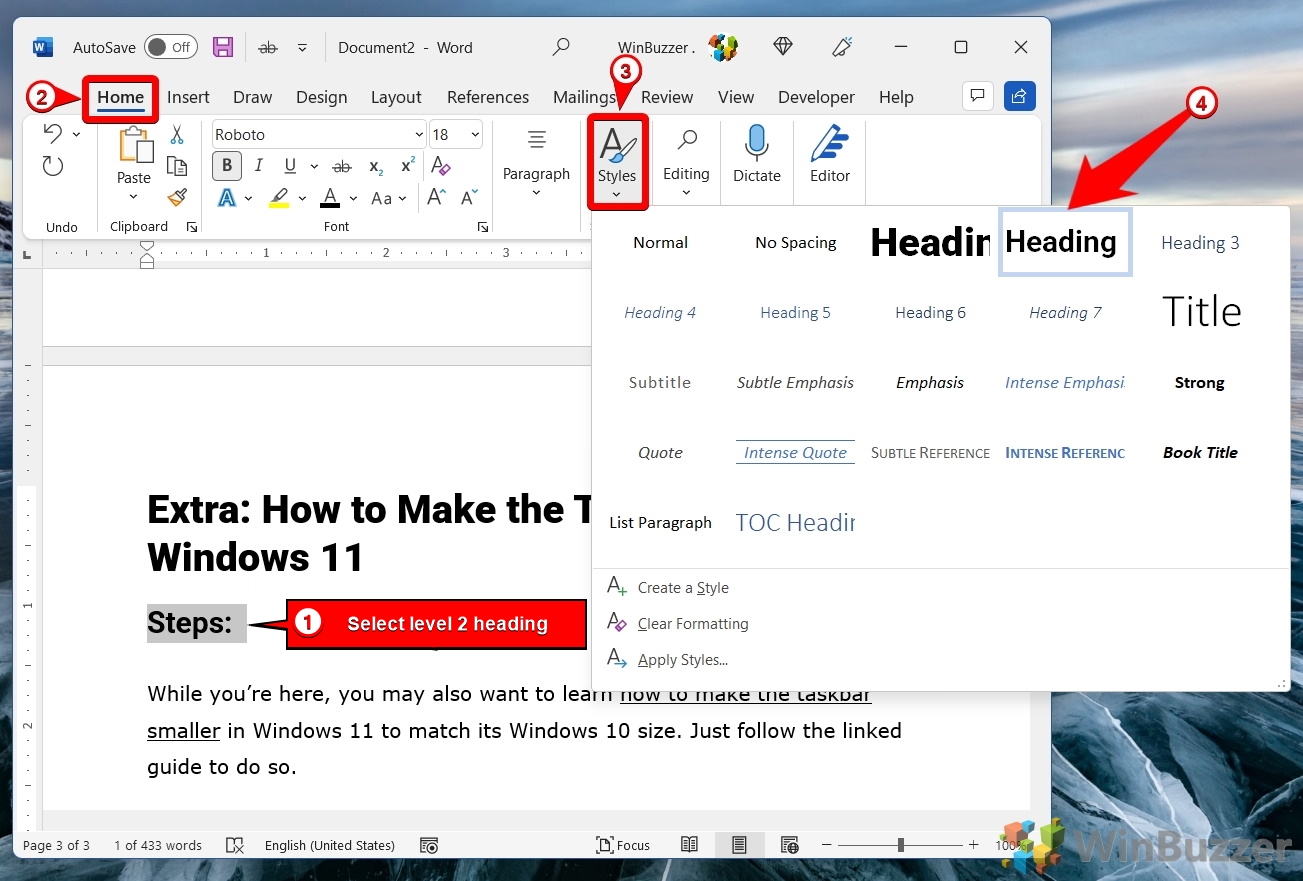
- Format level 2, level 3 etc. headings by choosing a Word heading style
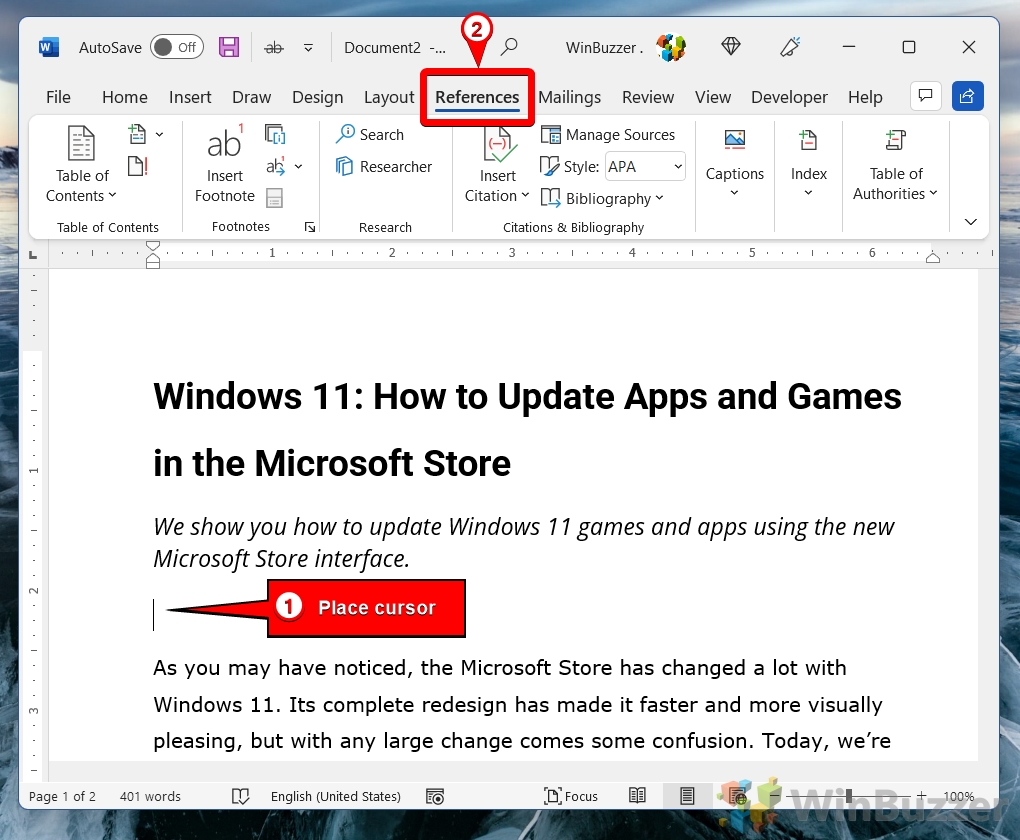
- Choose where to insert the table of contents in Word
Place the cursor at the desired location and switch to “References” in the Ribbon.
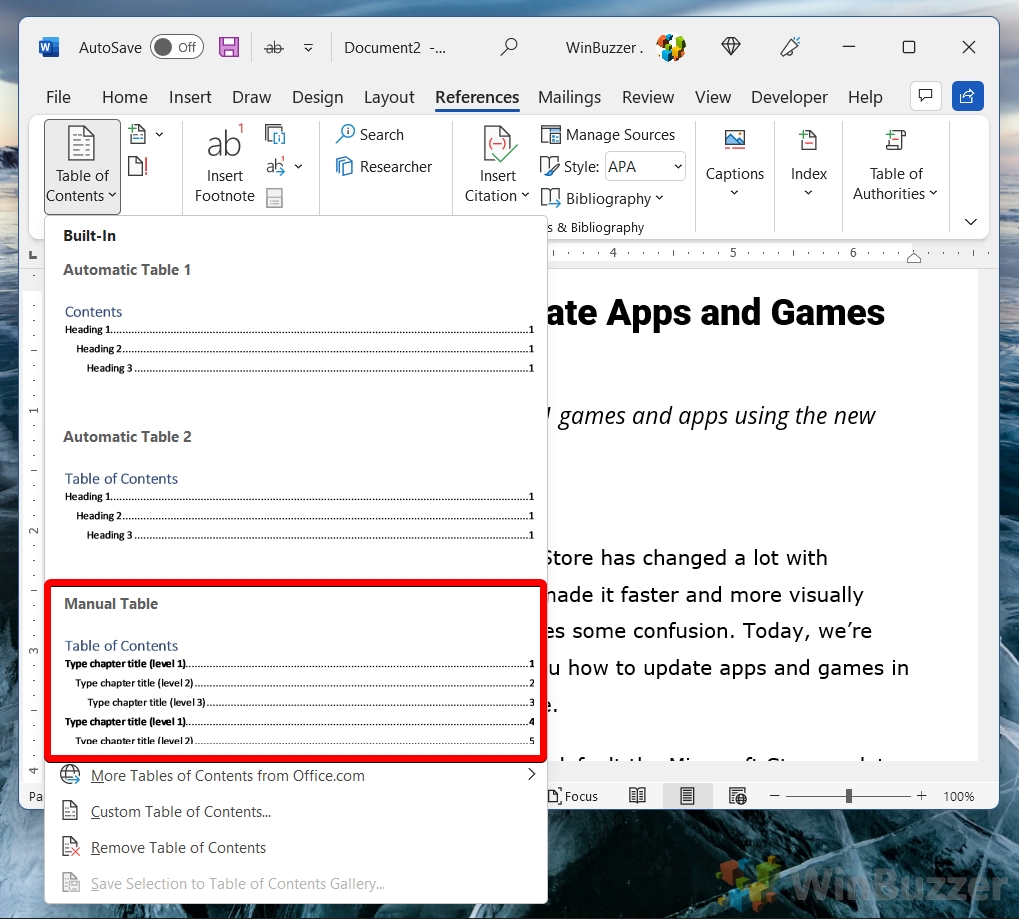
- Choose a Table of Contents style
The options “Automatic Table 1” and “Automatic Table 2” will always gather all headings automatically. The “Manual Table” option allows to edit them manually afterward.

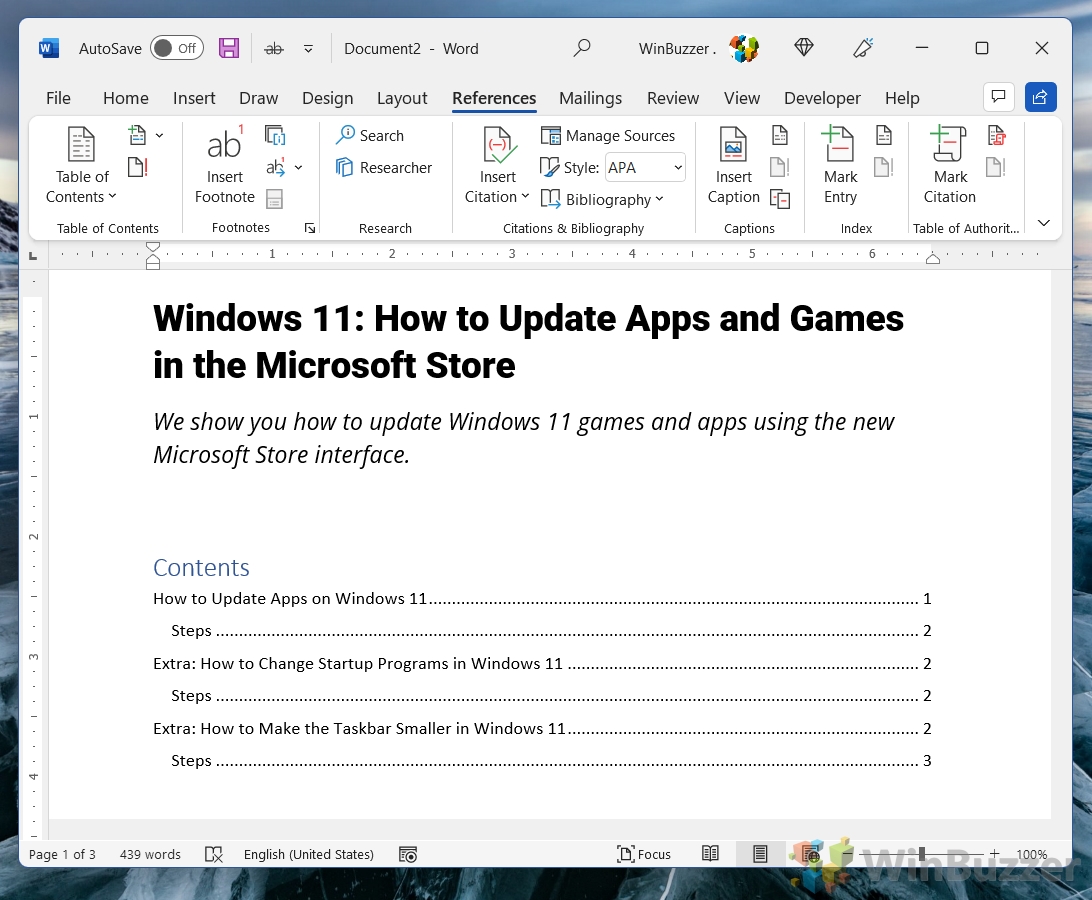
- Check your Table of Contents for completeness
If chapters, subchapters, or sections are missing, you might need to check the proper heading formatting of their respective titles. If you miss levels, you must use the customization option shown below.
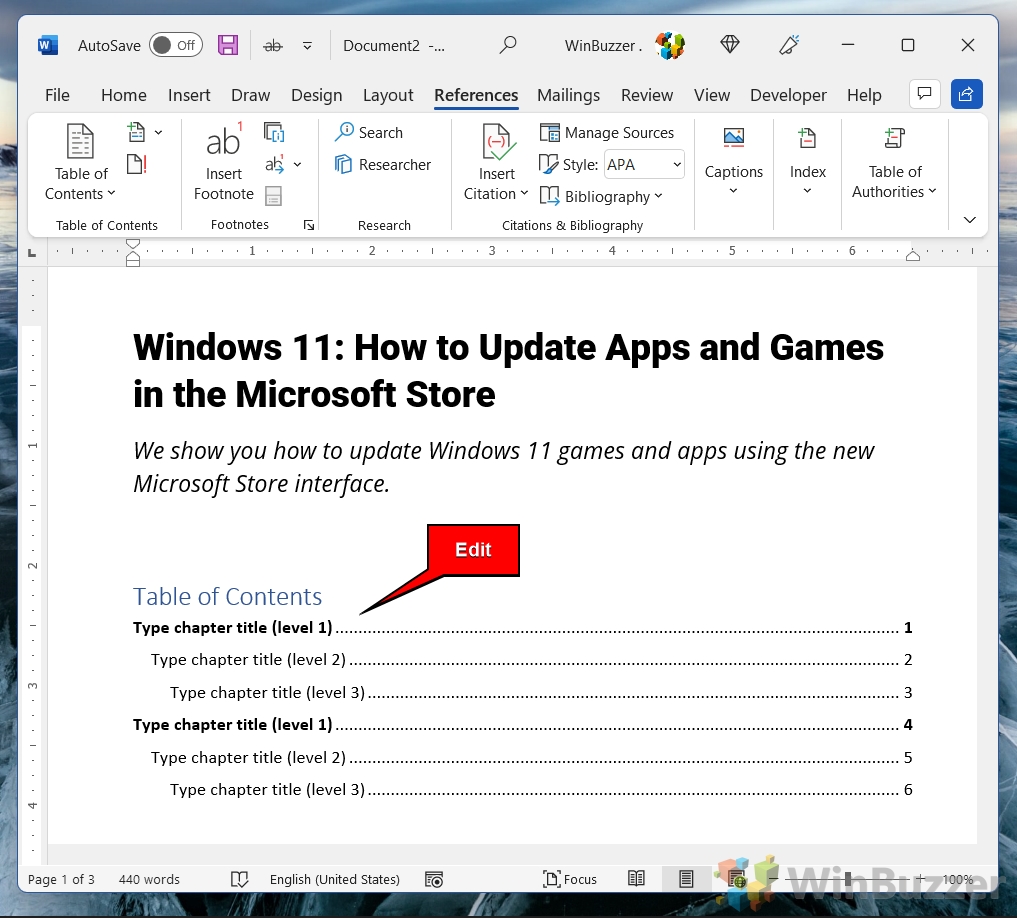
- Edit your Word table of contents if needed
Switch to “Manual Table” and use the options shown afterwards.
- You then can change entries in the Word table of contents after clicking on them
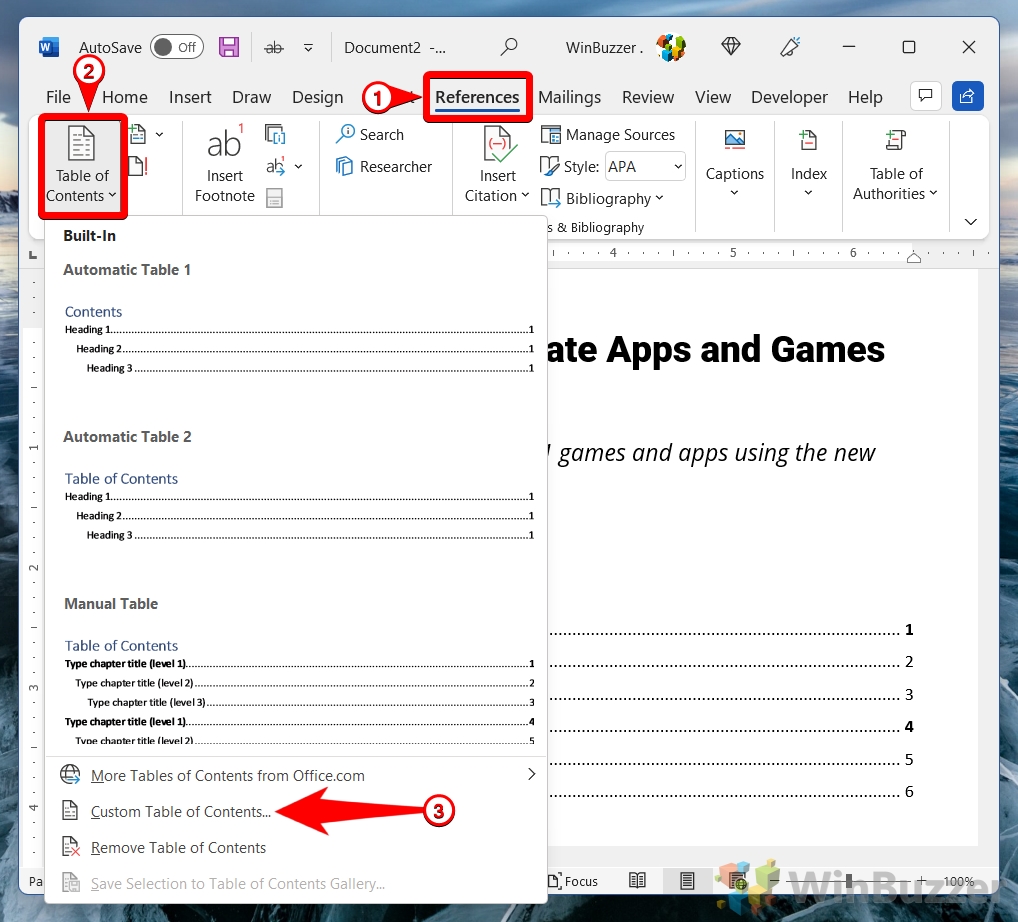
How to Customize a Table of Contents in Word
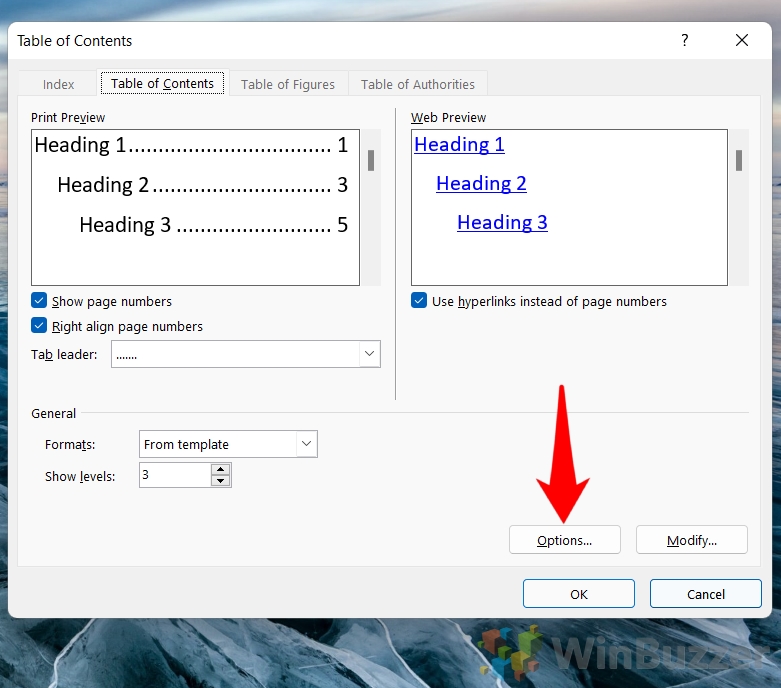
- In “Custom Table of Contents” you can change your Word table of contents formatting to your needs
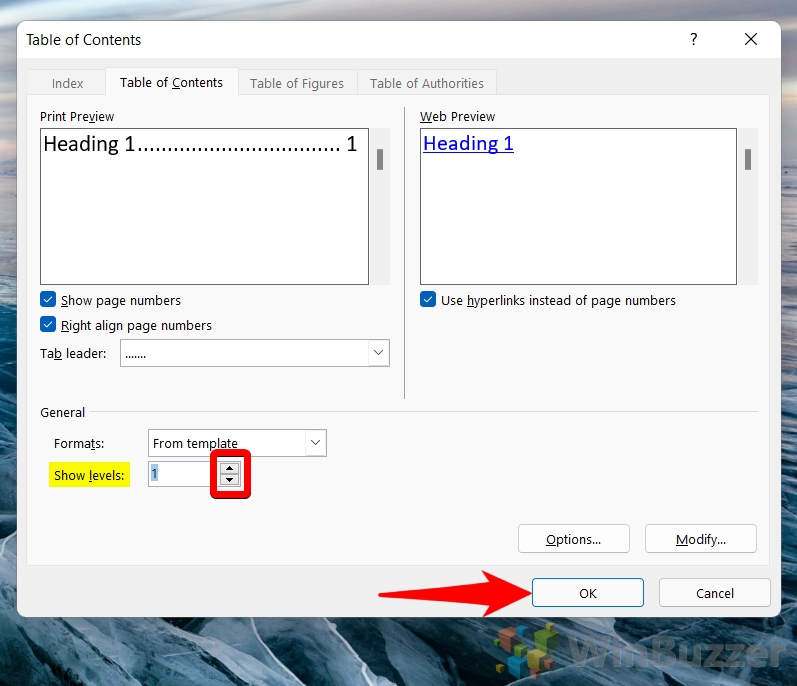
- Choose table of contents levels, page number visibility and alignments
With the levels option, you can choose how detailed your table of contents should be and include/exclude subchapters and other sections. For web documents you can “use hyperlinks instead of page numbers” so readers can jump to a section with a simple click.
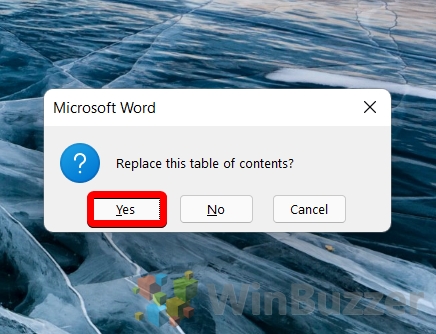
- After customizing the table of content, the previous Word table of contents will be replaced after clicking “Yes”
- You can customize the appearance further via “Options”
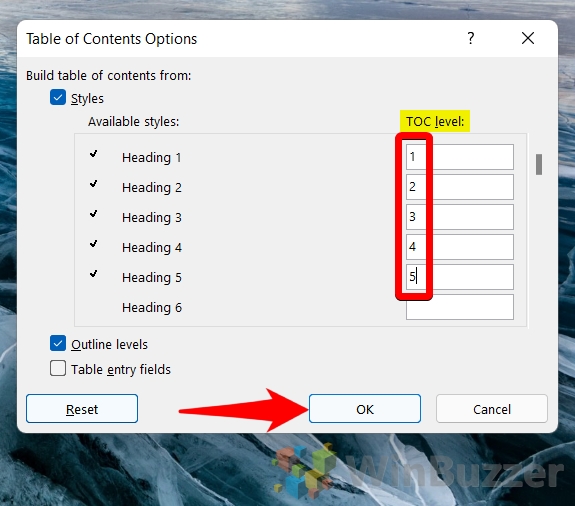
- Define heading styles for the Word table of contents
Word offers to assign different heading styles in the table of contents than those present in the document itself.The check box for “Outline levels” determines whether to include paragraphs with outline levels in the table of contents. By default, this option is checked, and all outline levels are included. However, if you want to exclude some outline levels from the table of contents, you can clear this check box and specify which styles to include instead. Alternatively, you can edit the TOC level for each style or outline level in the Available styles list.
The “Table entry fields” option in the Word table of contents allows you to insert and update the entries in your table of contents based on the text that is formatted with a specific style. For example, if you apply the Heading 1 style to your chapter titles, you can use the table entry fields option to automatically generate a table of contents that lists all the chapters and their page numbers. You can also modify or delete the table entry fields manually if you want to customize your table of contents.
How to Update a Table of Contents in Word
An automatically created Word table of contents can be updated the following way. If you use the manual table of content option shown previously, you can also edit the entries in the table of contents directly, which we don´t recommend for updating as it tends to create a mess usually when you don´t remember if you have just updated the table of contents or also the document headings themselves.
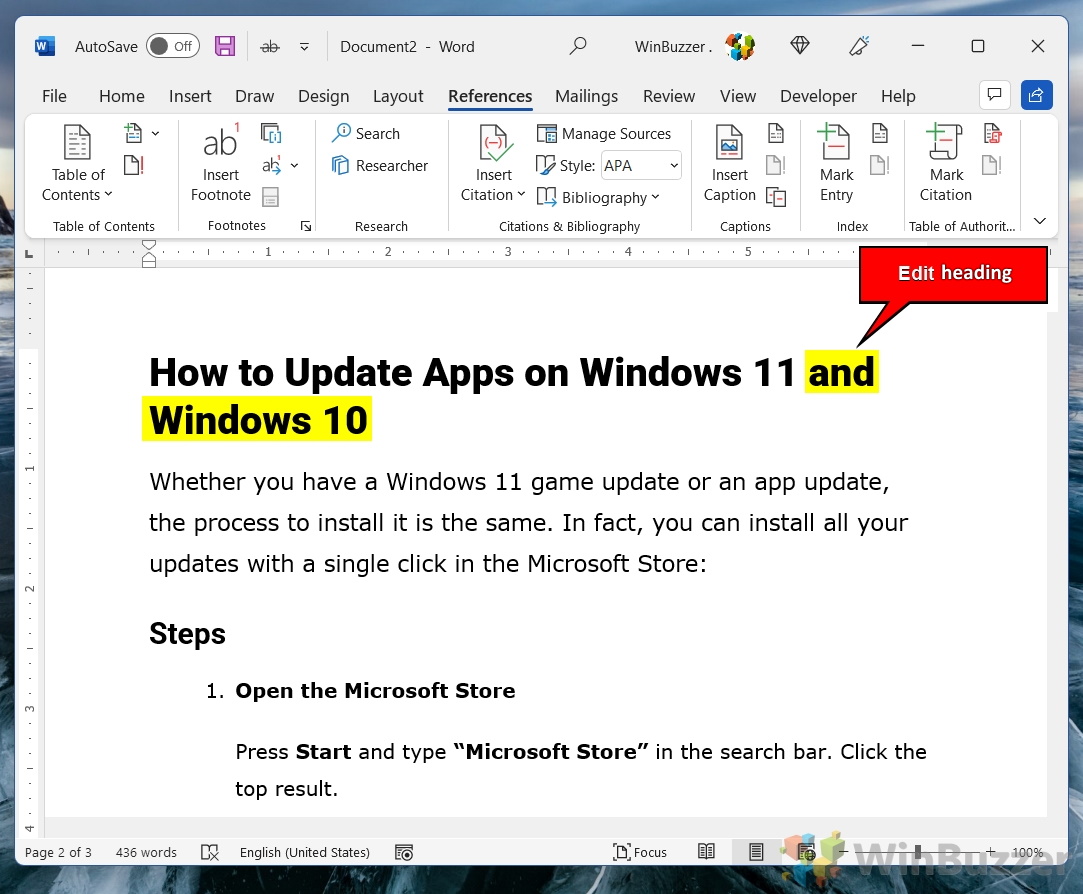
- Change the headings in your document
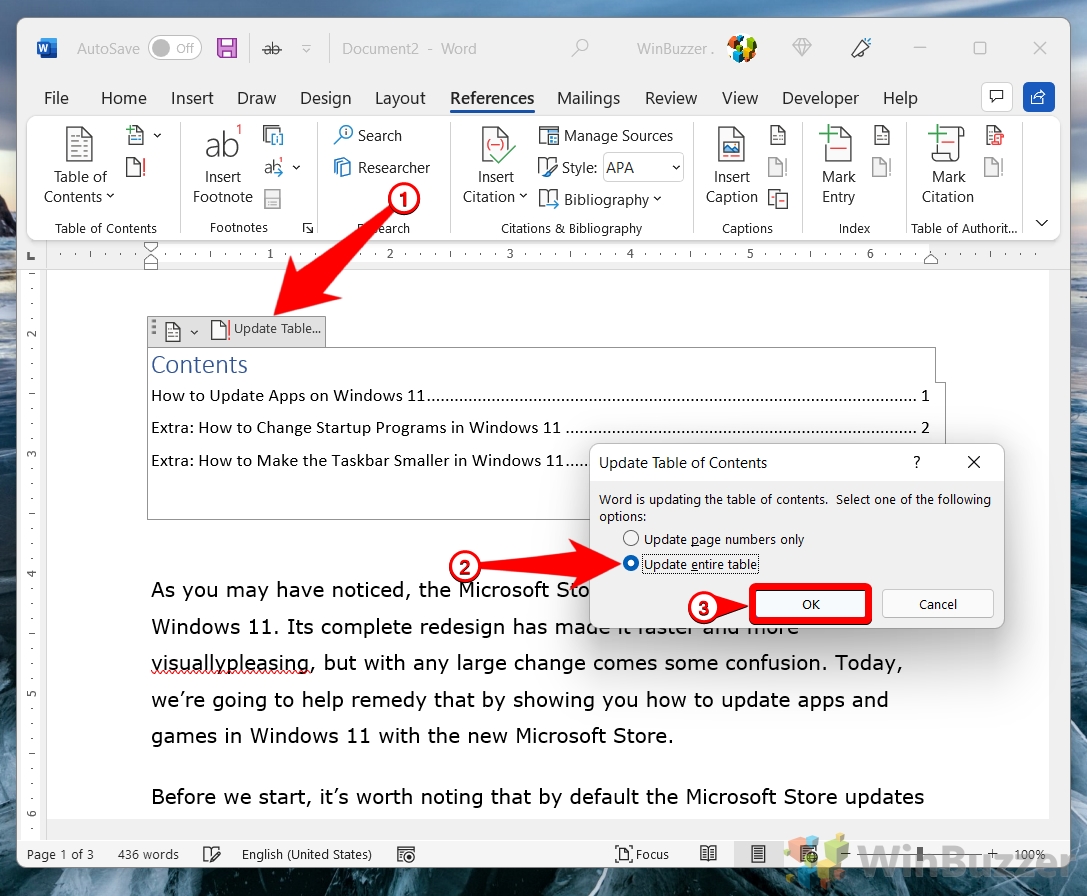
- Click once on the table of contents and select “Update Table”
If you have just changed some paragraphs but not the headings, you can choose to “Update page numbers only”. This might be important if you have done manual edits in the table of contents, which you don´t want to lose when you click “Update entire table”.
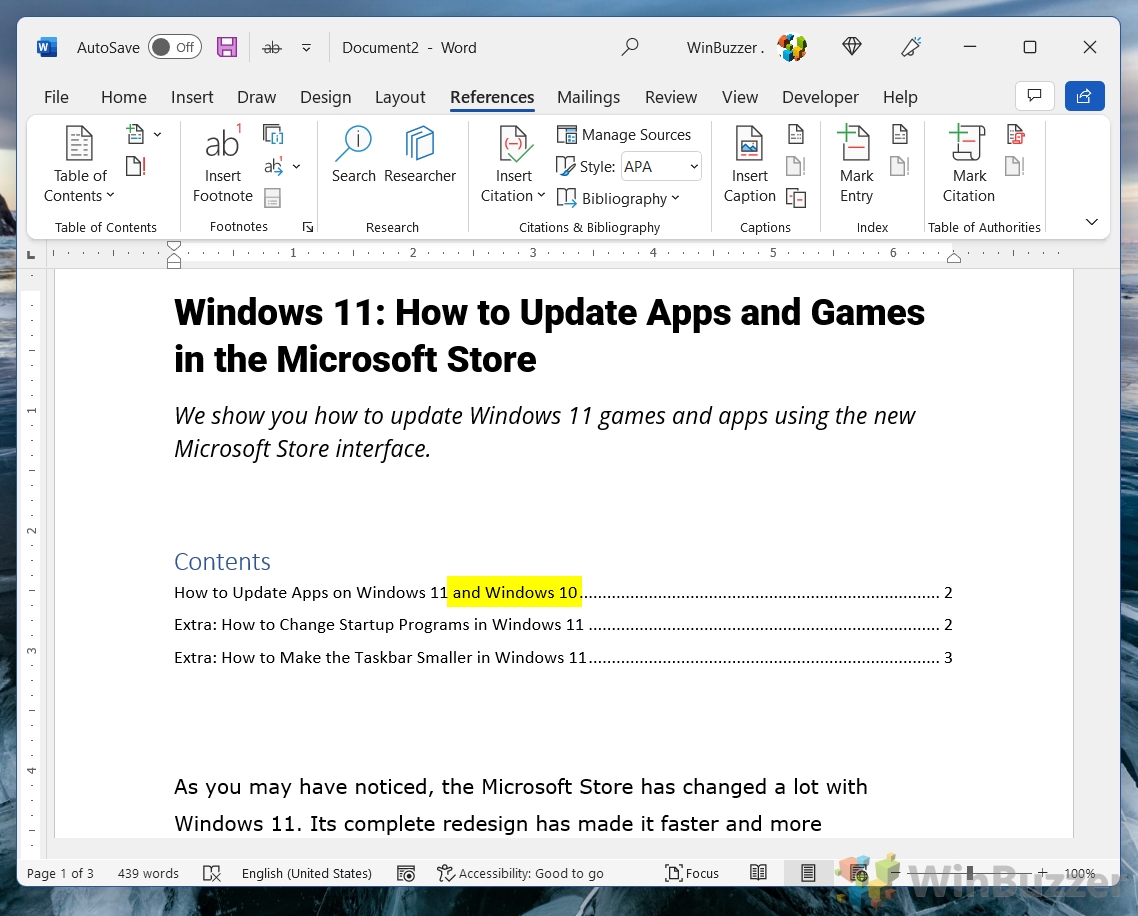
- Check your Word table of contents if everything has been updated correctly
How to Remove a Table of Contents in Word
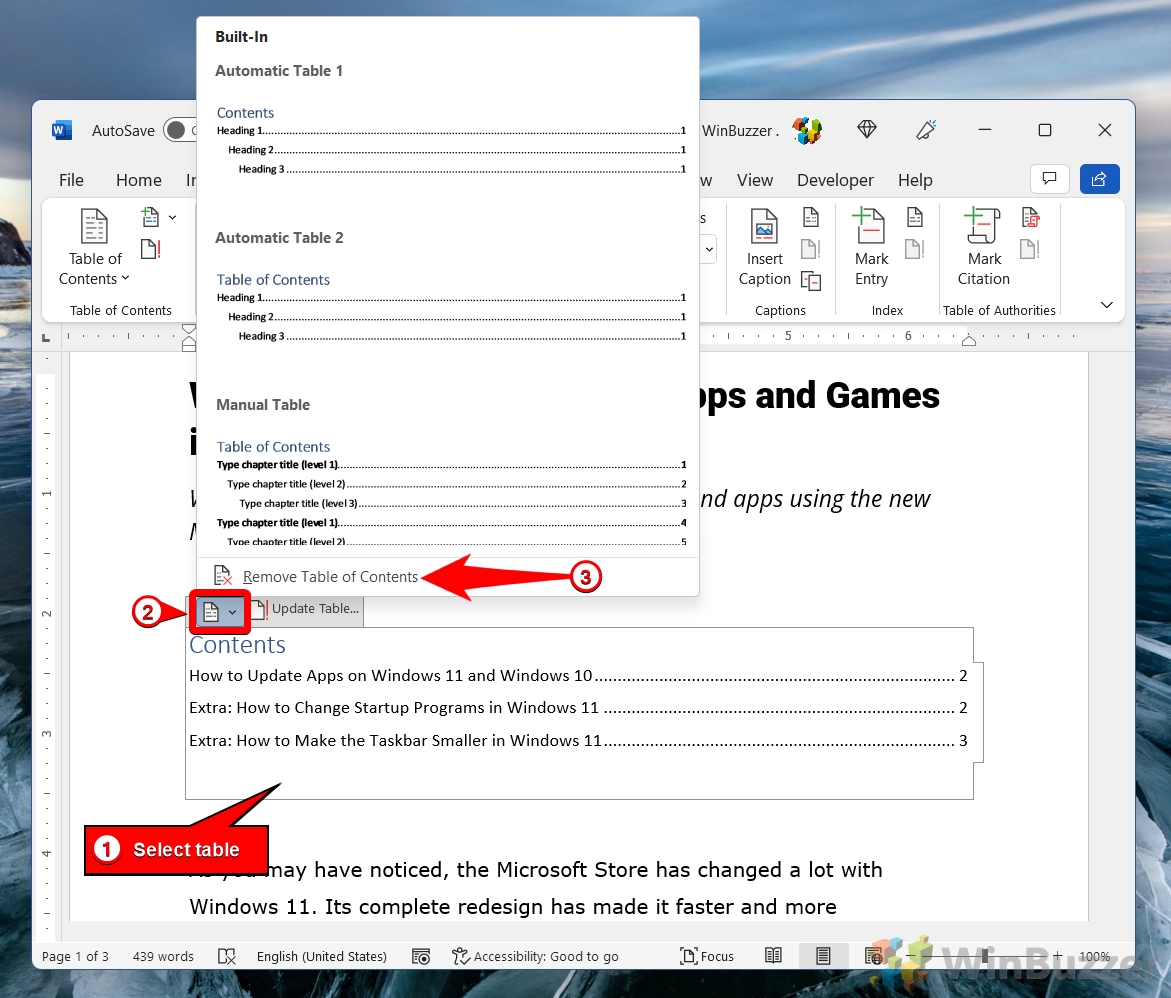
To remove a table of contents in Word, it´s best to use the specific option available for that, as just hitting delete on your keyboard might mess up your document in a way you don't want.
You can remove a table of contents in Word by selecting it, clicking the menu button on the lower left, and then on “Remove Table of Contents”.
Extra: How to Add Page Numbers in Word and Modify Them If Needed
Page numbers in Word are a valuable tool to help you order pages after printing or quickly reference information for other readers. In our other guide, we show you how to add page numbers in Word, format them, and skip the first-page number if necessary.
Extra: How to Insert a Vertical or Horizontal Line in Word and Word Online
Vertical and Horizontal lines have many uses in a document. They can help to split up content, draw the eye to a particular place, or just provide visual flavor. In our other guide, we're showing you how to insert a line in Word using a variety of methods that often have slightly different outcomes.
Extra: How to Add a Table of Contents in Google Docs and Update It Afterwards
The Google Docs table of contents can be created automatically by pulling data directly from your heading styles. While many overlook this feature in favor of the document outline, it's a useful tool to tell readers what's in the document and help them navigate it.


